R e n o v a t i o n J o u r n a l 1
2018:
2019:
2020:
Part 3 ~ Part 4 ~ Part 5 ~ Part 6 ~ Part 7
2021: Part 8a ~ Part 8b ~ Part 9 ~ Part 10 ~ Part 11 ~ Part 12 ~ Part 13 ~ Part 14 ~ Part 15
2022: Part 16 ~ Part 17 ~ Part 18 ~ Part 19 ~ Part 20 ~ Part 21 ~ Part 22 ~ Part 23 ~ Part 24 ~ Part 25 ~ Part 26 ~ Part 27 ~ Part 28
2023:
Chapter 30 ~ Vineyard Watchtower
Chapter 31 ~ Animals in the Forest
~~~
B e f o r e t h e S u m m e r o f 2 0 1 9
Since the Cochemer Bahn involves so many projects in my 2019 Renovation Plan,
it seemed fit to me to tell the whole story on one page as a Journal
instead of scattering all bits and pieces over several pages on this homepage.
Previously, I wrote about the renovation that started in 2018!
~~~
Chapter 1.1 ~ T h e W a l l
Aging and Weathering into Old Stones
(March 29 and 30th, 2019)
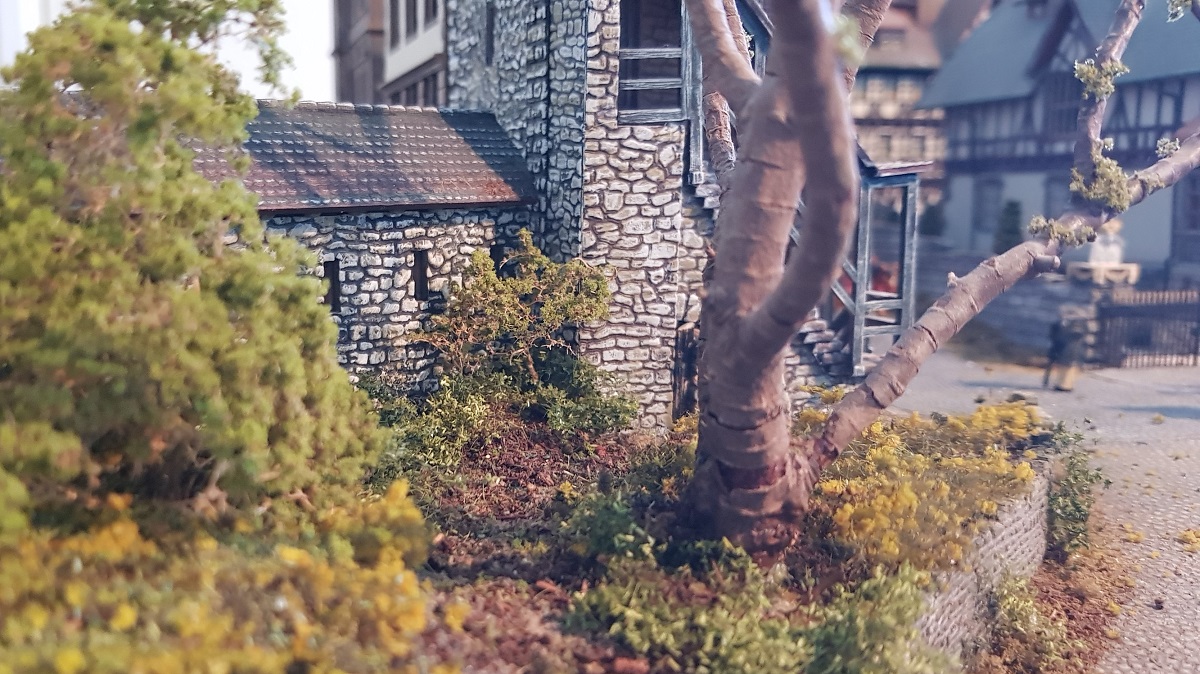
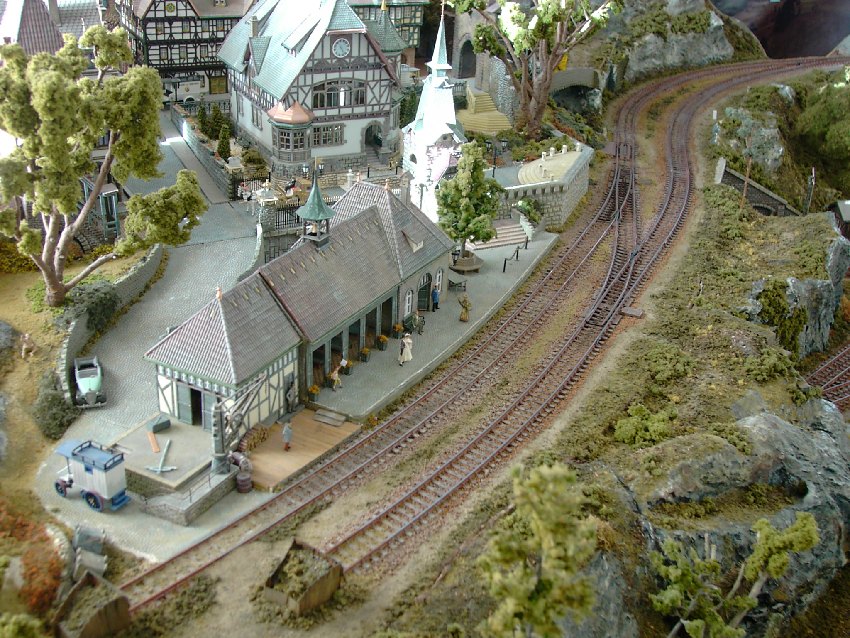
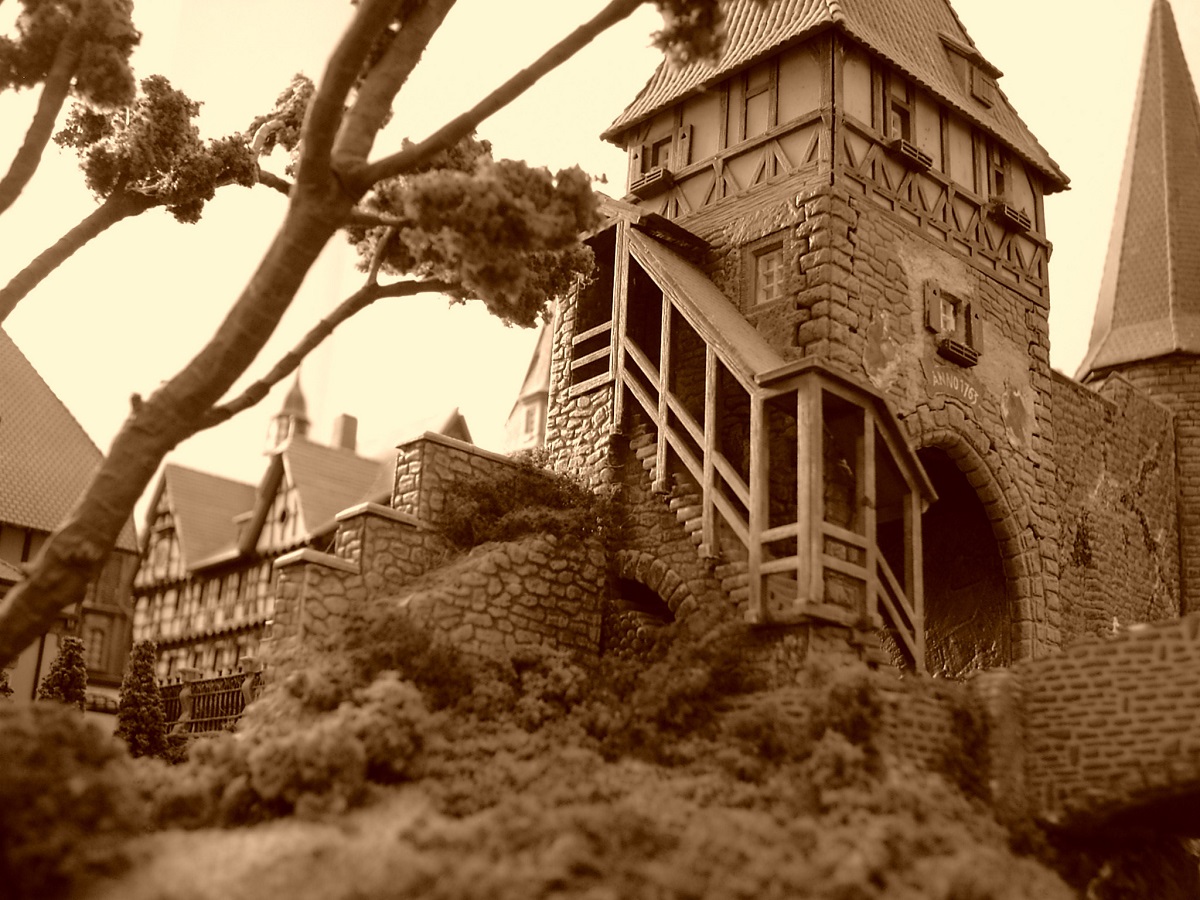
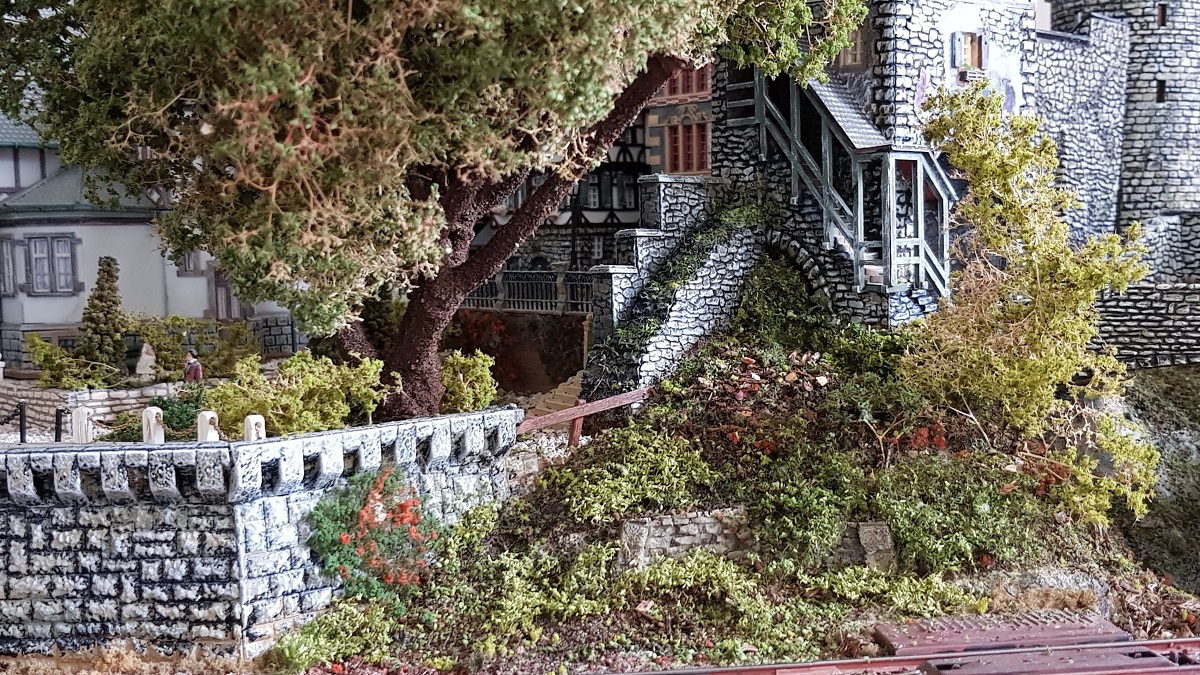
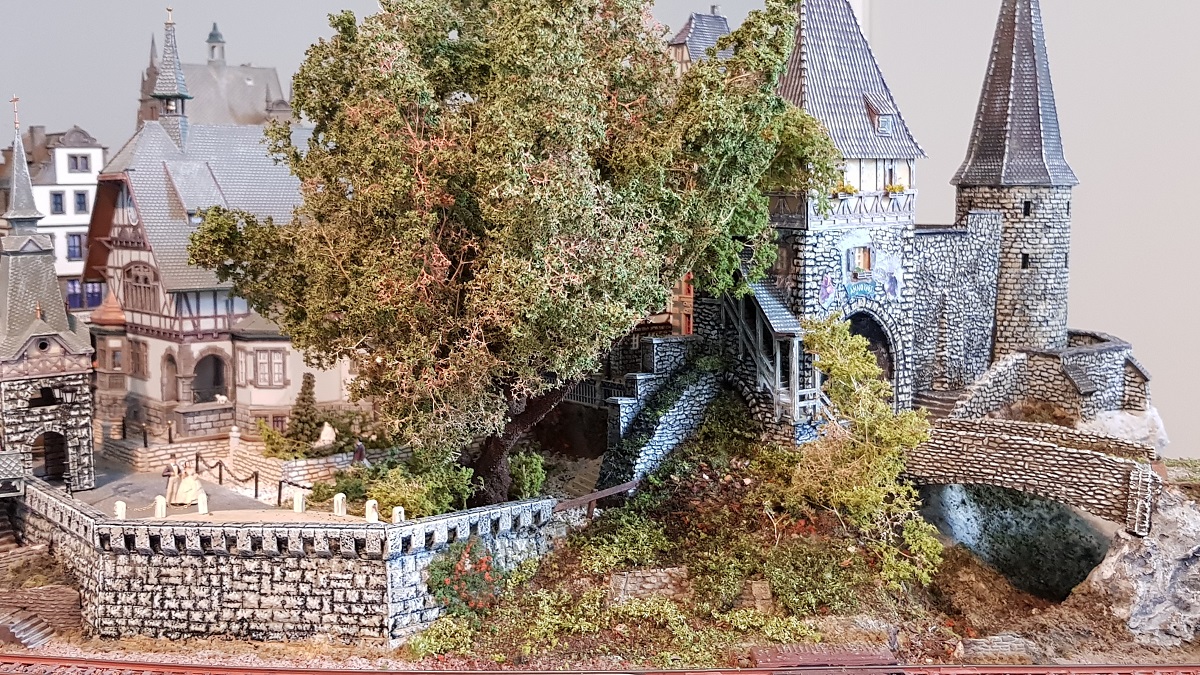
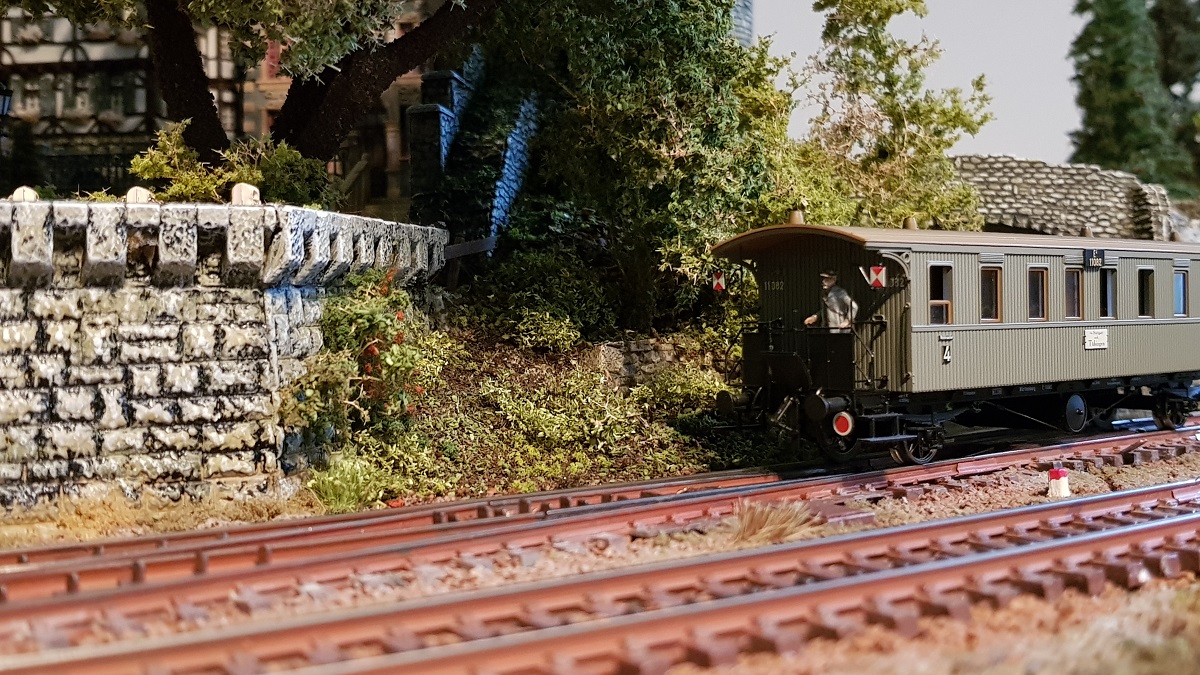
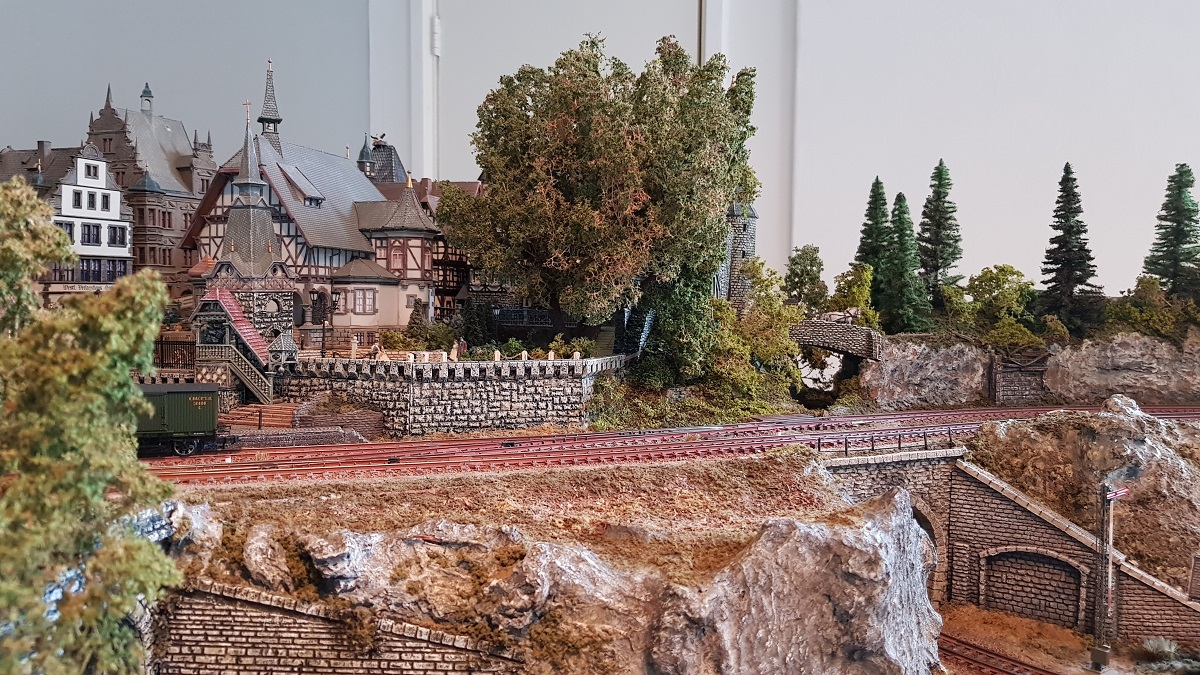
At the far left side of the layout, just behind the station, there is this small park, dominated by a huge tree and confined by the city's wall.
Although I 'weathered' the wall in the 1990's - then again I must say: only the parts visible from the front! - it doesn't outweigh the standard that I am after today!
But prior to taking care of the vegetation I will do some weathering and painting of the walls.
Since I am planning to redo the whole 'unseen' backyard behind the houses, I take the whole area into consideration.
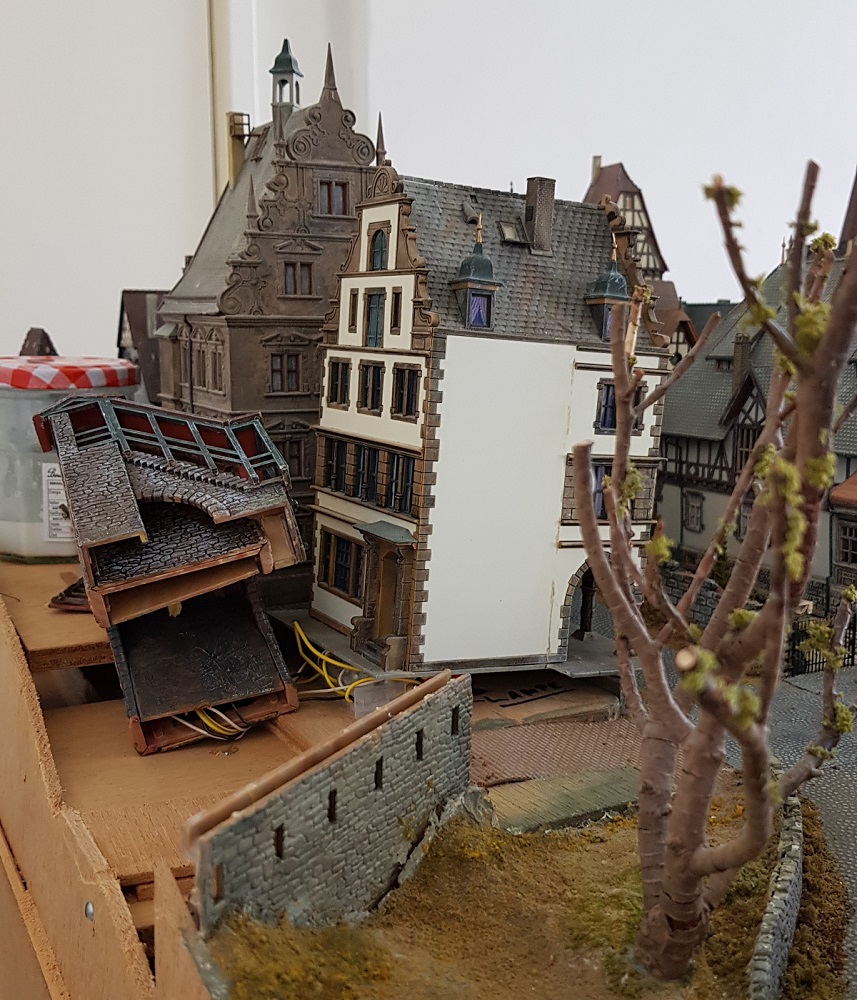
Part of the side panel - in the early days meant for a steep hilltop! - has to be removed for gaining a better access to the town.

Some eight years of dust have committed a major attack on most of the vegetation.
In my 2019 Renovation Plan I sincerely consider to remove most if not all of the vegetation - grass, bushes and trees,
since it is impossible to remove the now 'sticky' layer of dust with brush and vacuum cleaner.
However, since this tree trunk has such a magnificent shape, I will remove the clumps of foliage and try to use Seemoos for branches instead.
You can read more about that in chapter 8.
And now for some finer handicraft...
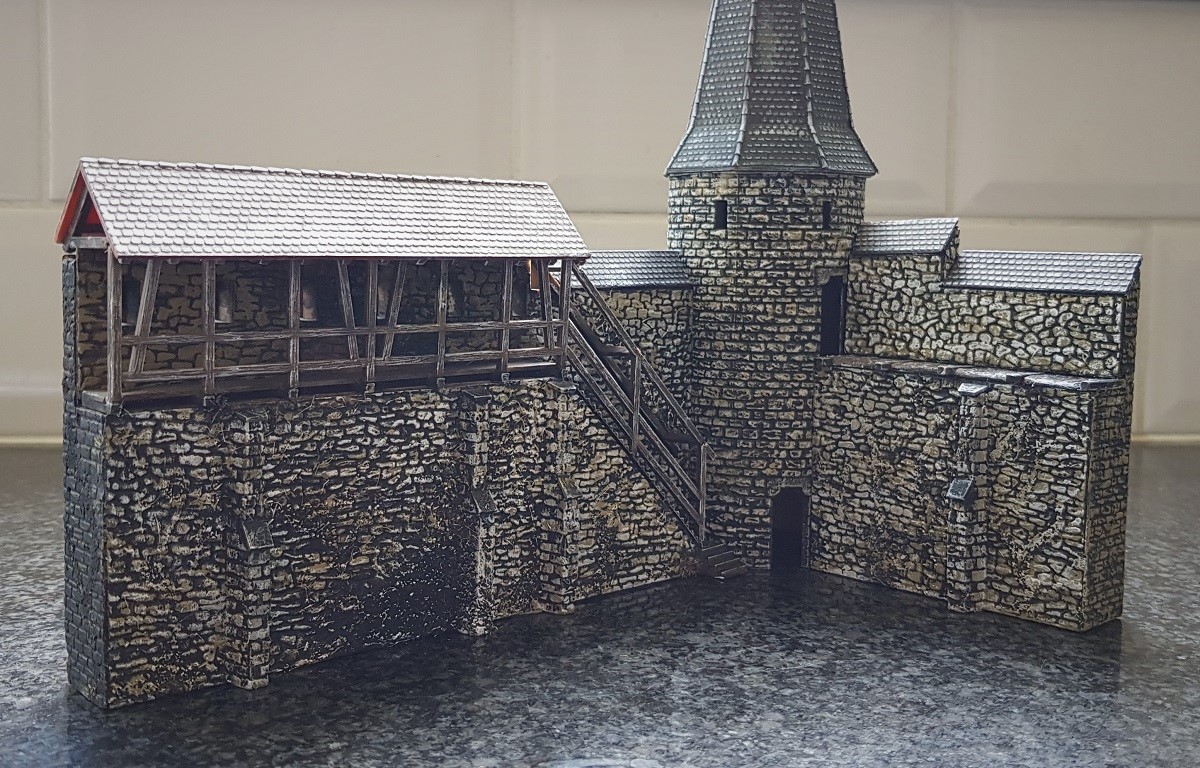
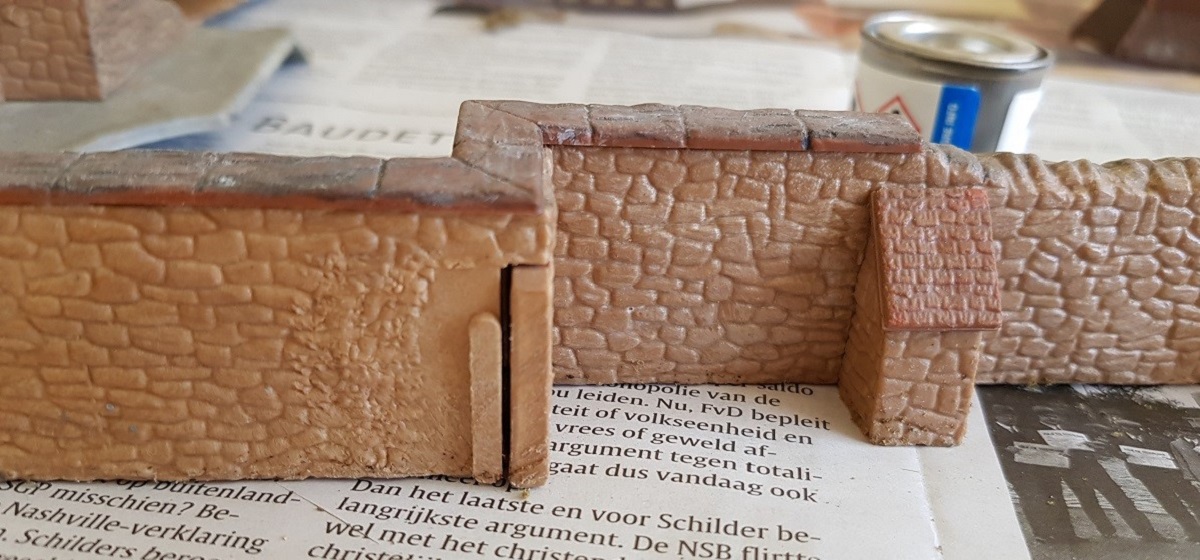
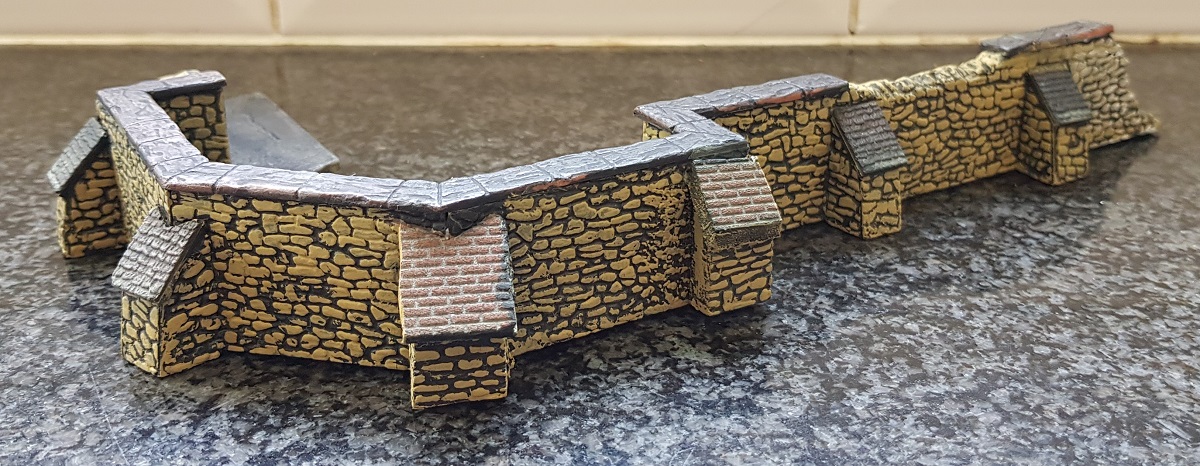
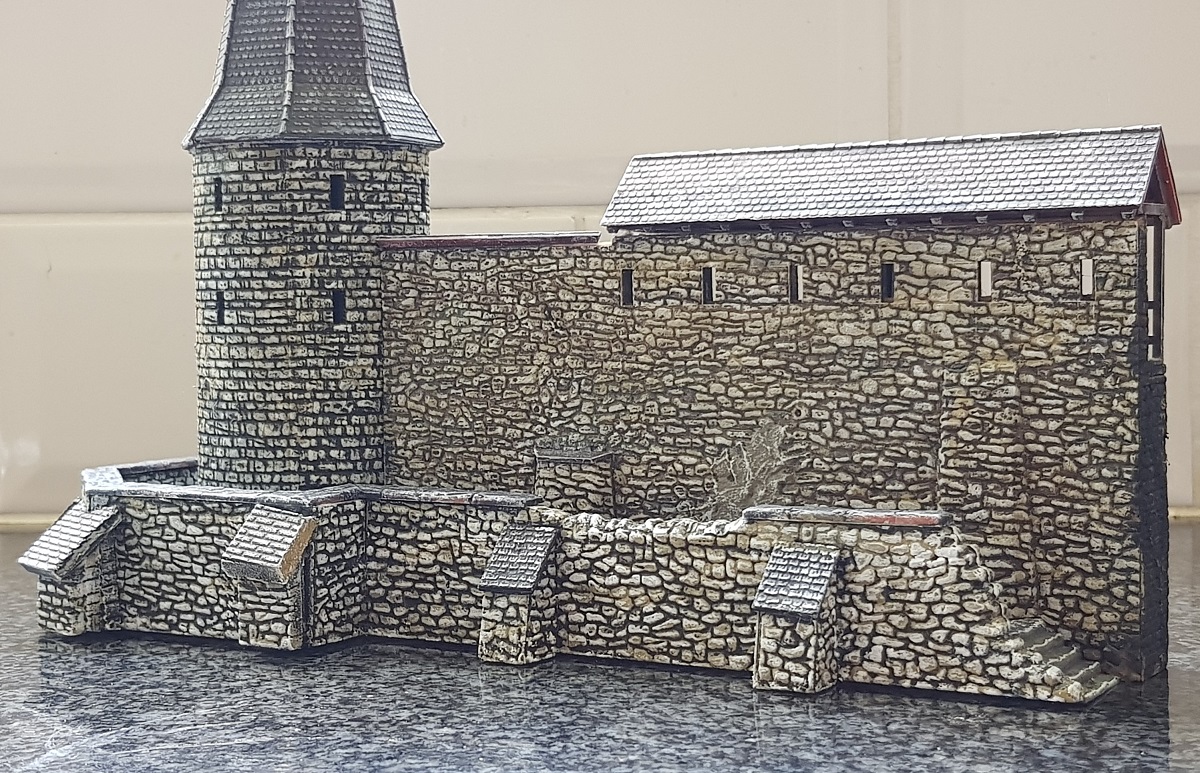
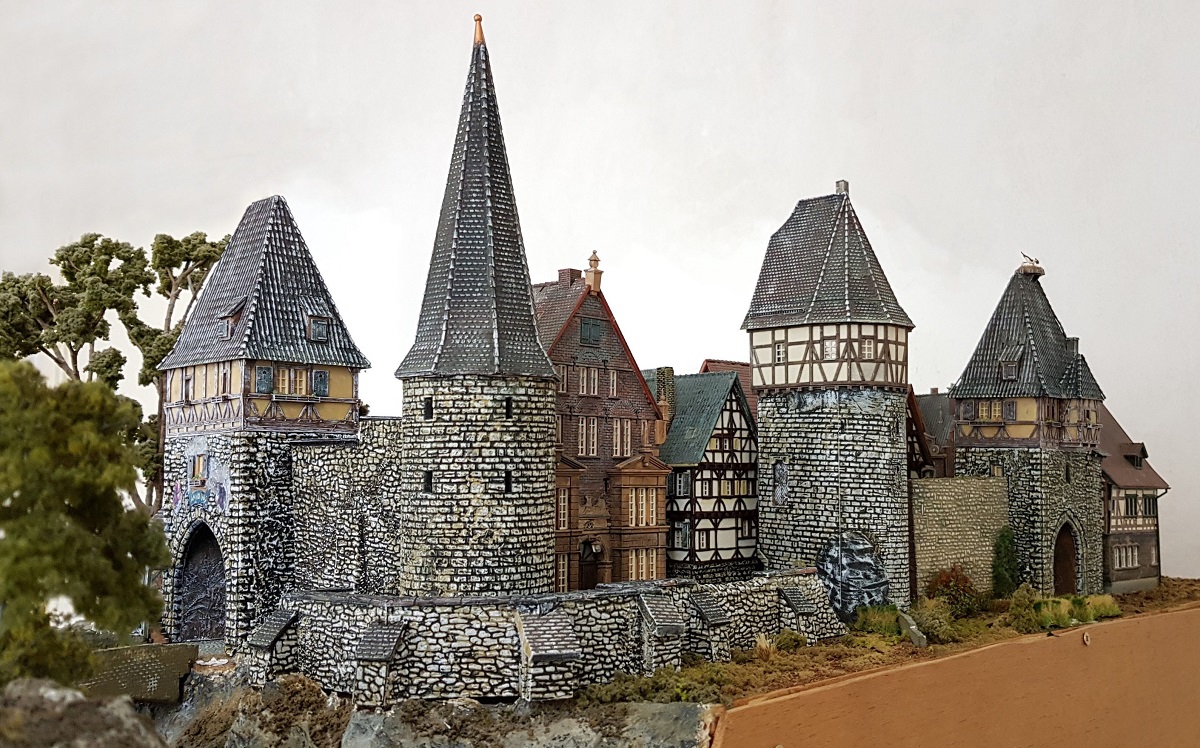
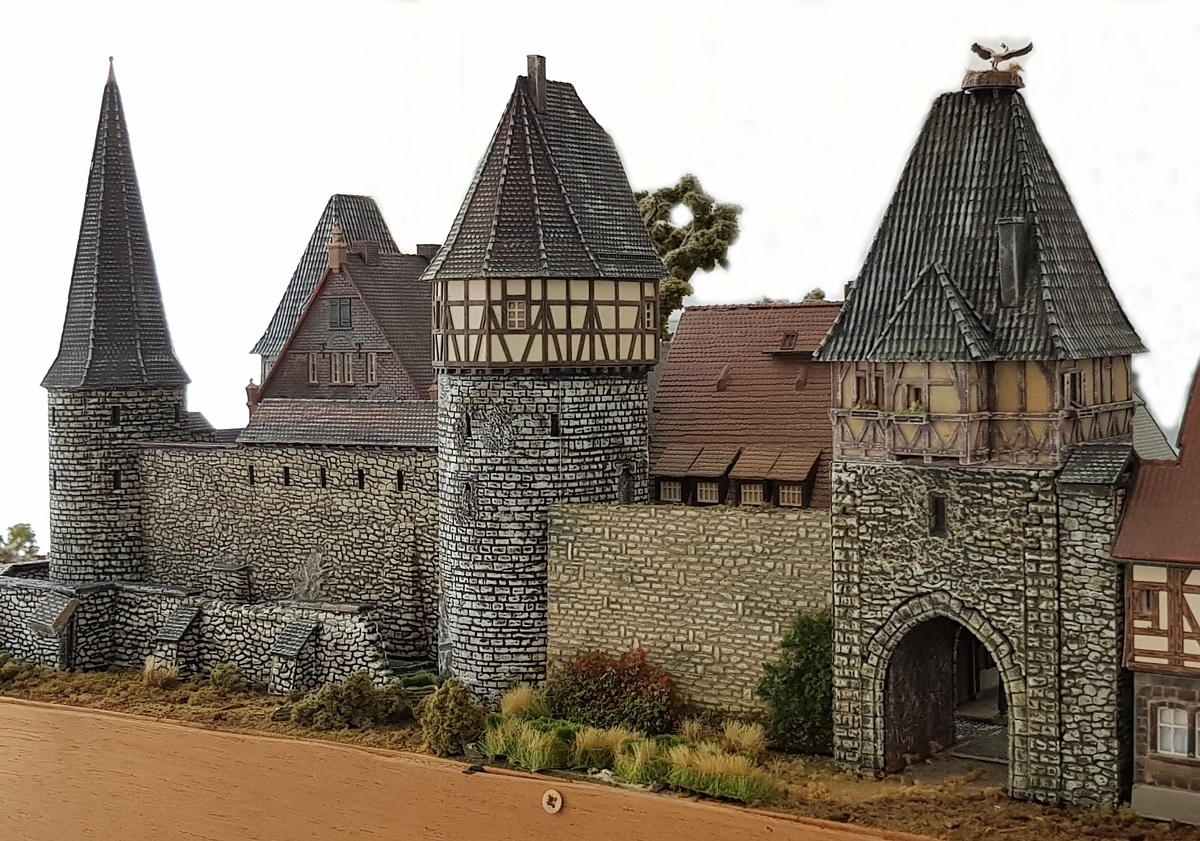
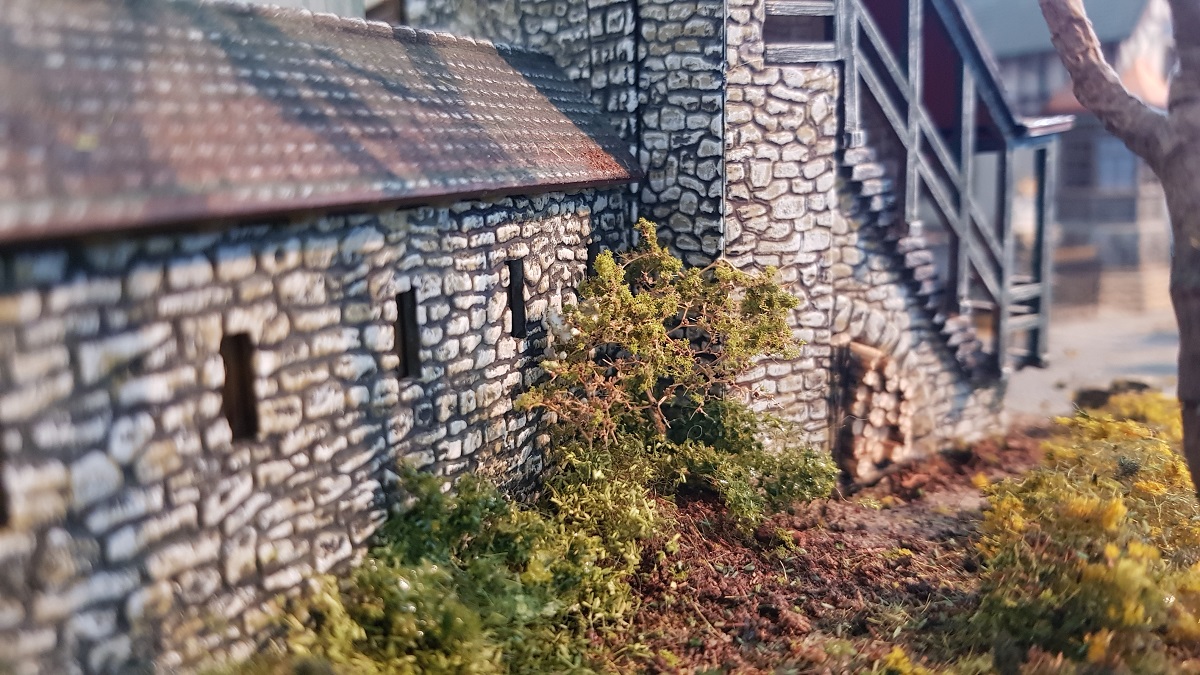
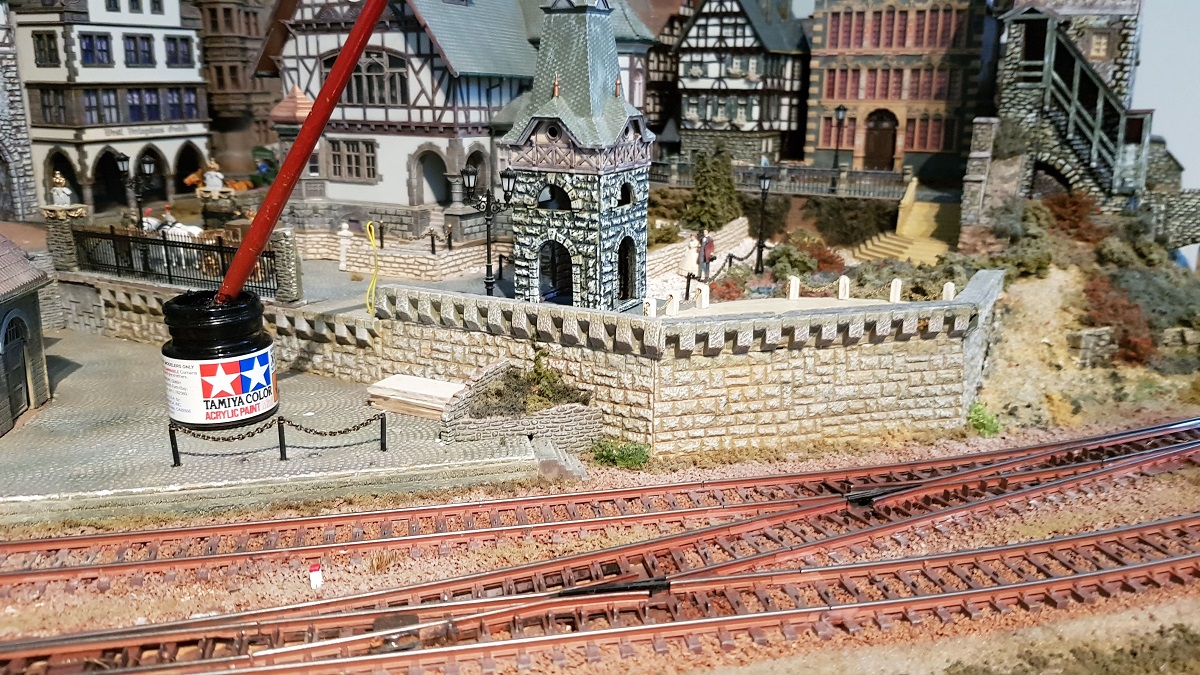
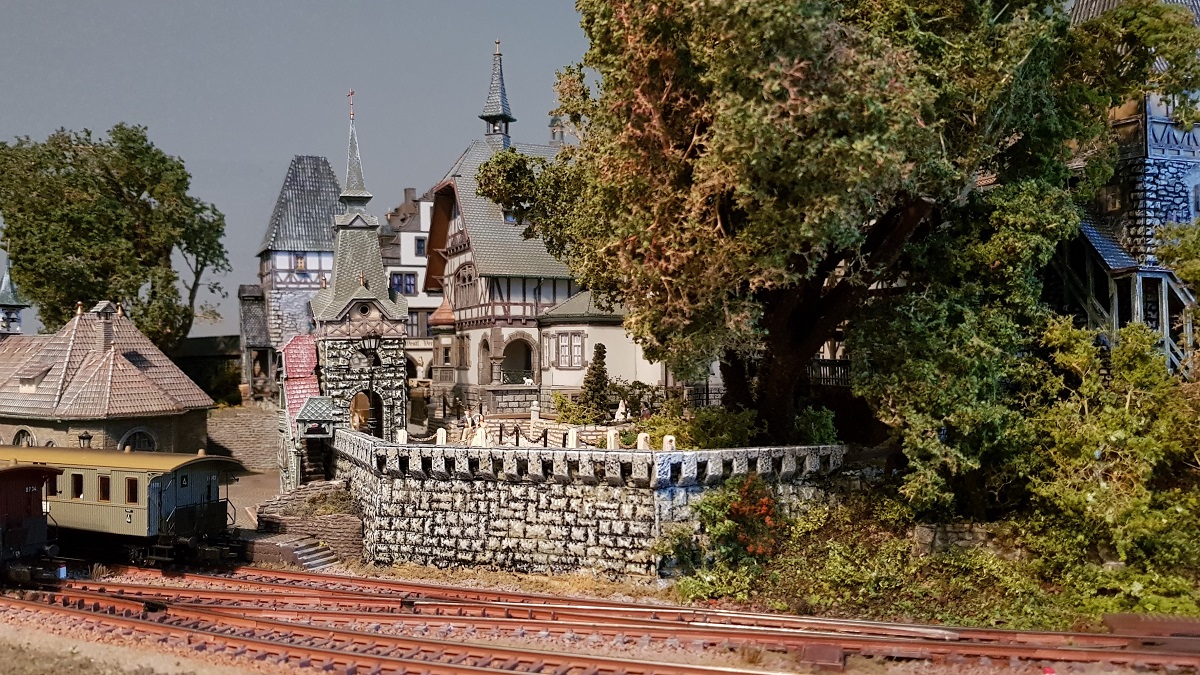
My first priority is to repaint all stone walls and towers to give them a more 'stonelike' look as if they have endured ages past.
I chose a colouring in an Elsass-Lorraine style: a kind of light greyish and yellow stones with dark mortar.
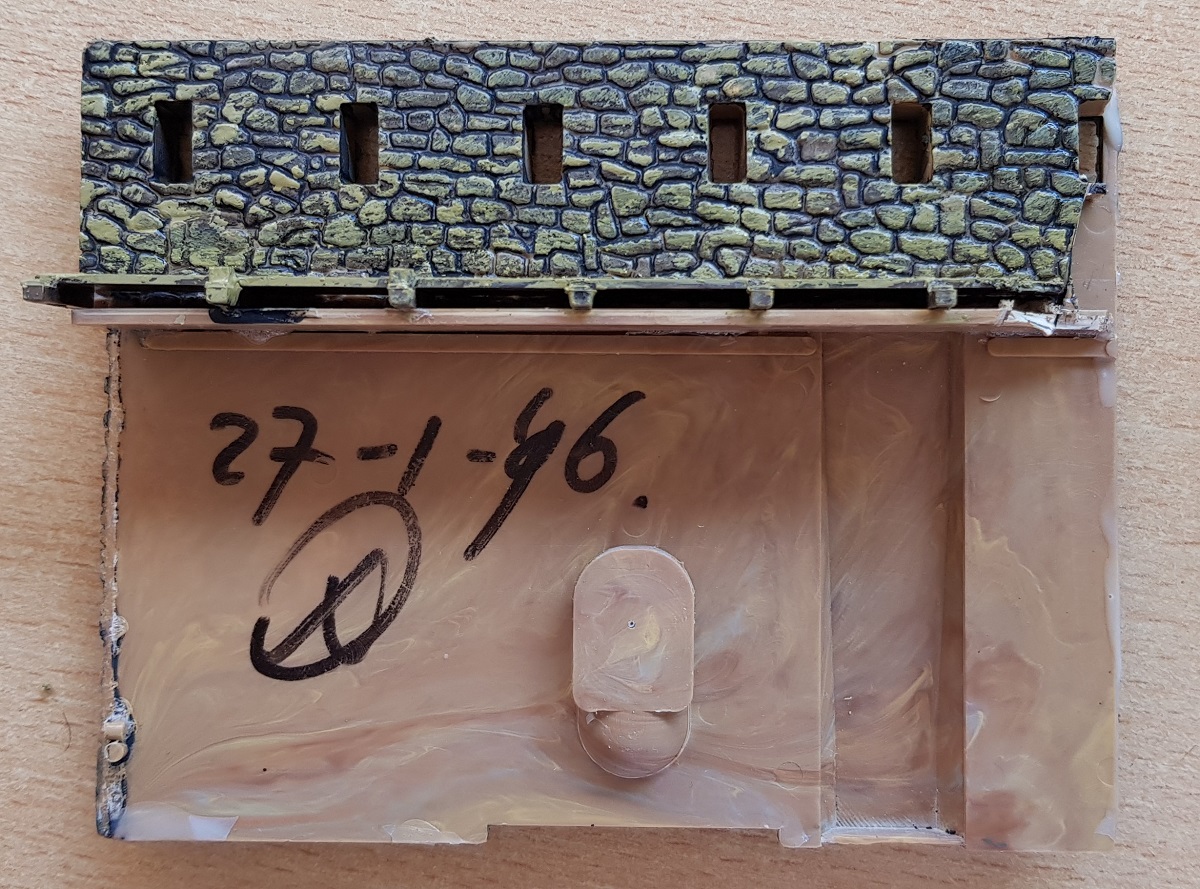
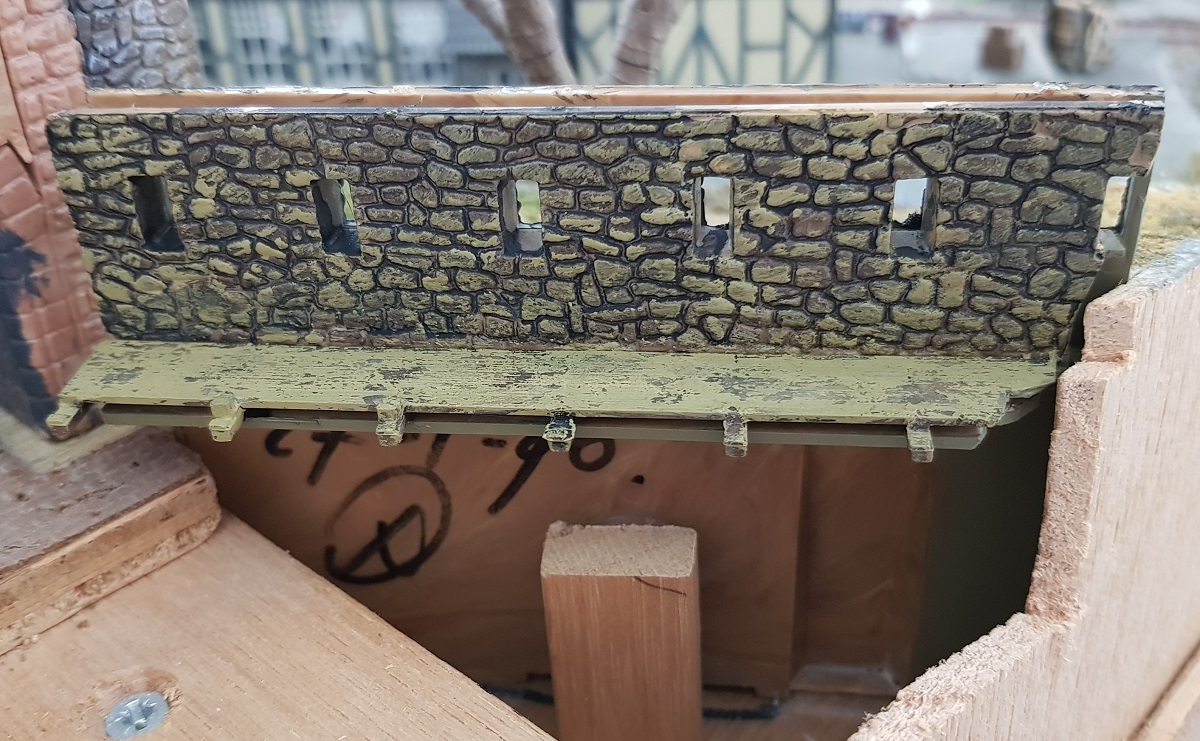
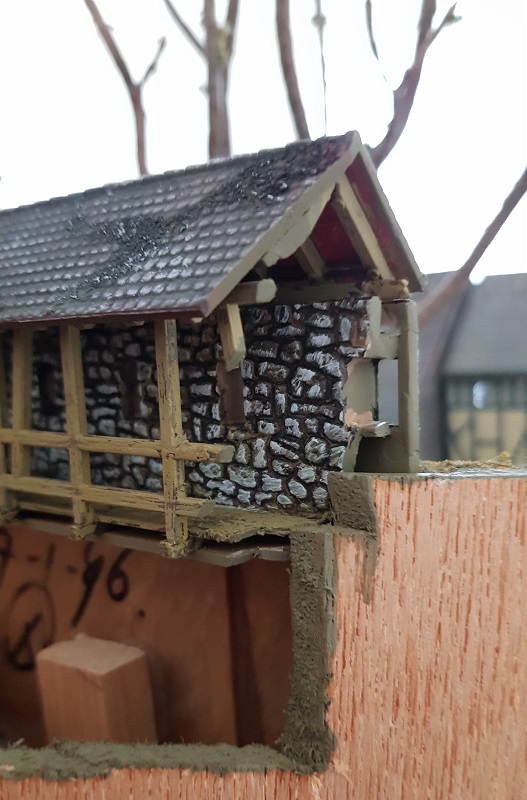
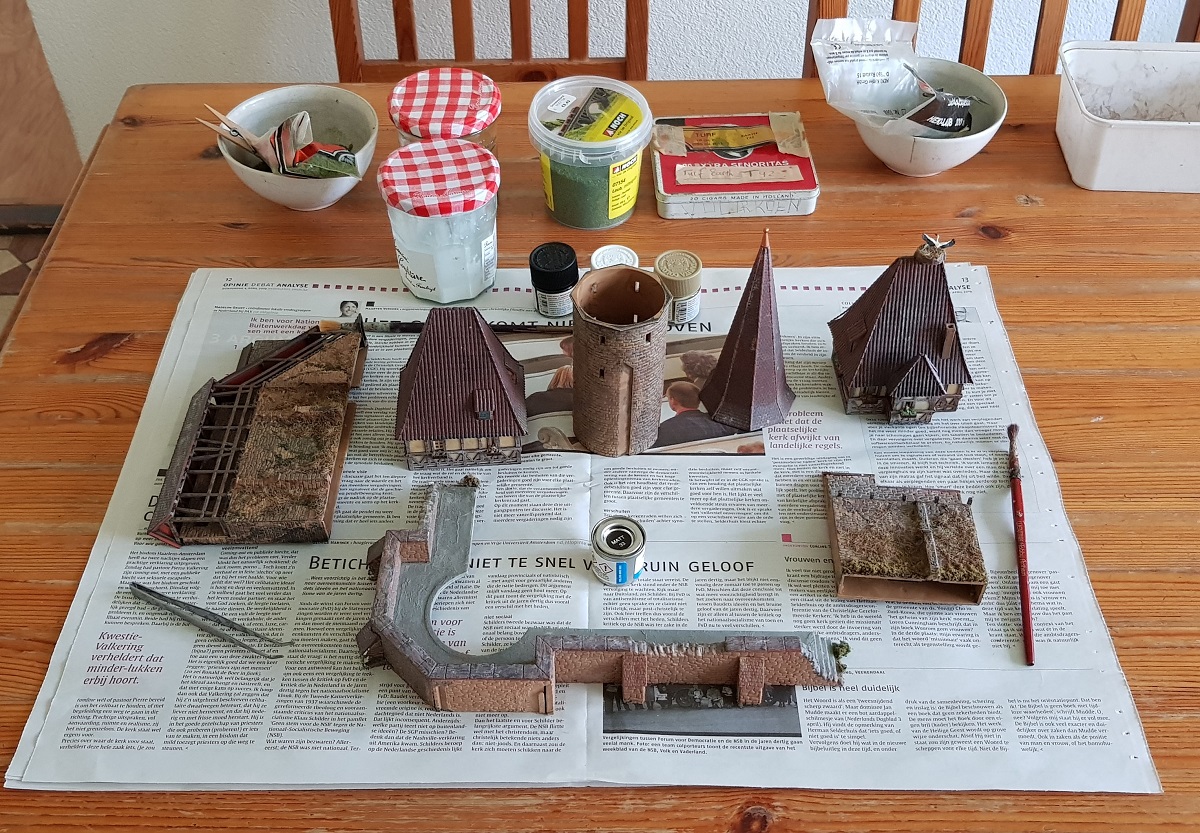
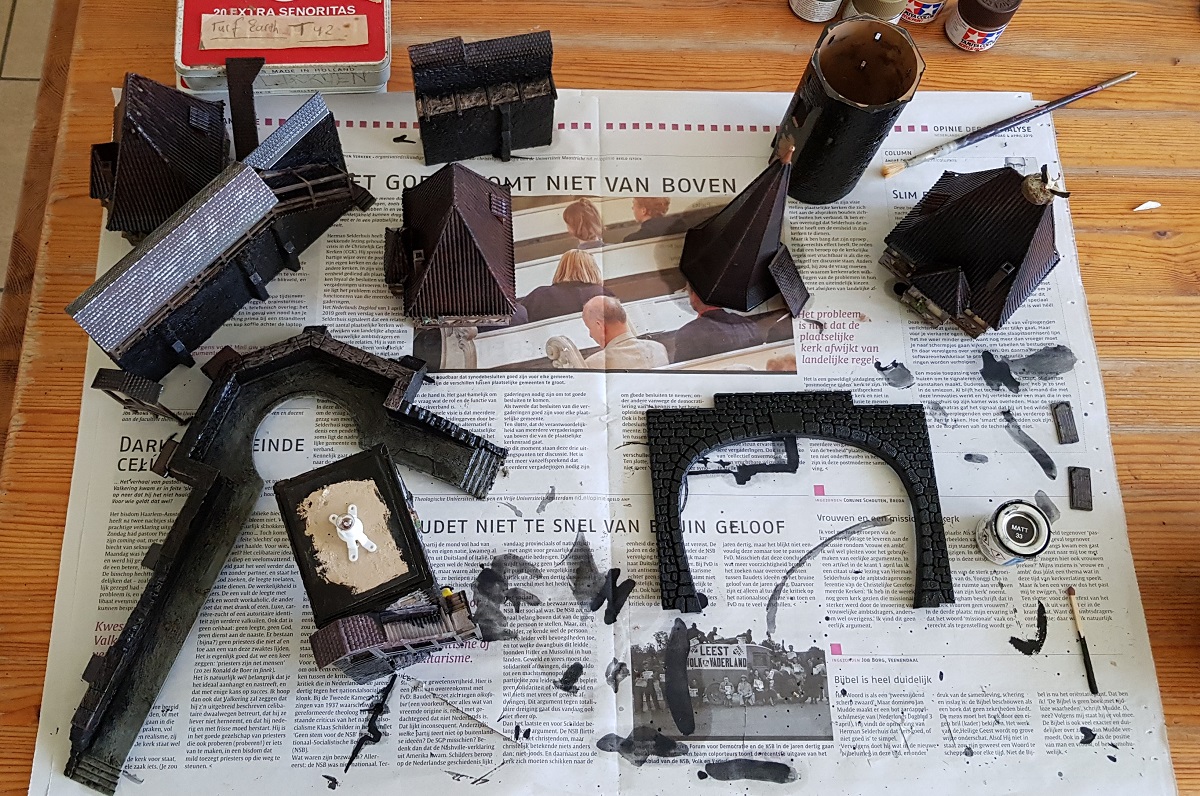
Before painting I'll have to remove them carefully from the layout...
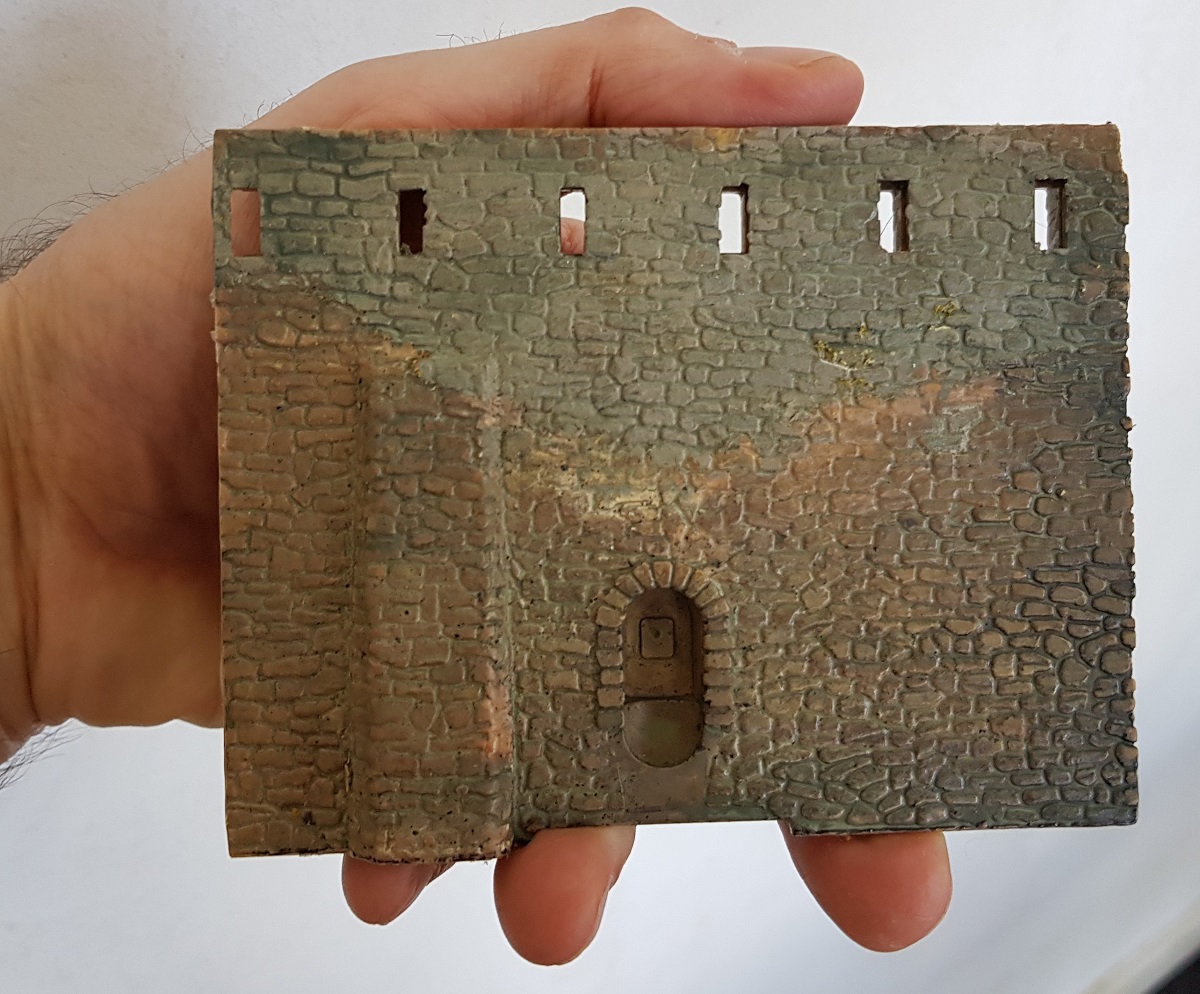
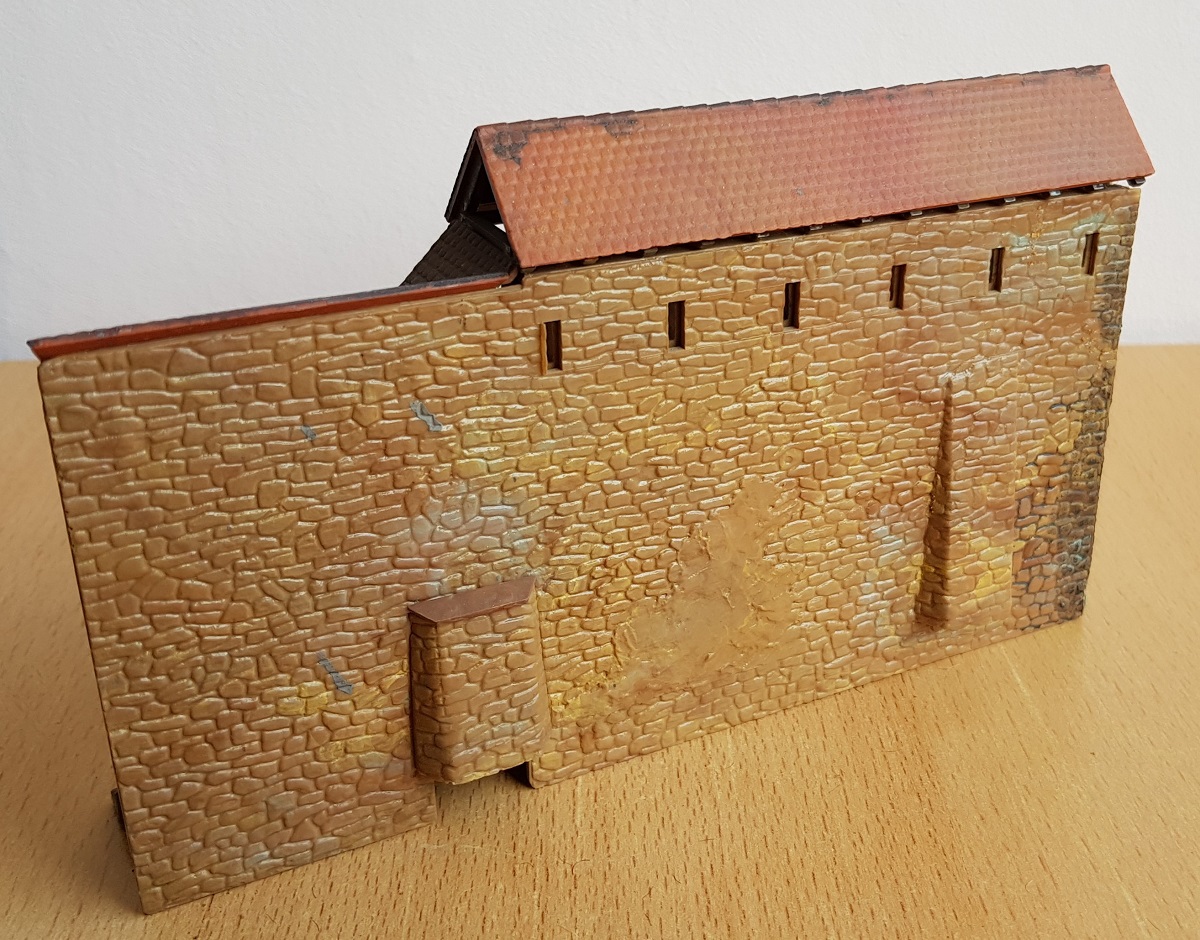
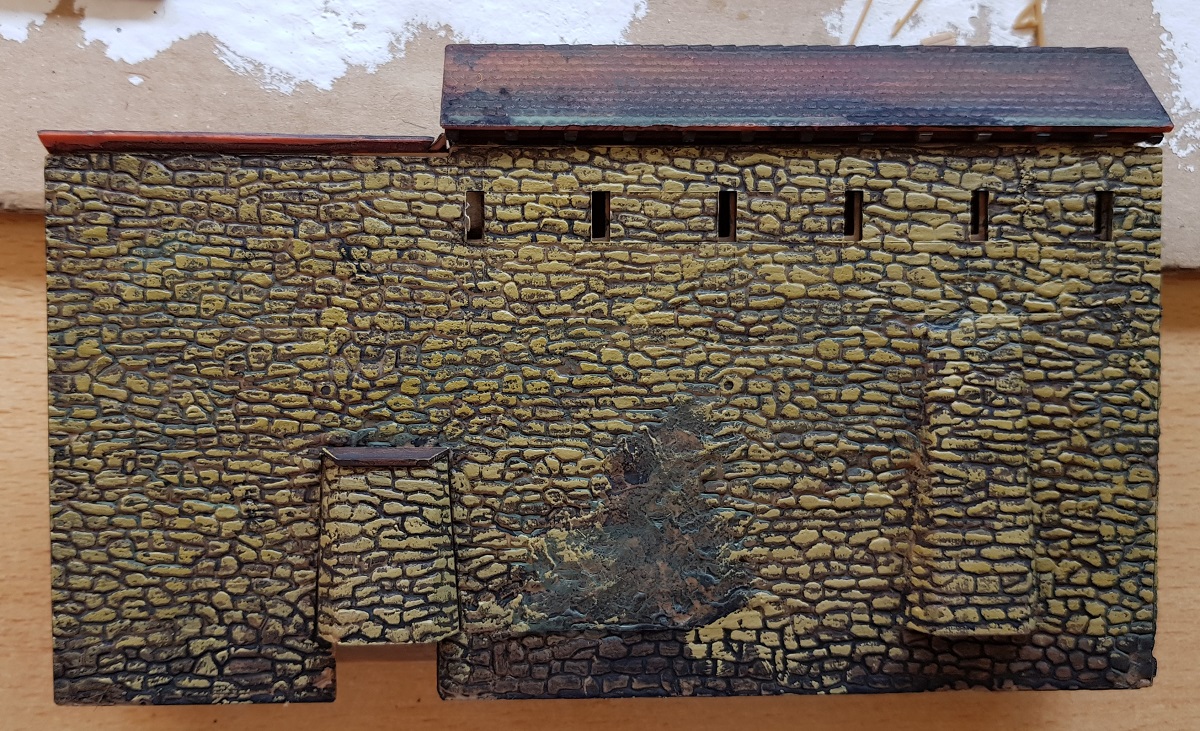
Part of the ancient Kibri wall. Screaming for colour, yeah, I know!
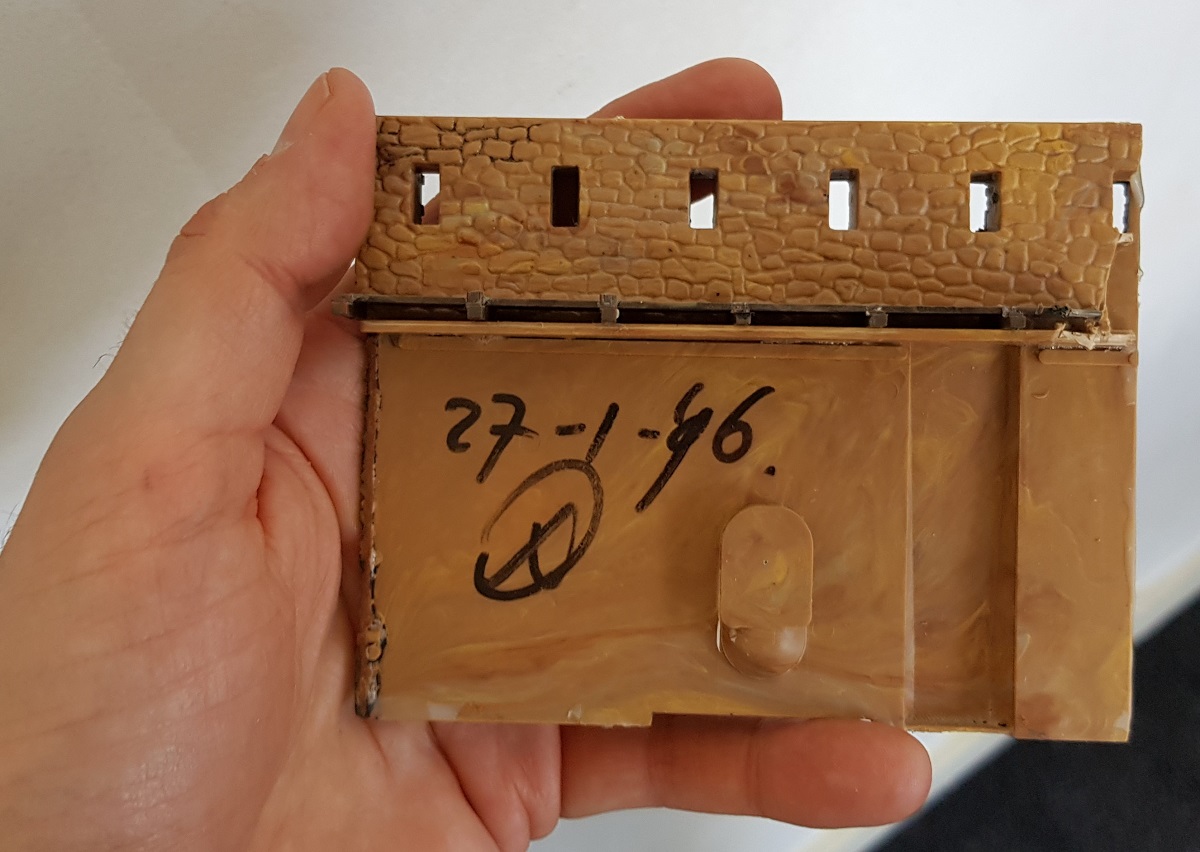
The back side wasn't even touched at all!
Pretty singular... a date written on the back side.
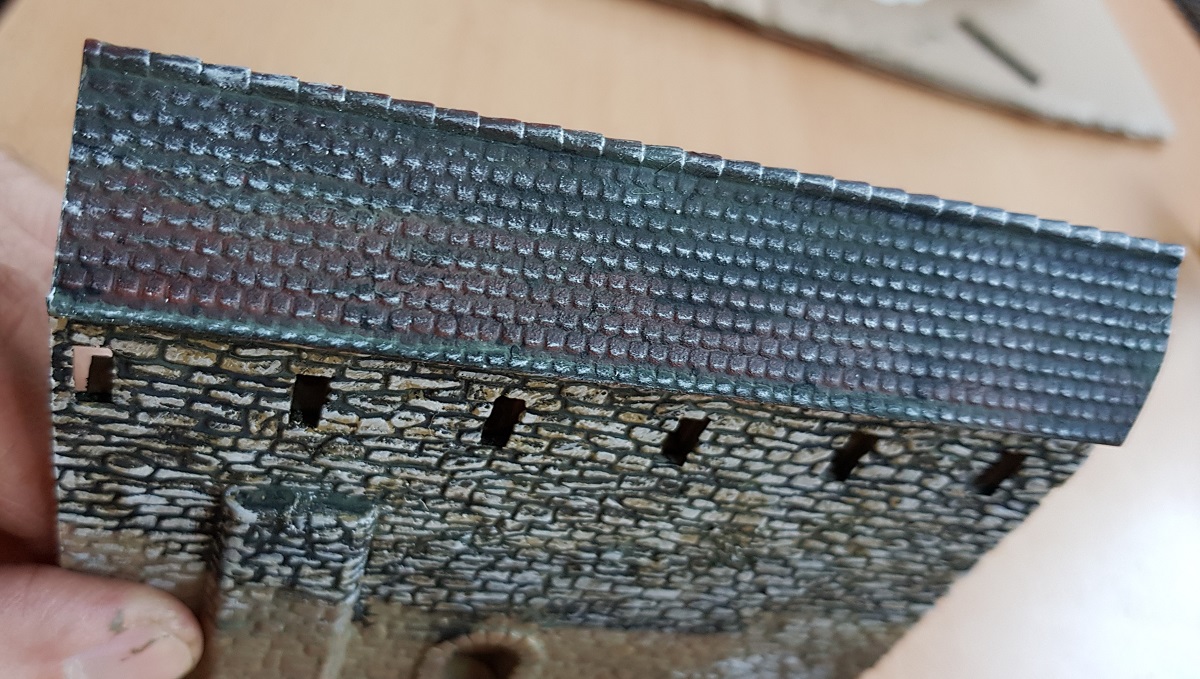
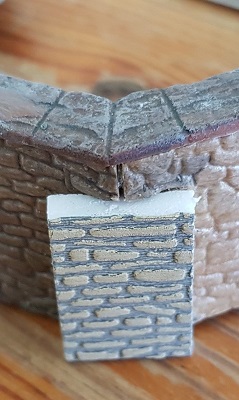
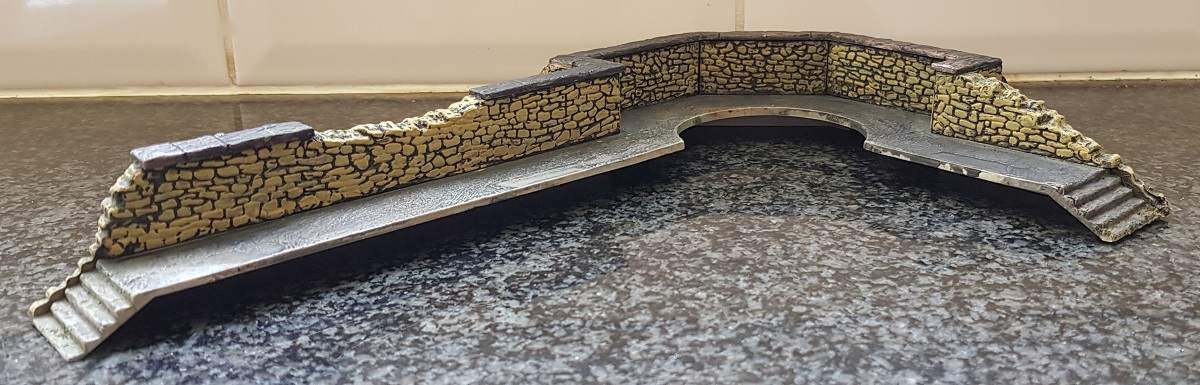
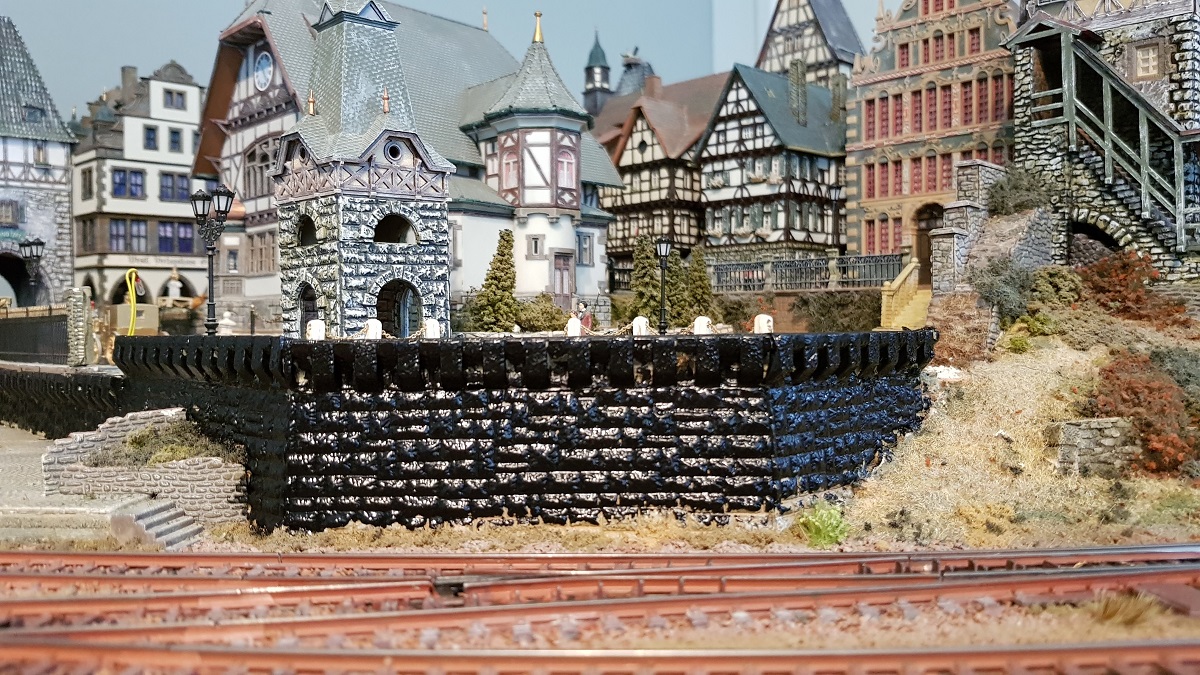
A. First a flat black layer (wet)
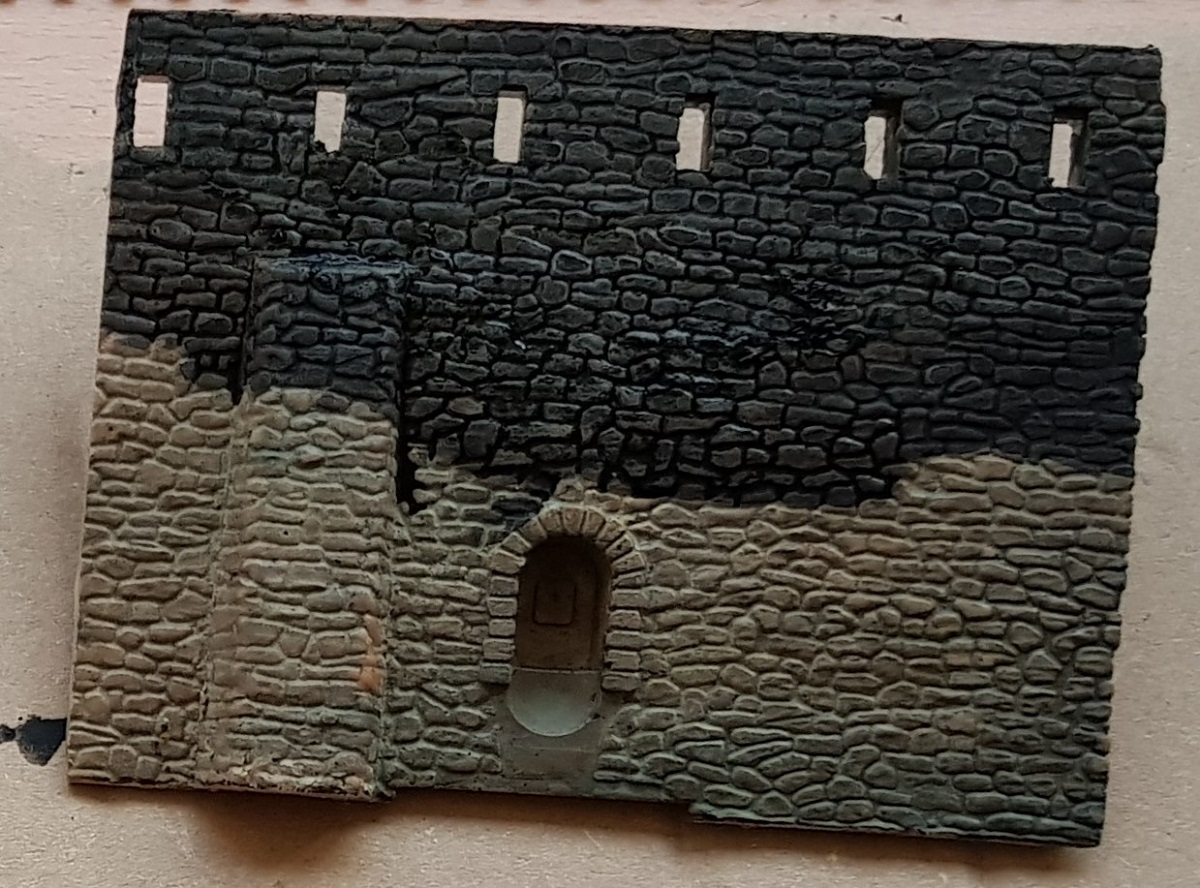
B. Then a semi dry layer of yellow, keeping the brush horizontal ...
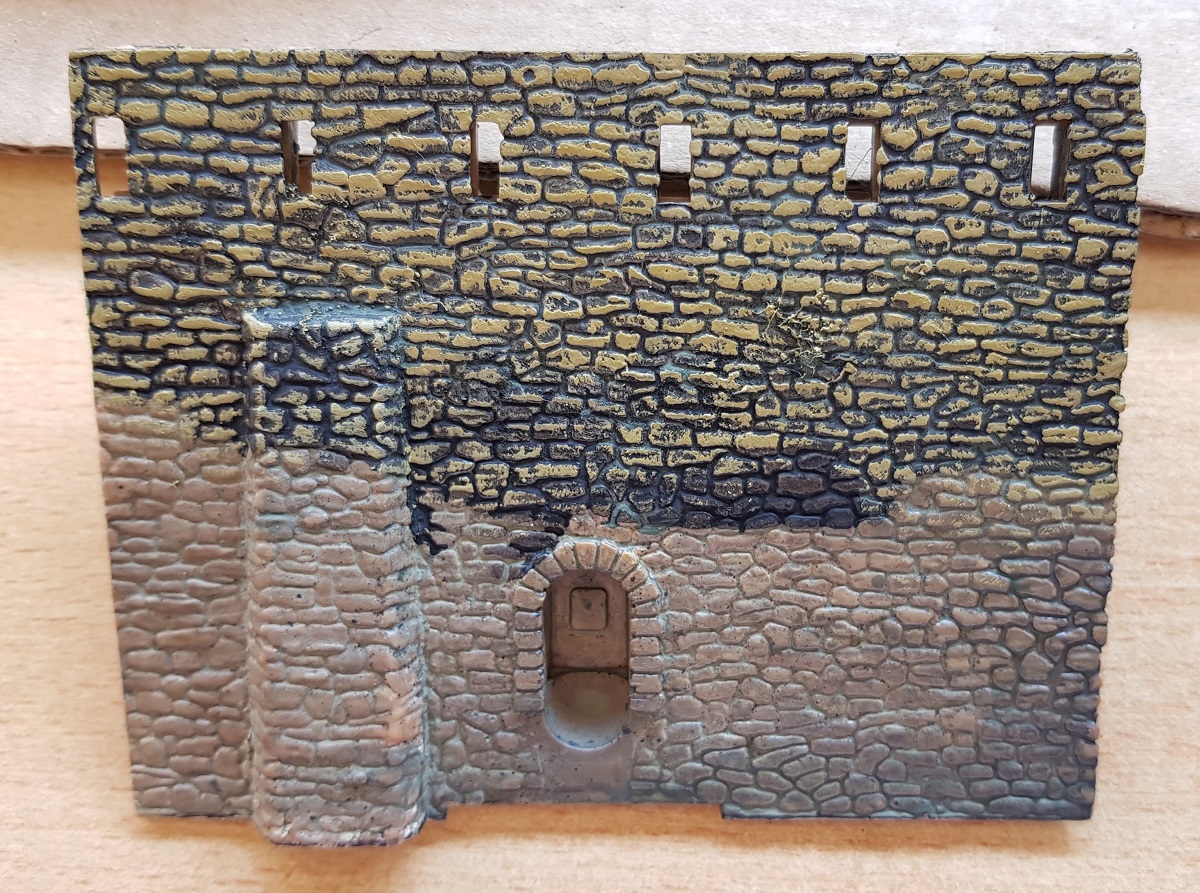
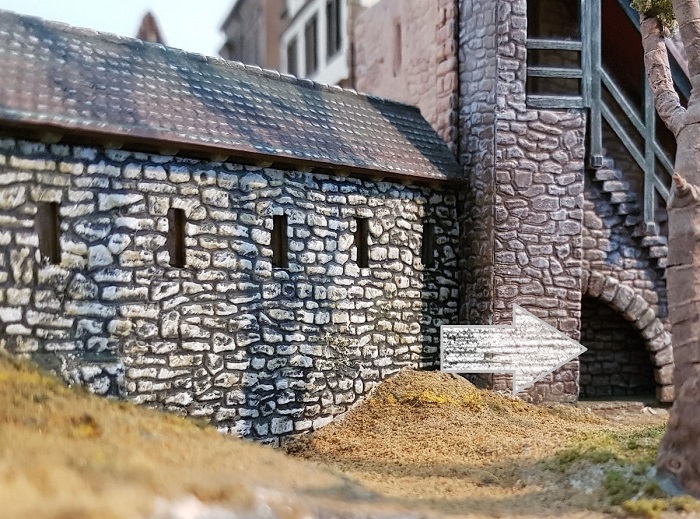
A quick peek to see how it fits in the environment...
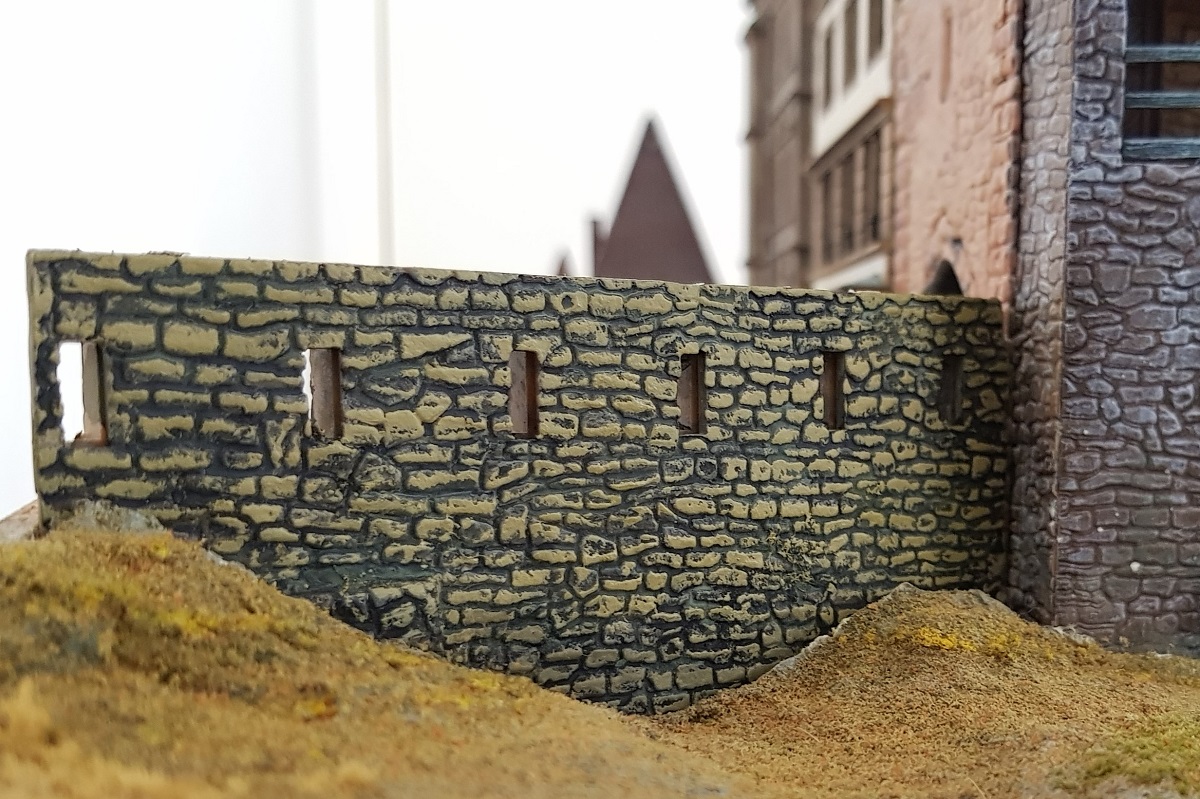
Not bad, but also... not yet!
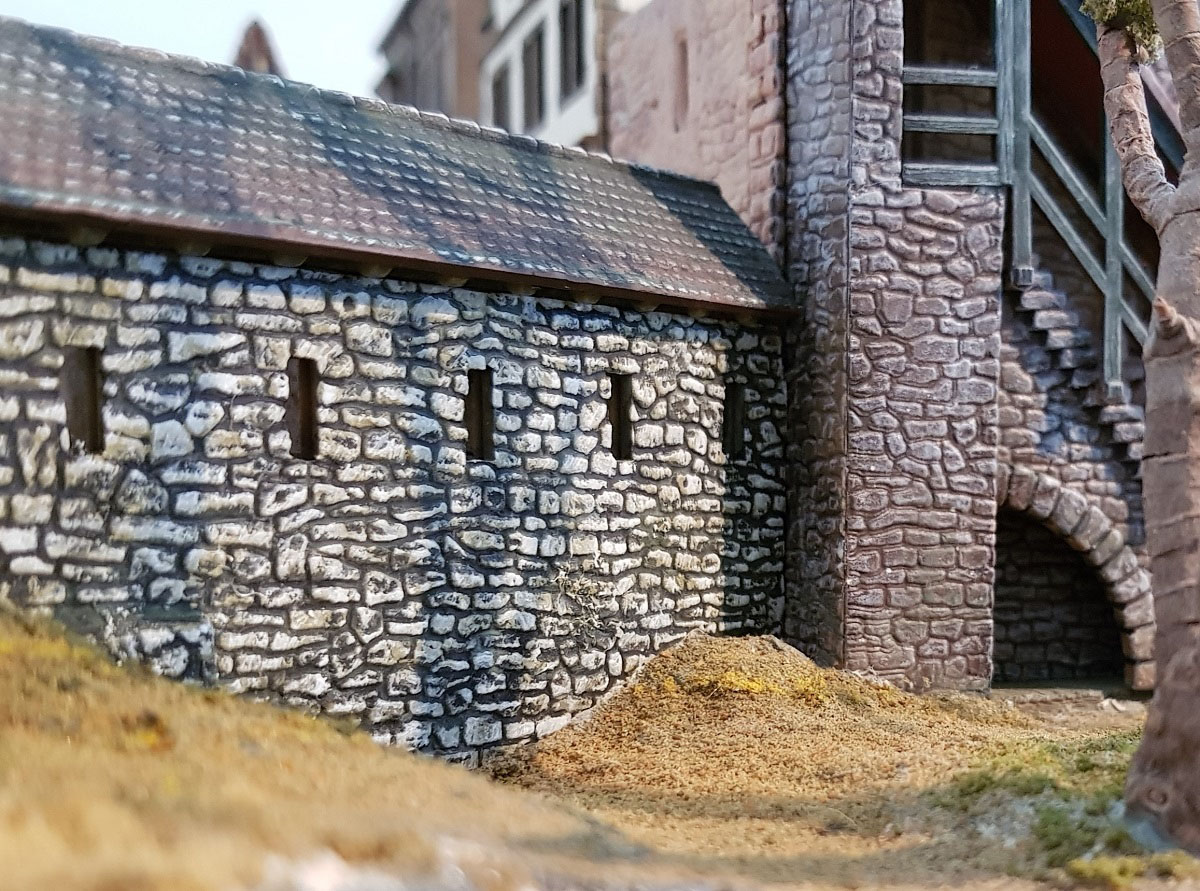
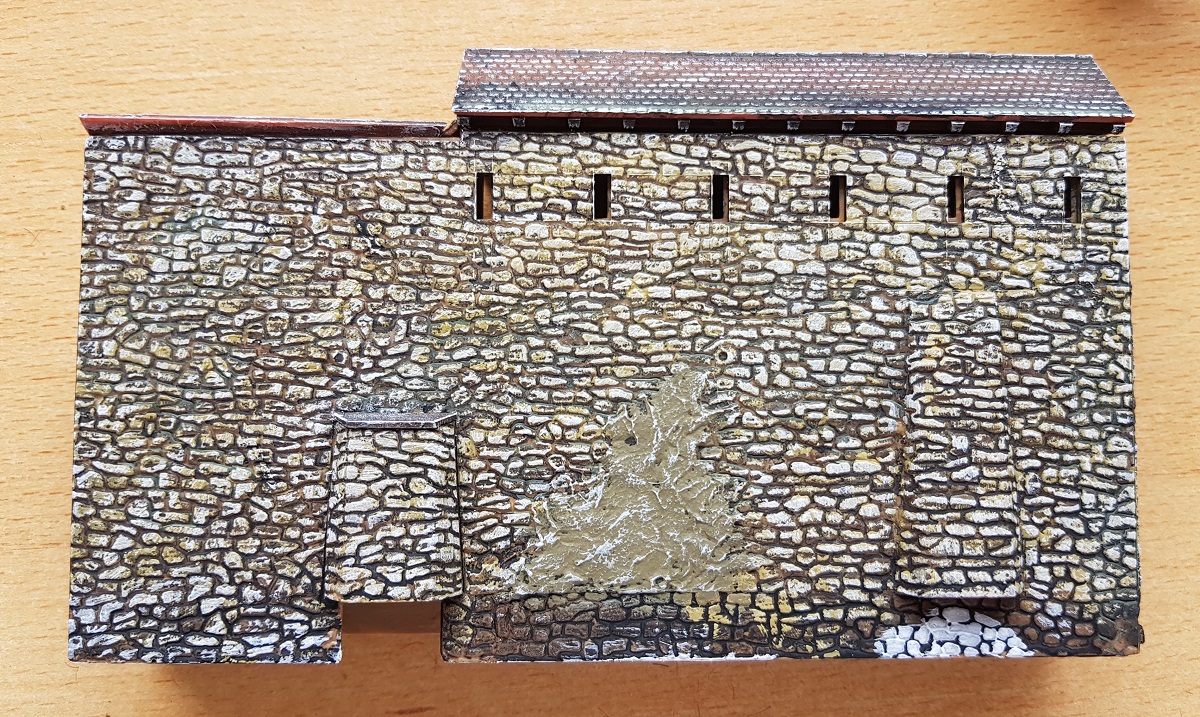
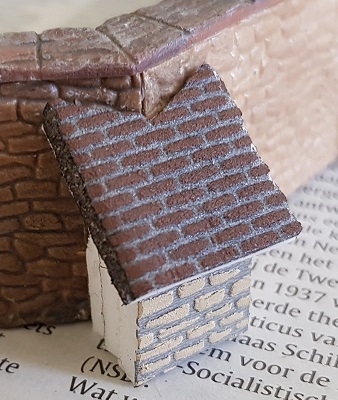
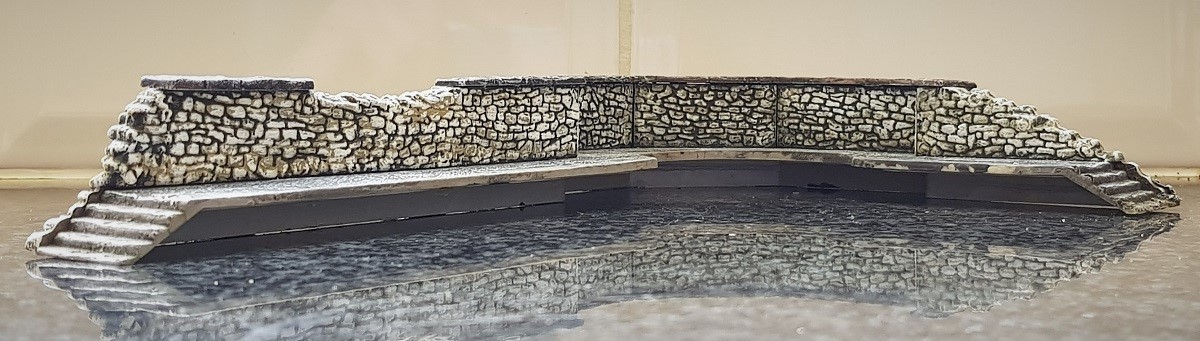
Before I come to step 3, first I'll take care of the corridor on top of the wall!
C. Finally, a dry brush of white, both on the wall and rooftop tiles ...
~~~
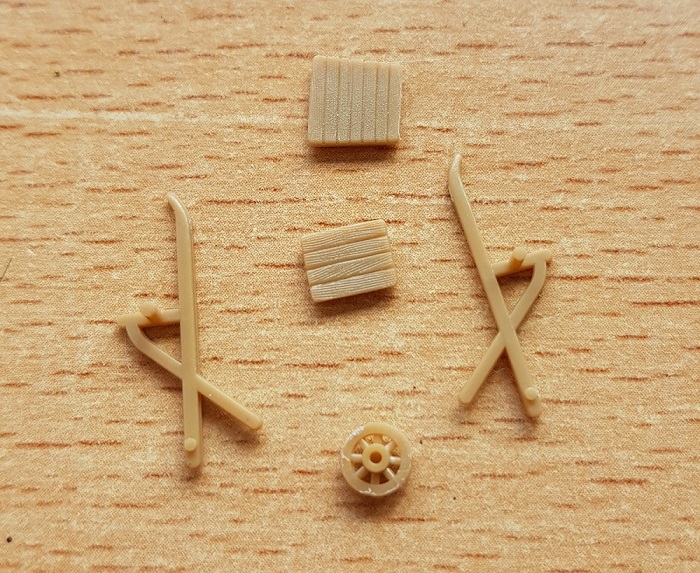
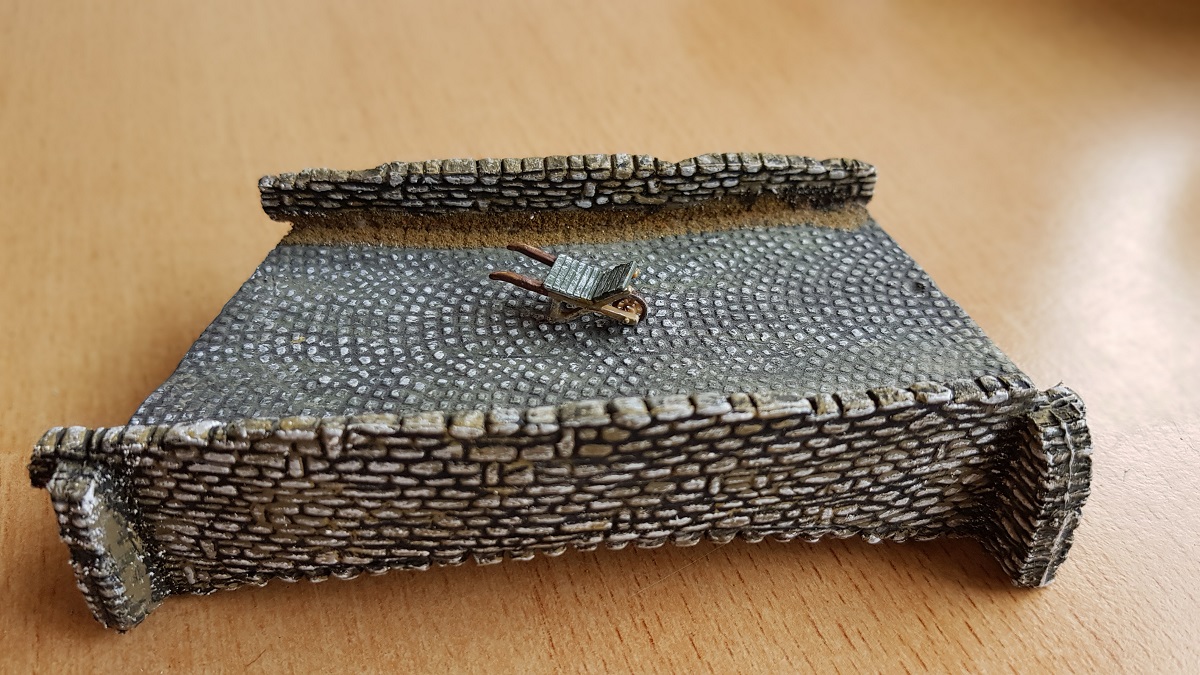
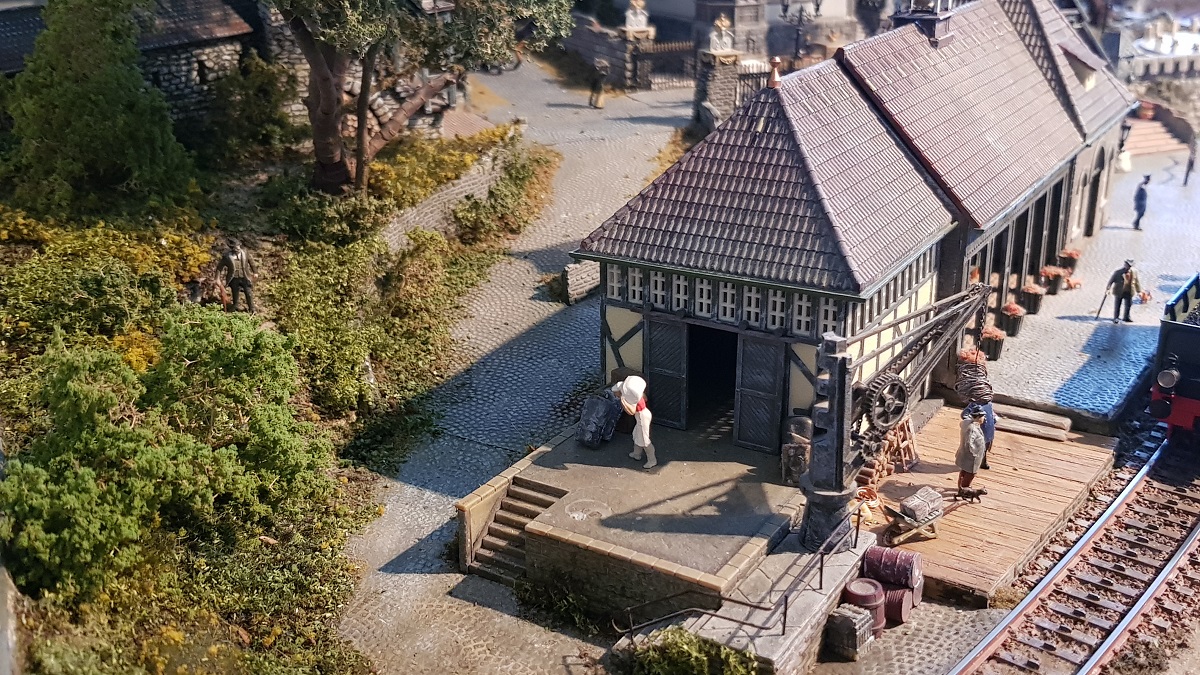
1.2 ~ I n t e r m i s s i o n: The W h e e l b a r r o w
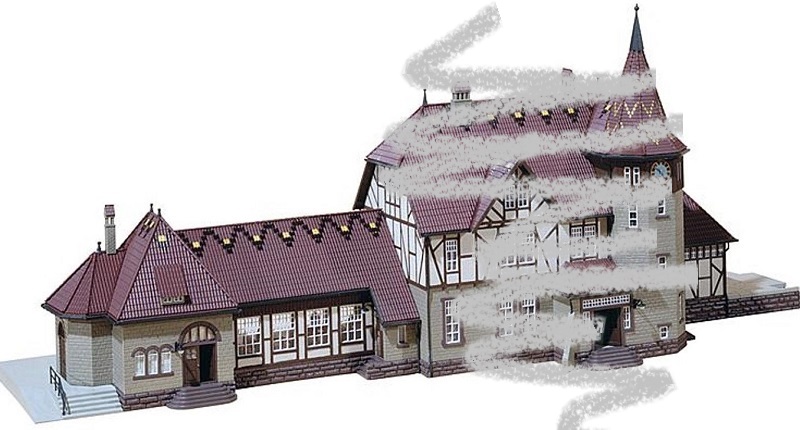
Since I only used part of the Faller Station "Bahnhof Schwartzburg" for my 'Endbahnhof' at Cochem Town,
I recently discovered that in the remnants of that kit were some peculiar parts of this ancient wheelbarrow,
exactly the kind I was looking for so many years ago... (in Chapter 28 you can read of another one)
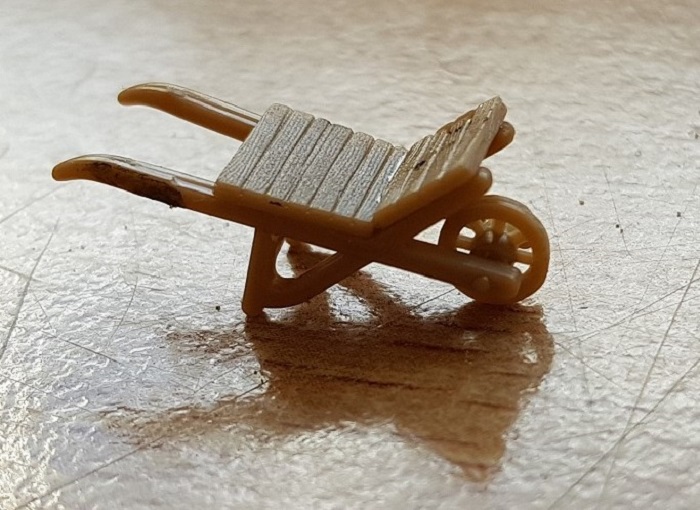
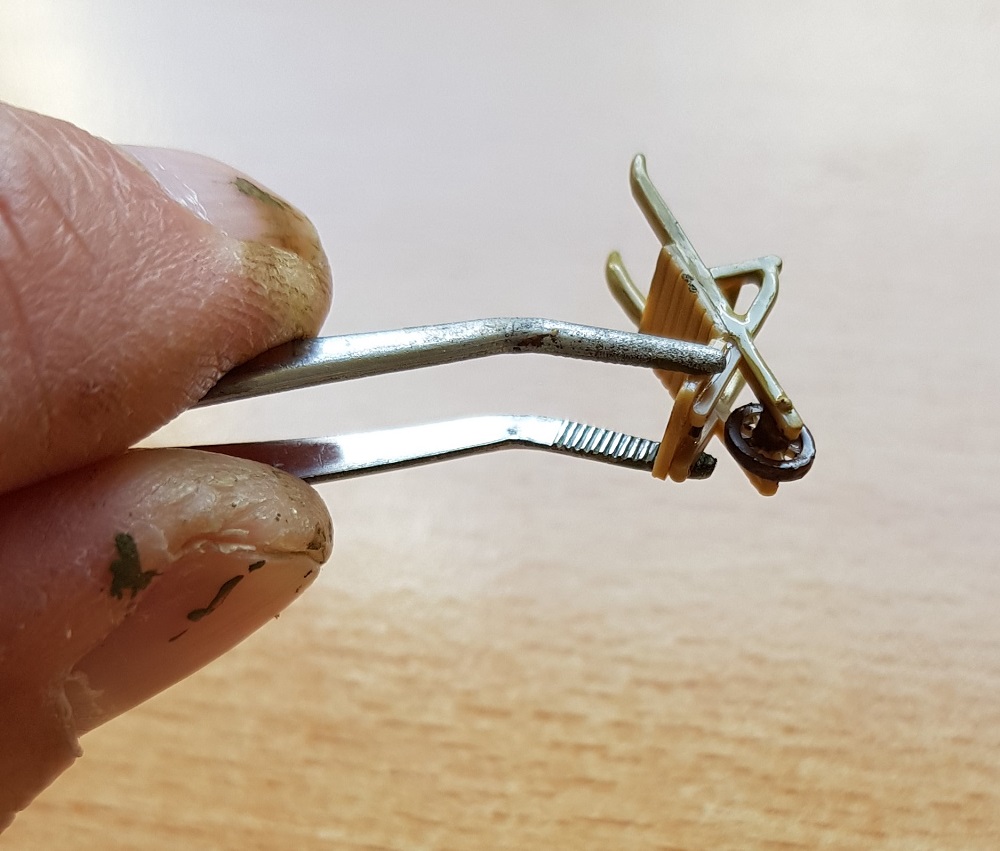
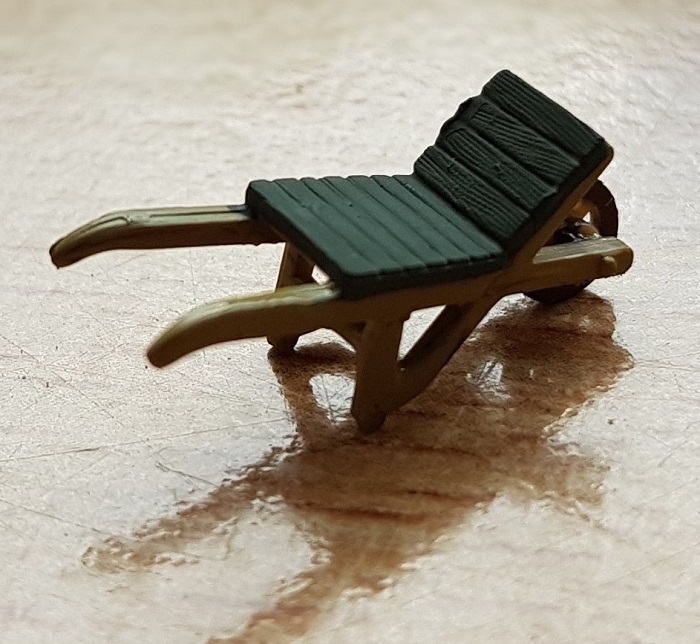
Finally, a dry brush white and...

... there you go!
~~~
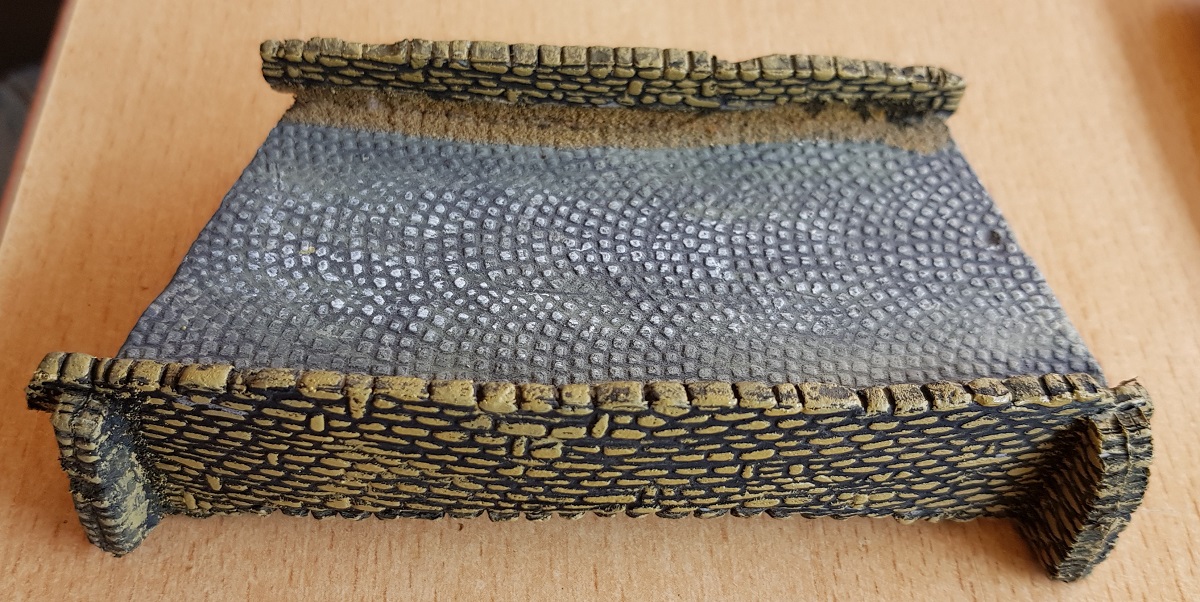
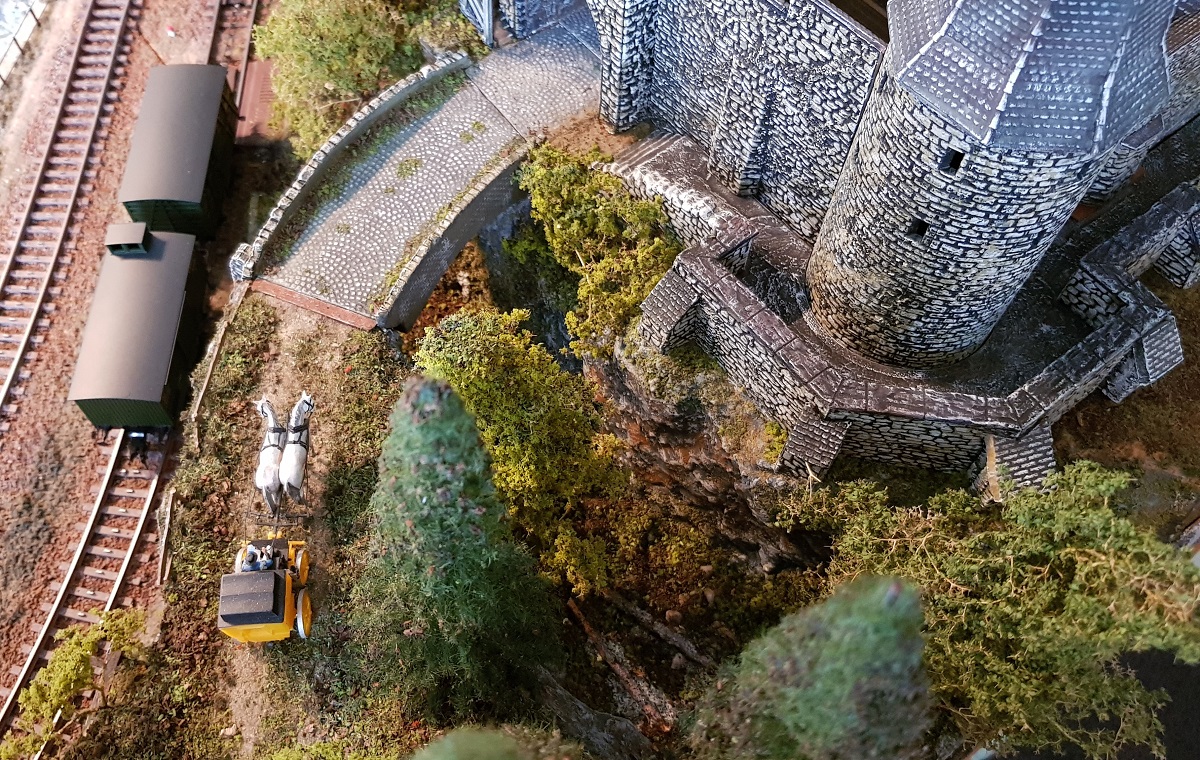
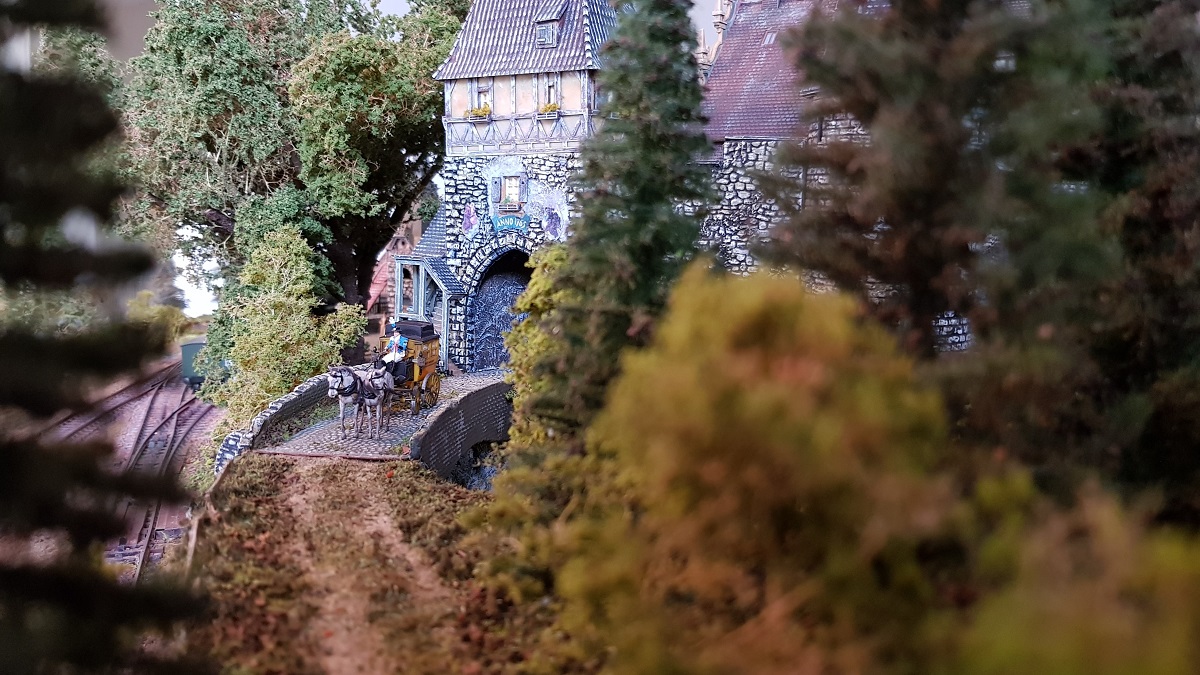
1.3 ~ T h e b r i d g e
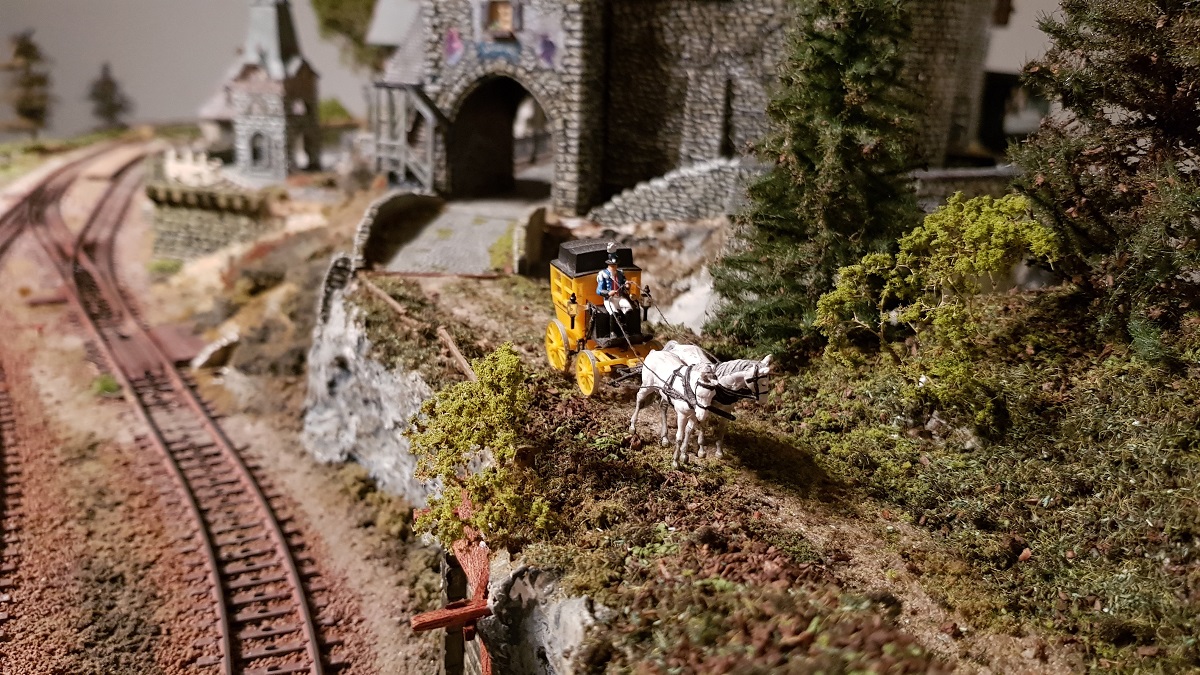
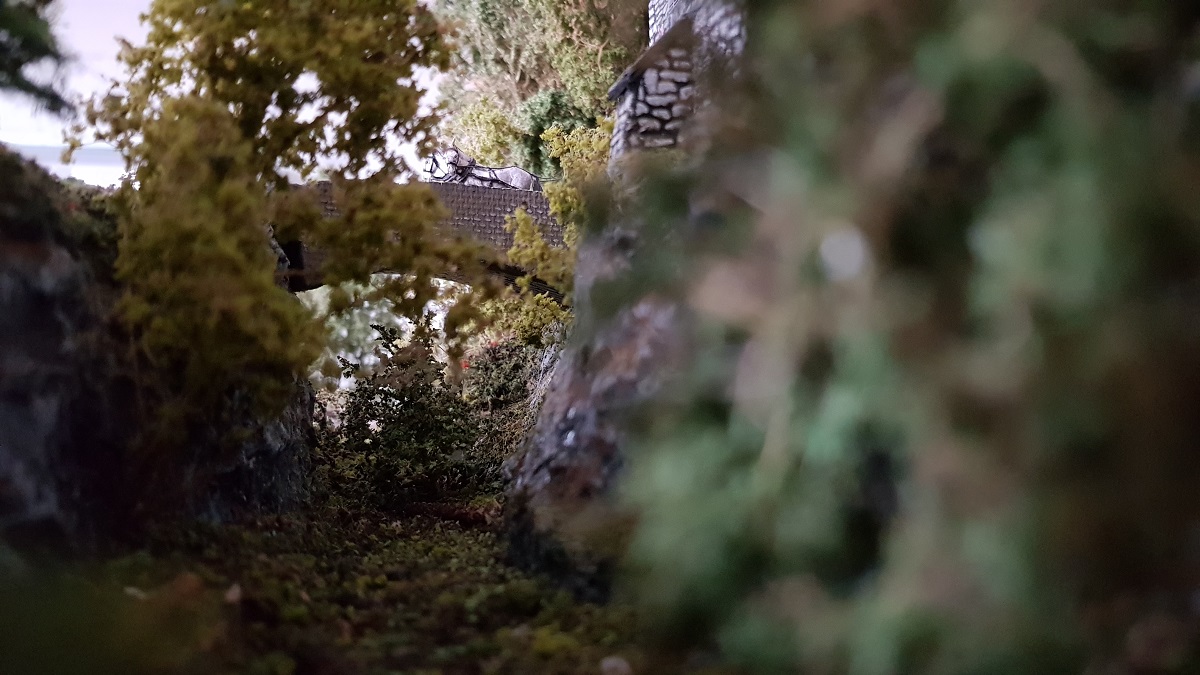
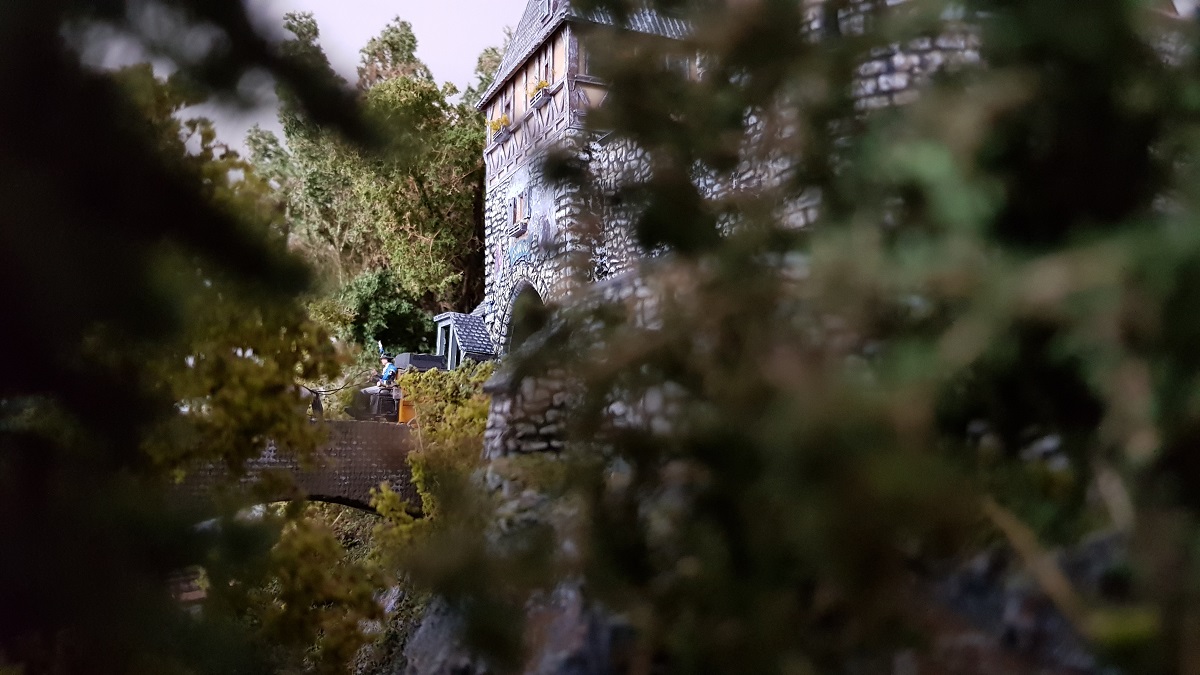
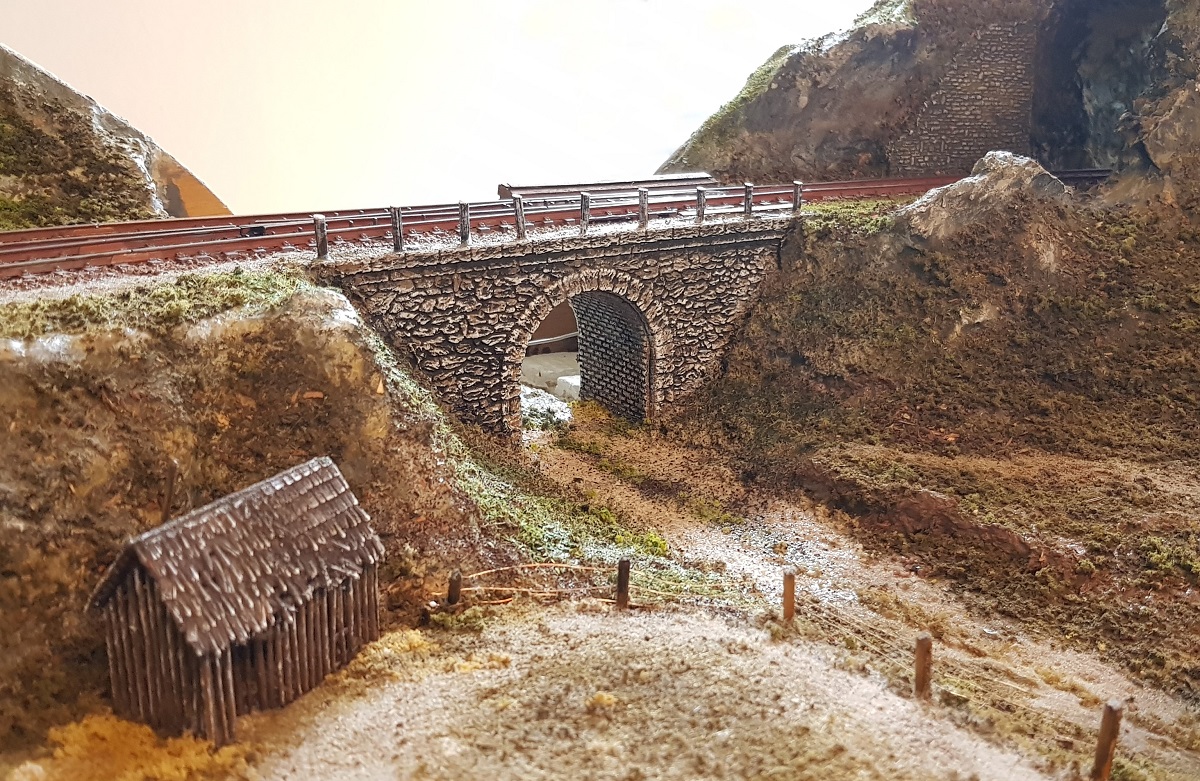
Probably you've noticed the little stone bridge across the gorge, leading from the plains into Cochem Town:
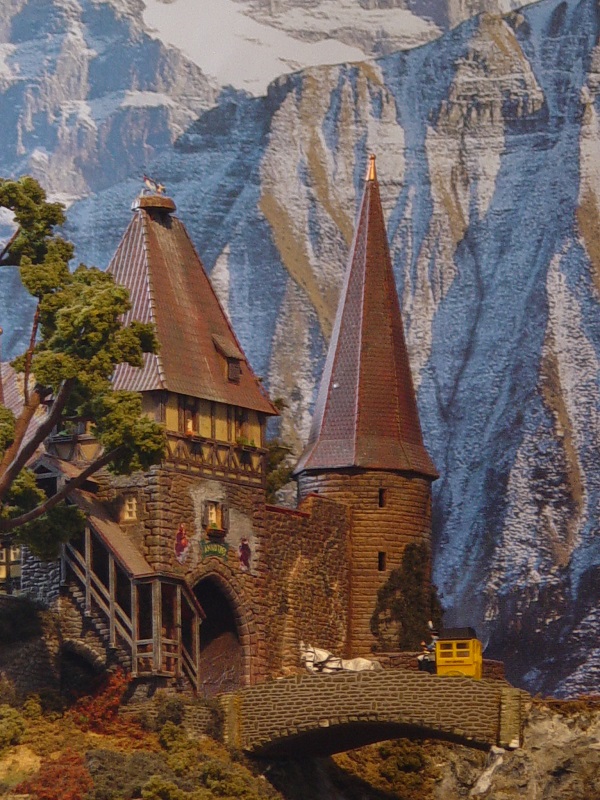
7.3.2003
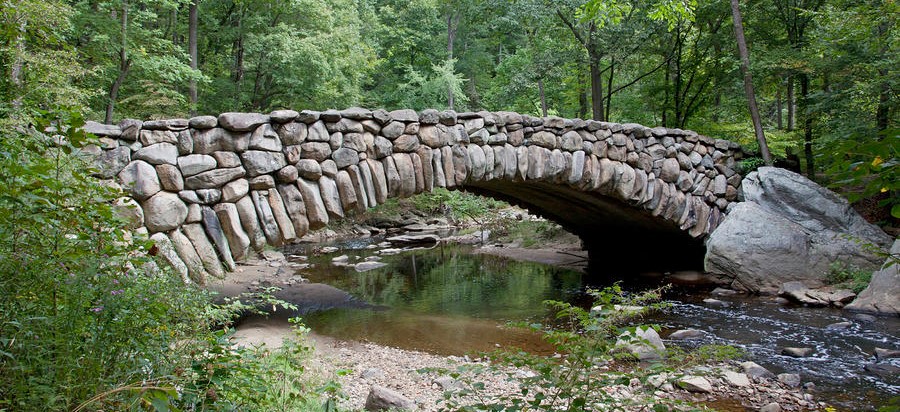
I am aware that the bending of the arcade is rather slight, and I had to make a curve for reasons.
In the world there are bridges having a similar slight bending.
Since I am redoing all the masonry and brickwork, I thought it a good idea to give this little bridge an upgrading as well.
The same procedure is applied.
I know: "Heard of... Droogstoppel, makelaer in koffij, Lauriergracht 37..."
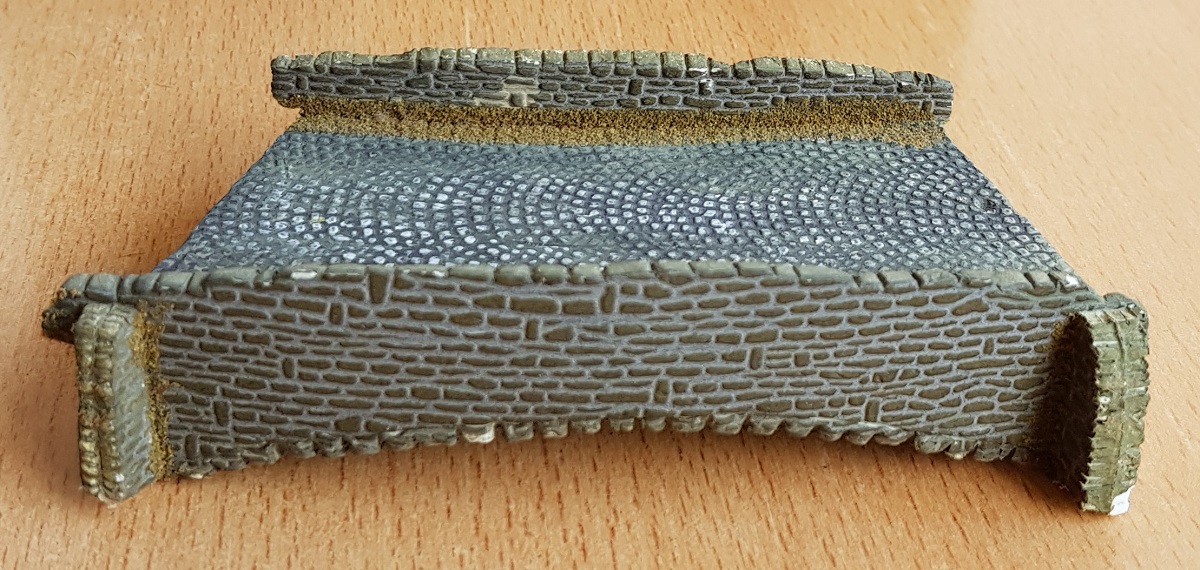
To start with...
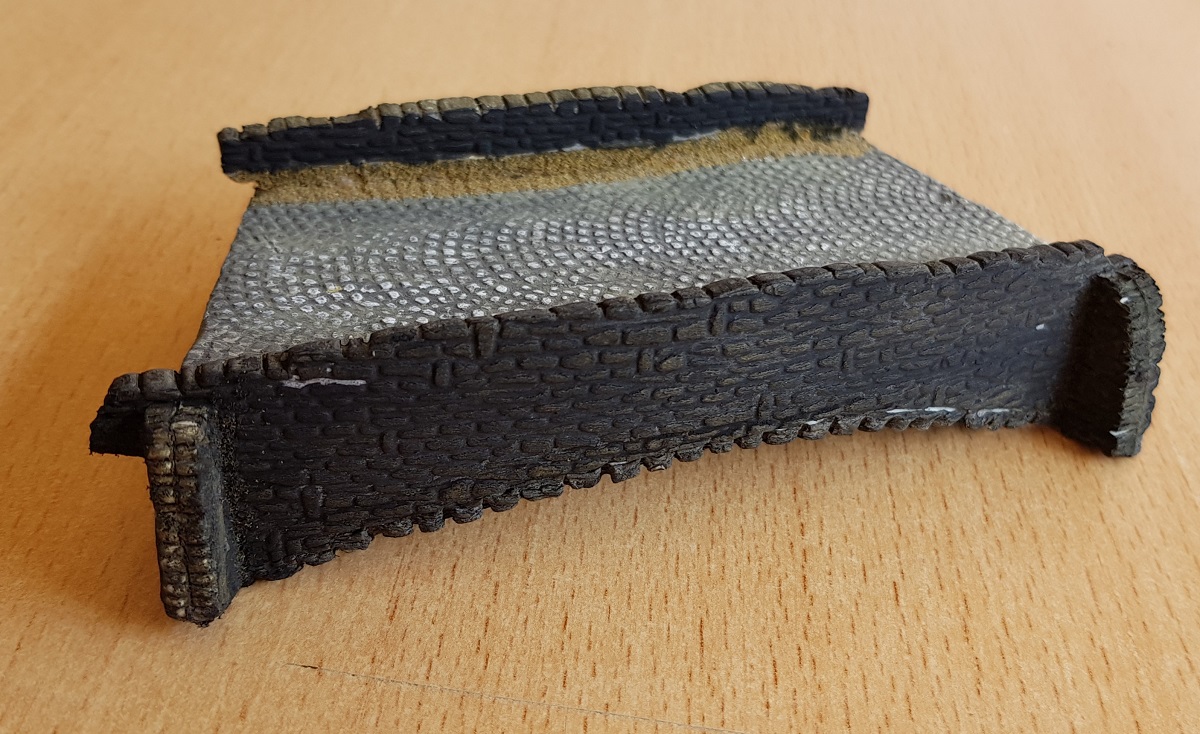
...adding mat black
...and yellow
... and a white dry brush
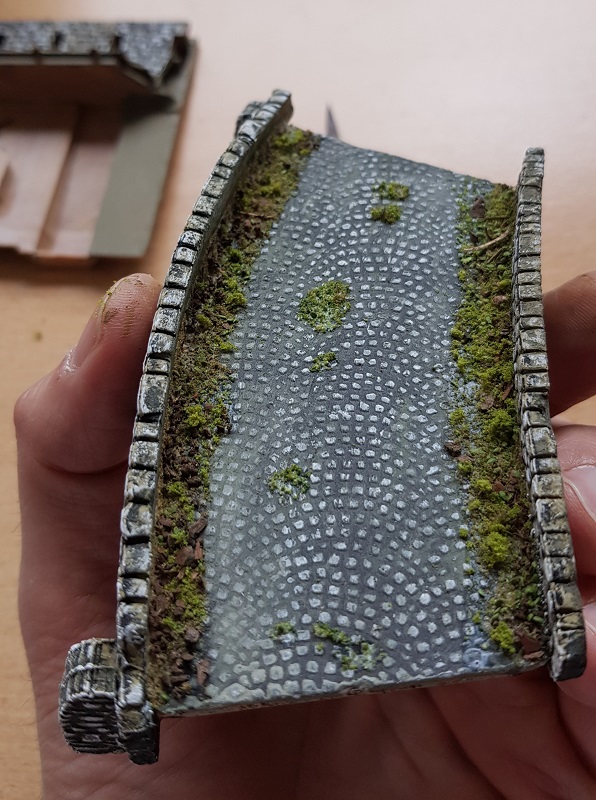
... and why not some fresh vegetation to it?

A new miniature!
~~~
1.4 ~ A n o t h e r w a l l i n t h e b a c k
Following the same procedure!

~~~
1.5 ~ I n t e r m i s s i o n
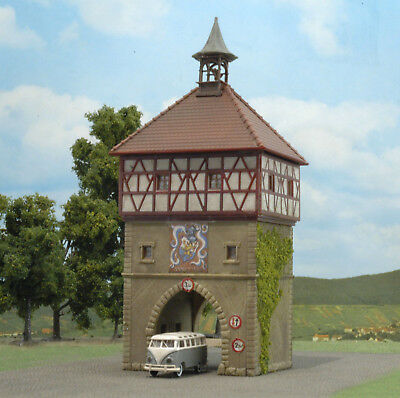
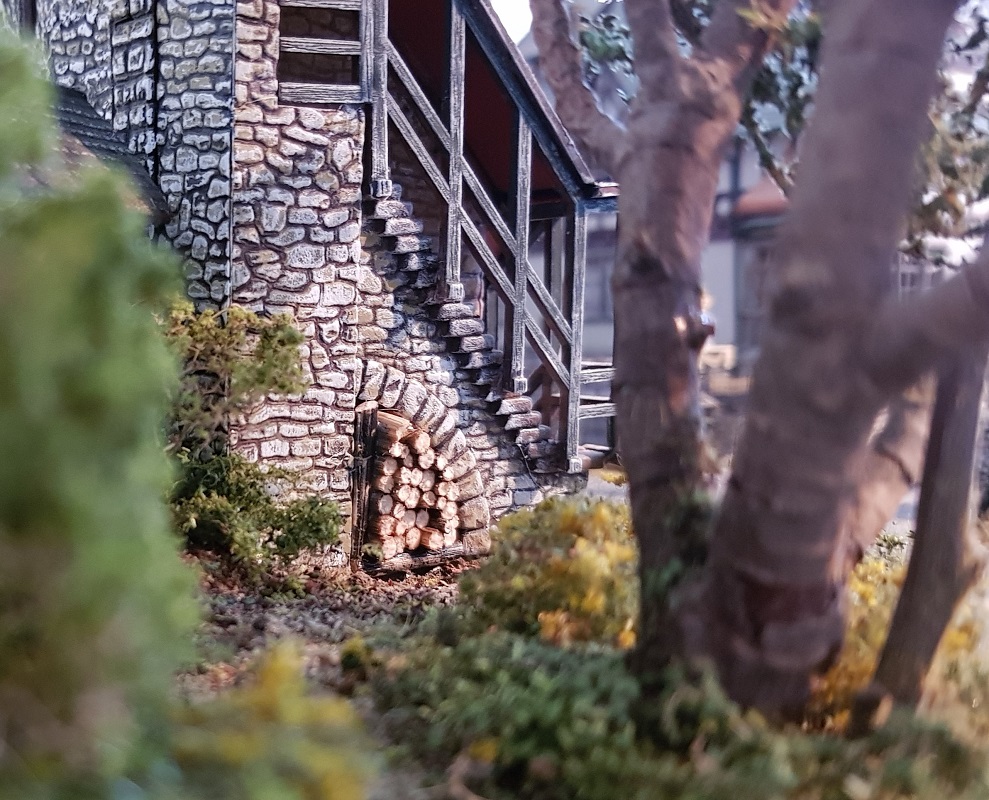
A pile of wood under the Tower
The Kibri tower has room for a semi round pile of wooden branches.
Why not make one for real?
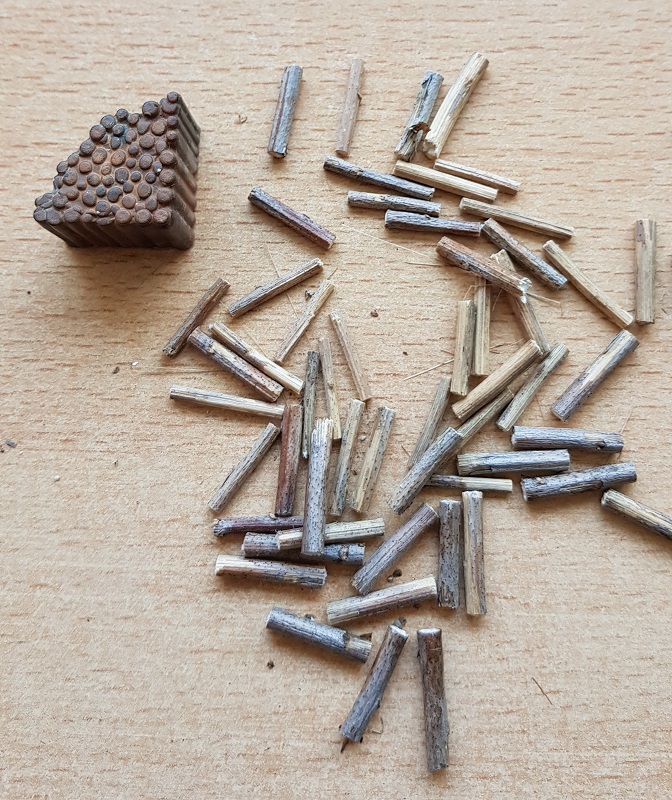
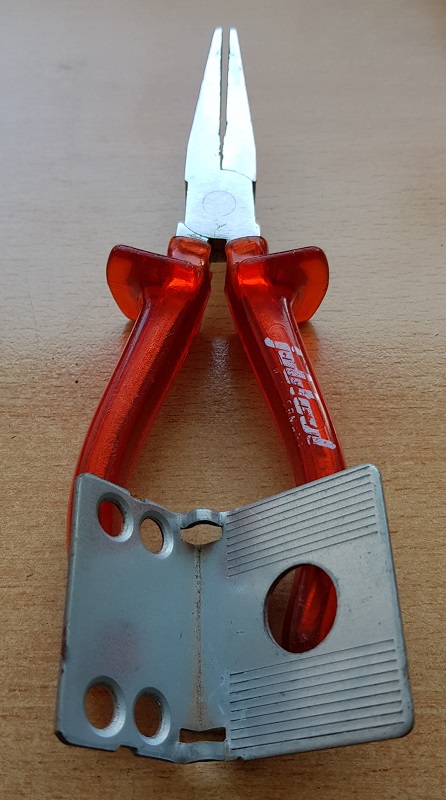
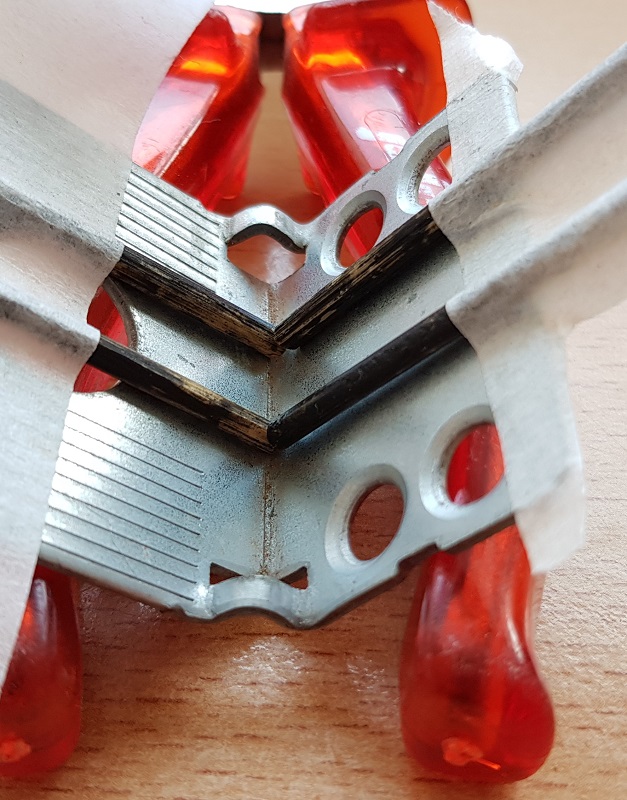
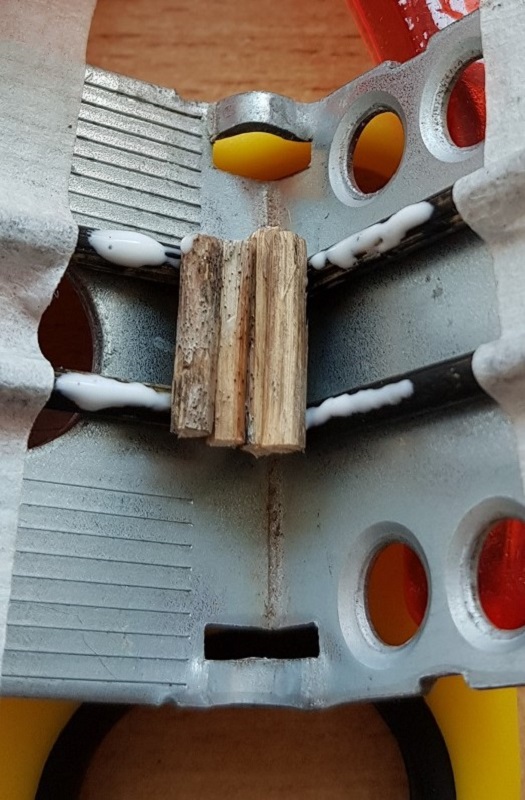
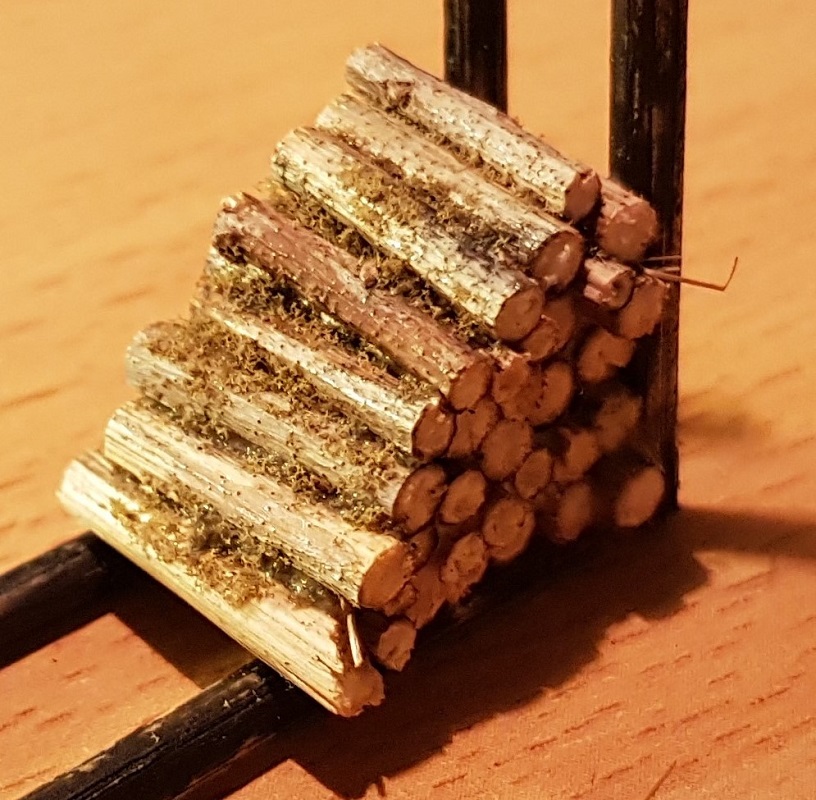
With four skewers and an angle iron it might work! And it did!
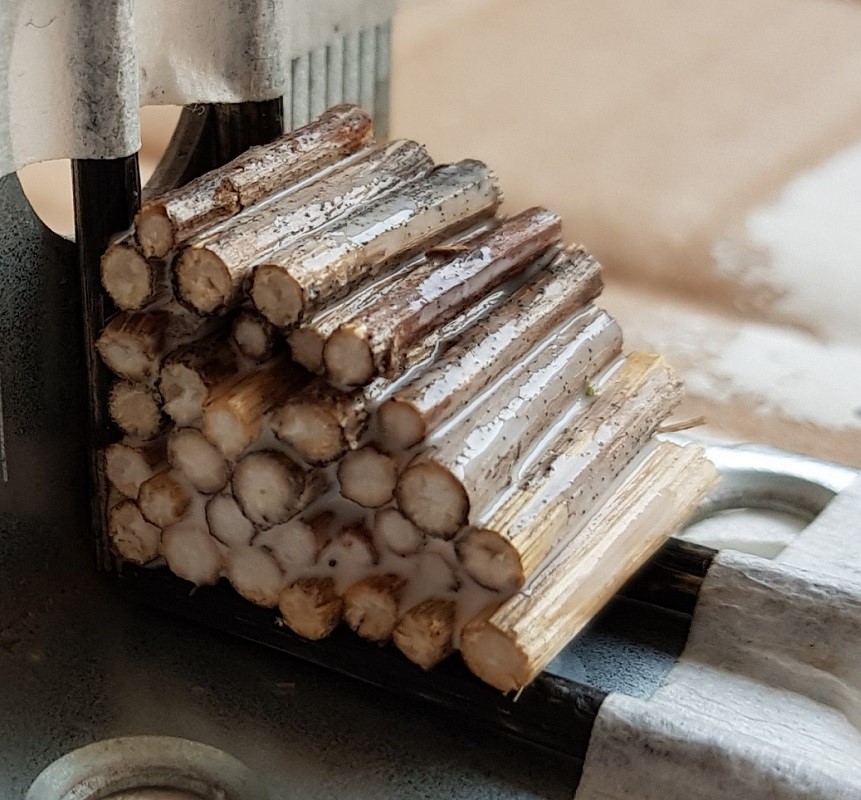
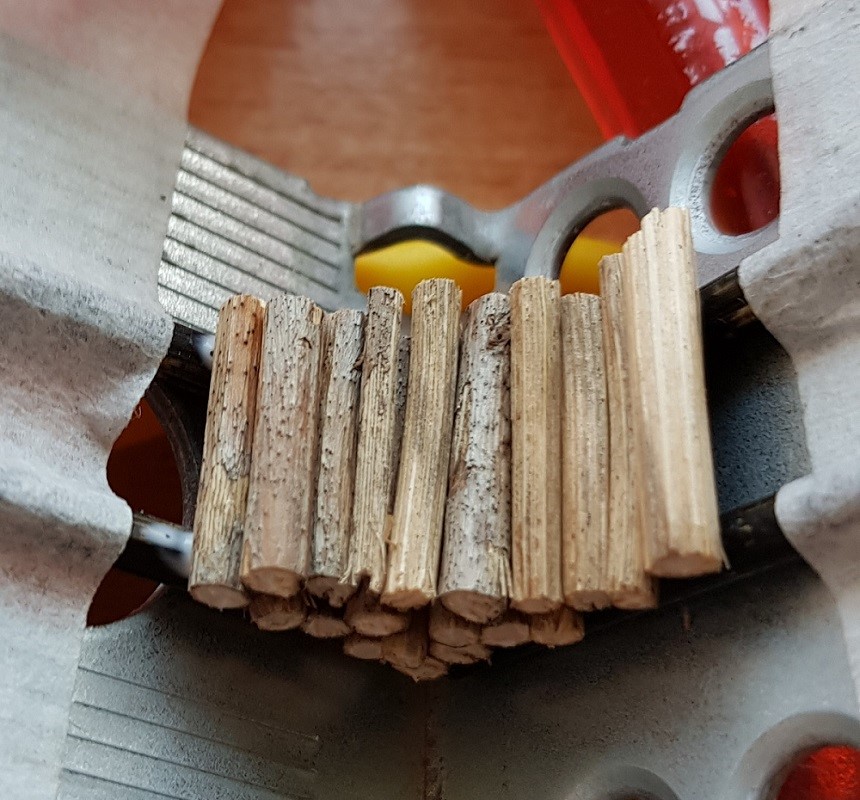
Fixing the beams with white glue...
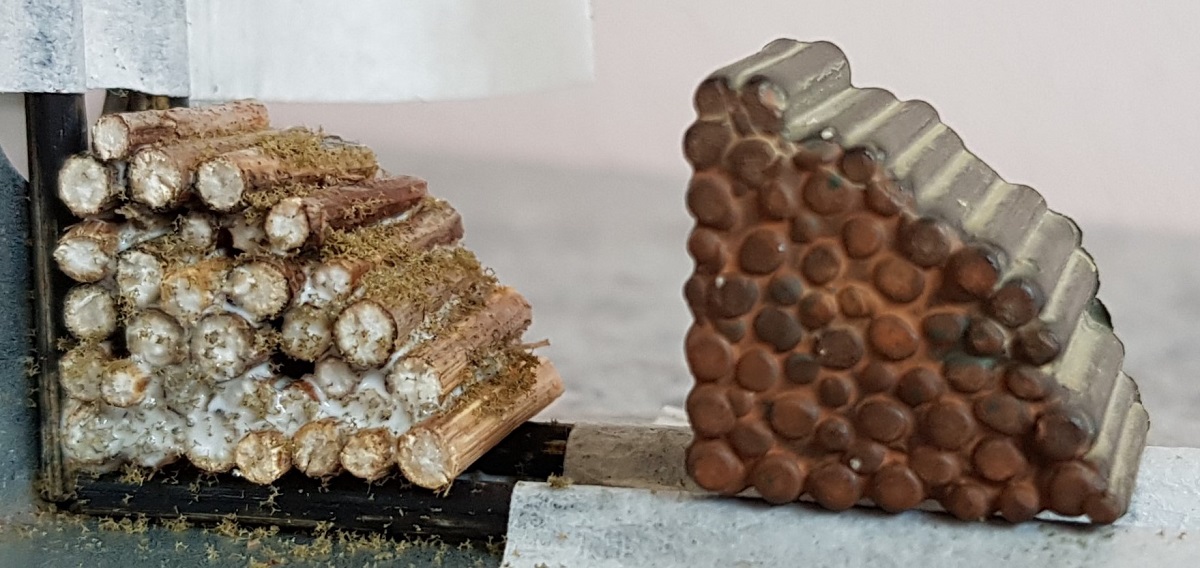
... and some additional vegetation!
~~~
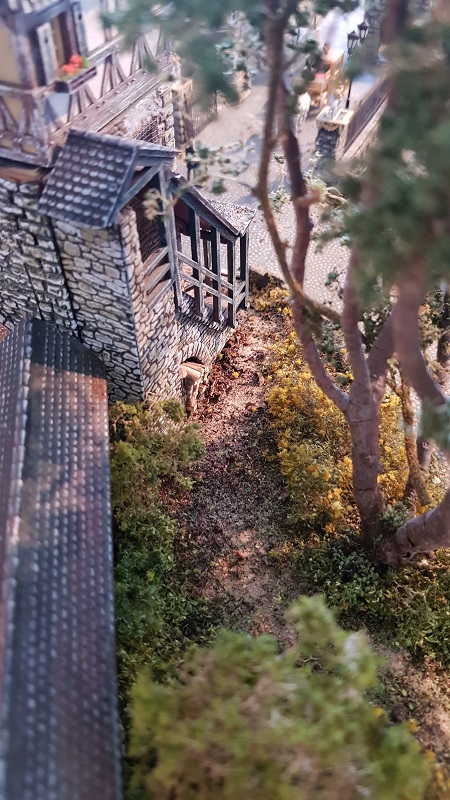
1.6 ~ T h e C o r n e r T o w e r
This is how the city wall looked like in 2002...

From brown to a kind of "Anton Pieck" green...
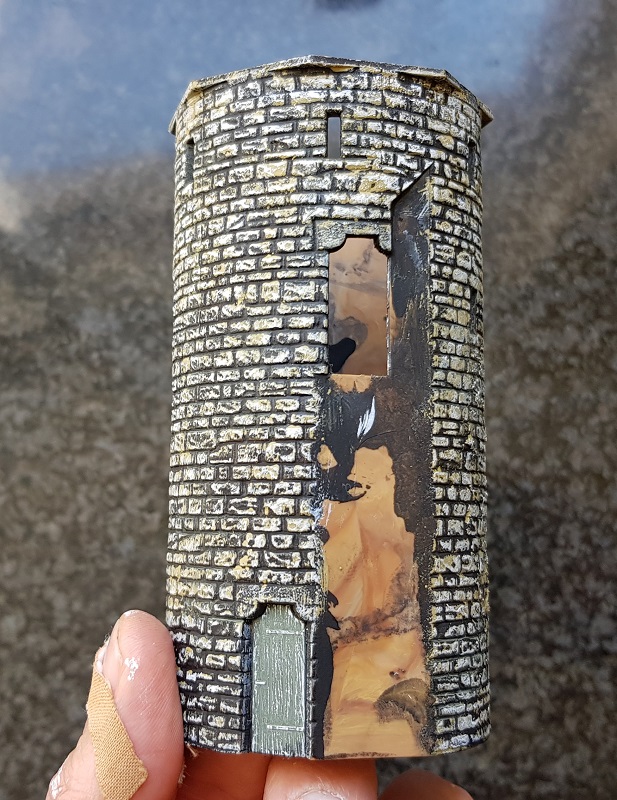
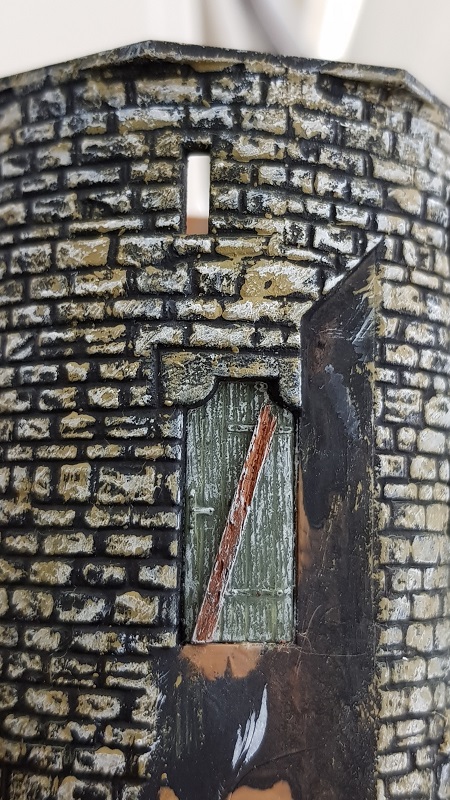
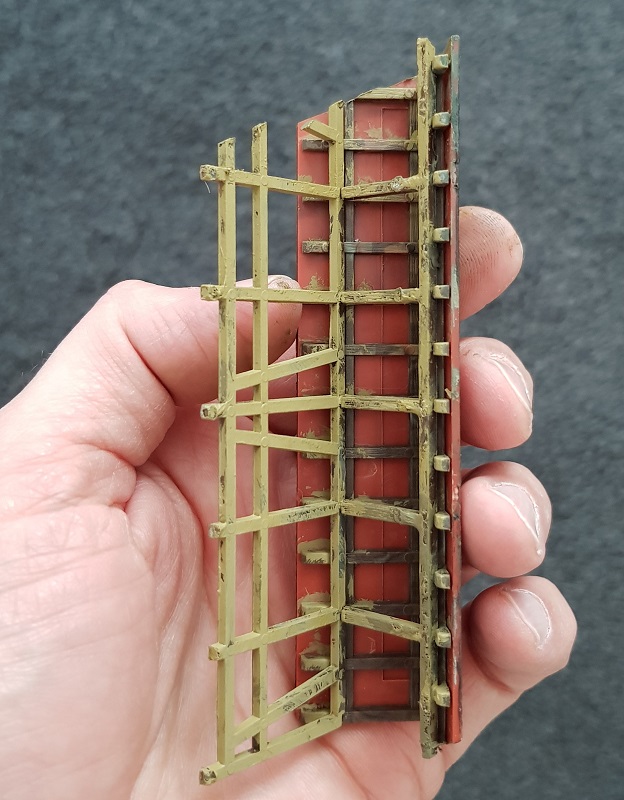
Since the adjacent wall lacks a proper fencing, the upper door is locked with timber...
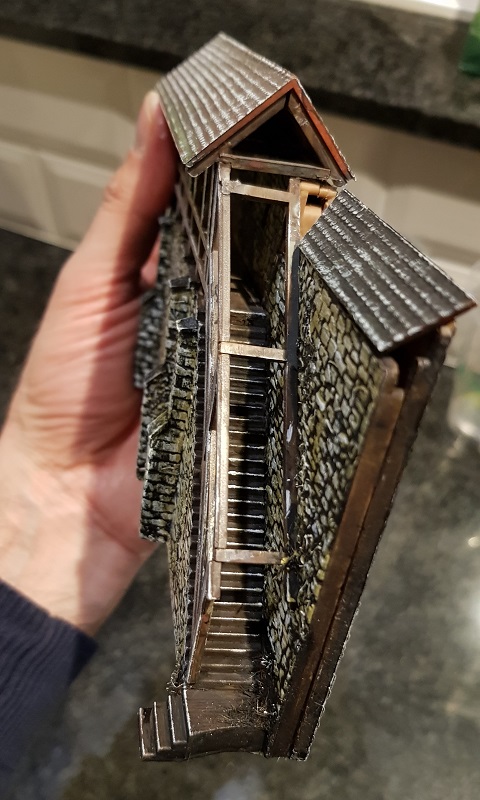
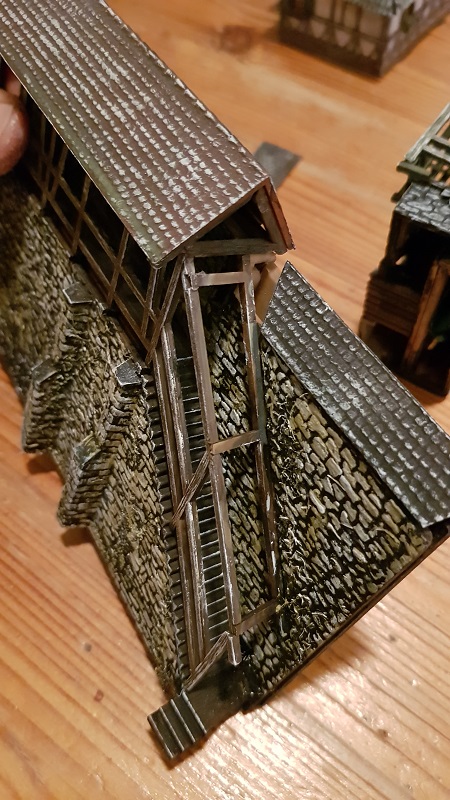
Painting the stairs and inner wall
The first results. Promising!
~~~
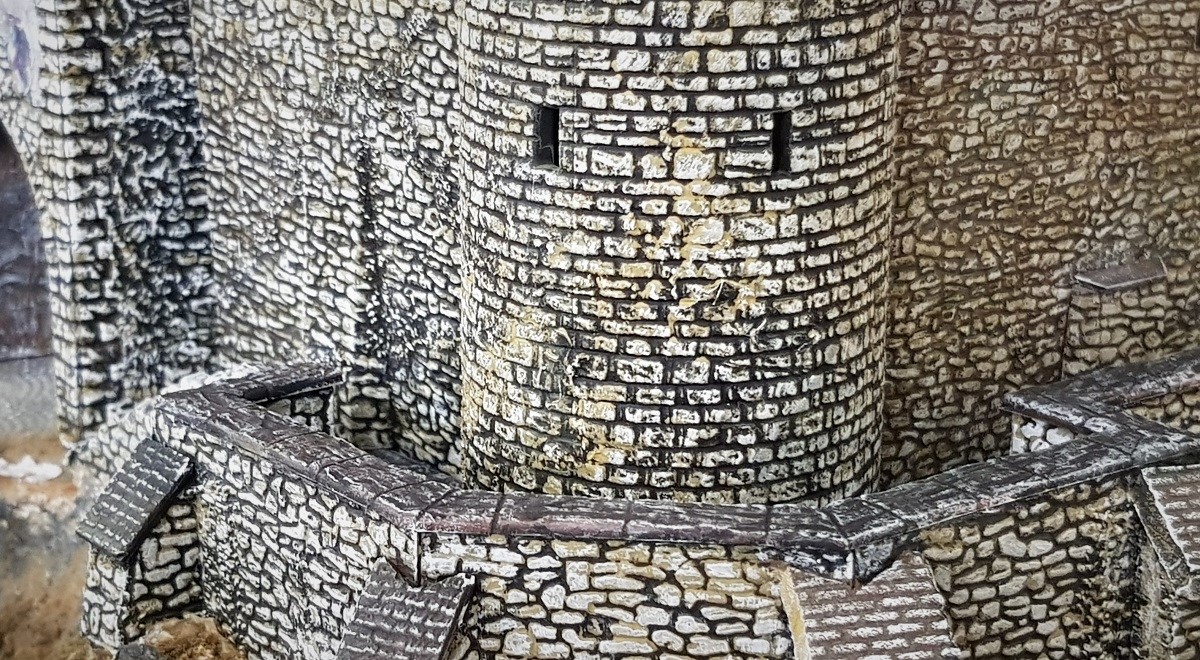
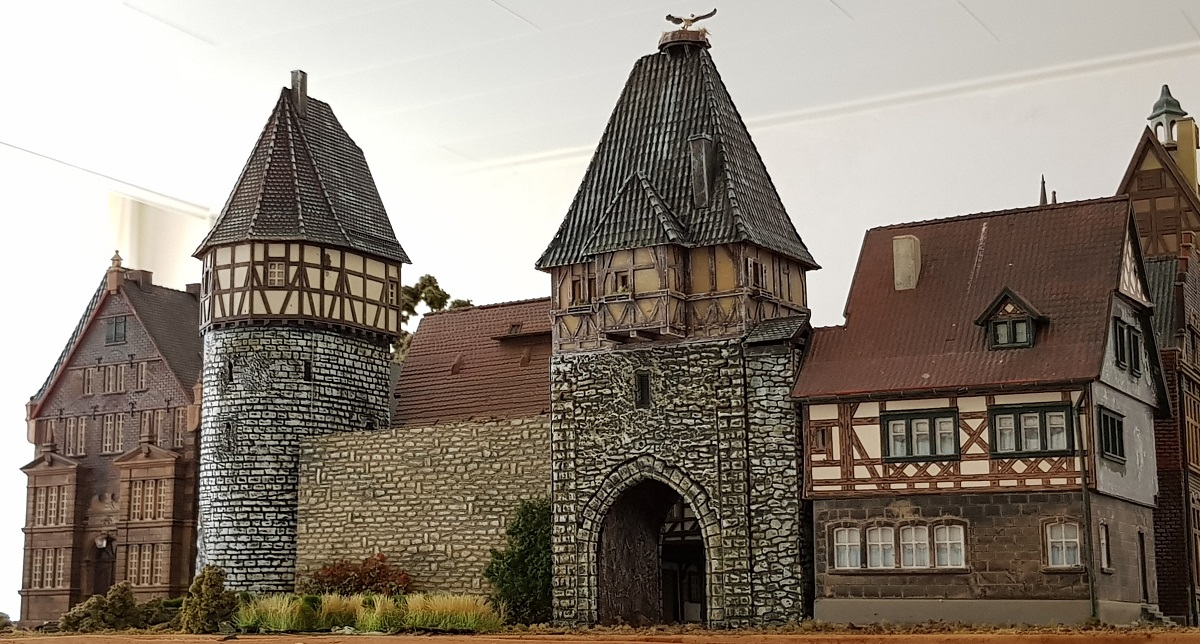
1.7 ~ T h e W a l l a r o u n d t h e C o r n e r T o w e r
Now it's time to pay attention to the balcony-like wall which surrounds the corner tower.
This part was never touched by any pencil.
Until now...
(April 11 - 12th)

I had to make new corner stones out of profiled Styrofoam, since I used the original parts at the Cochemer Burg
Black, yellow, white... well, ya know, the same procedure all over again.
Now, all remnant pieces were taken care of in less than two days.
Yea, I know. That hurts the eye...!
~~~
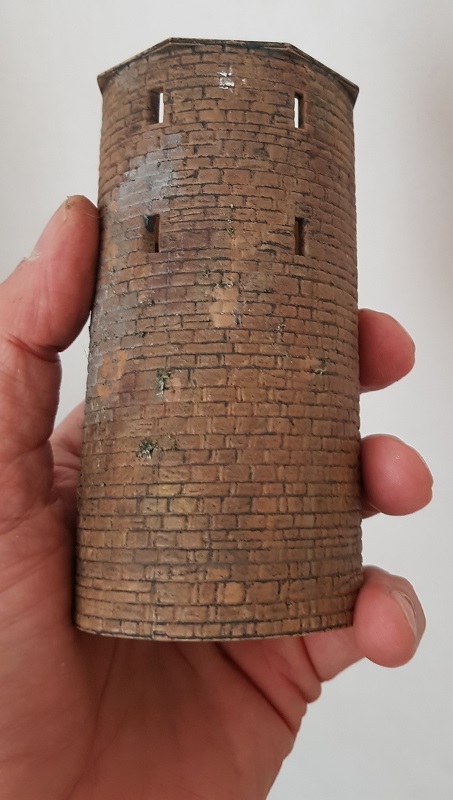
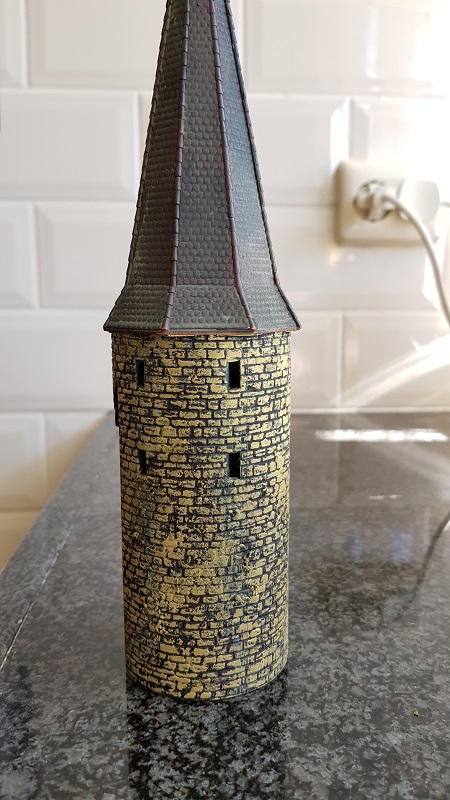
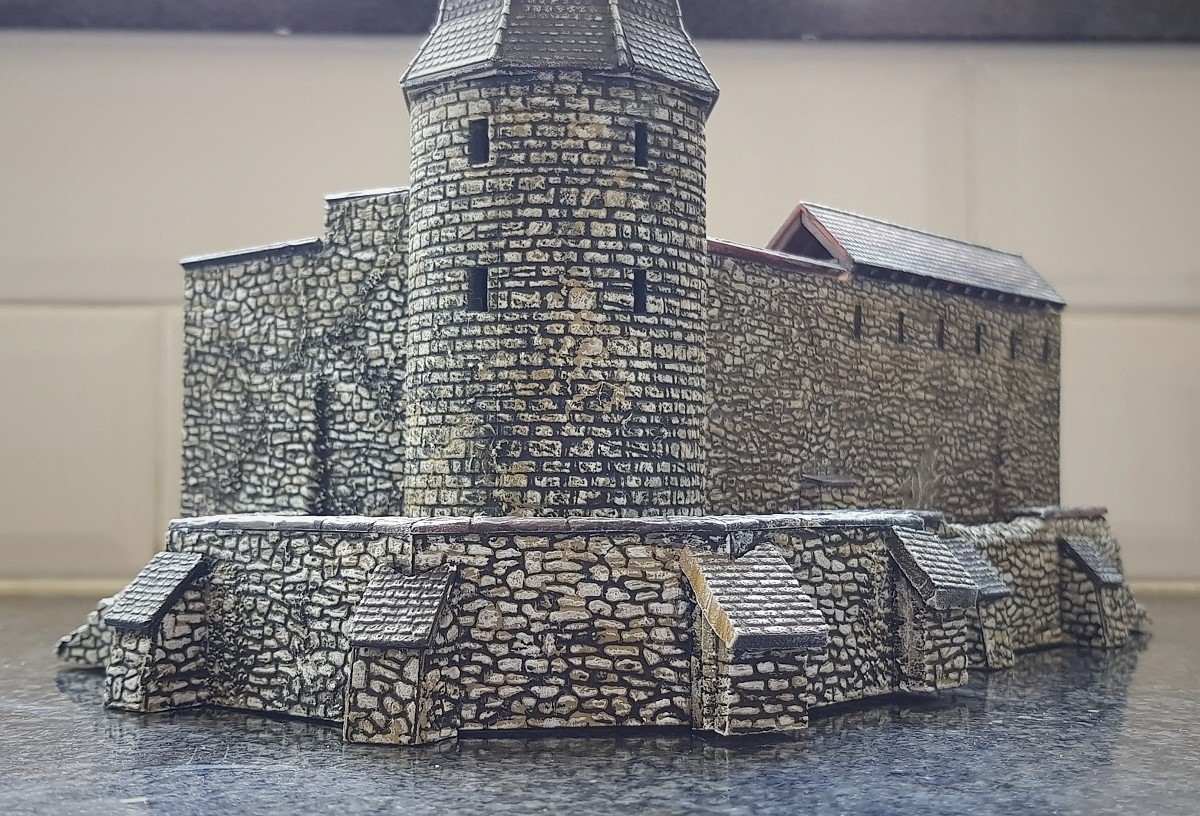
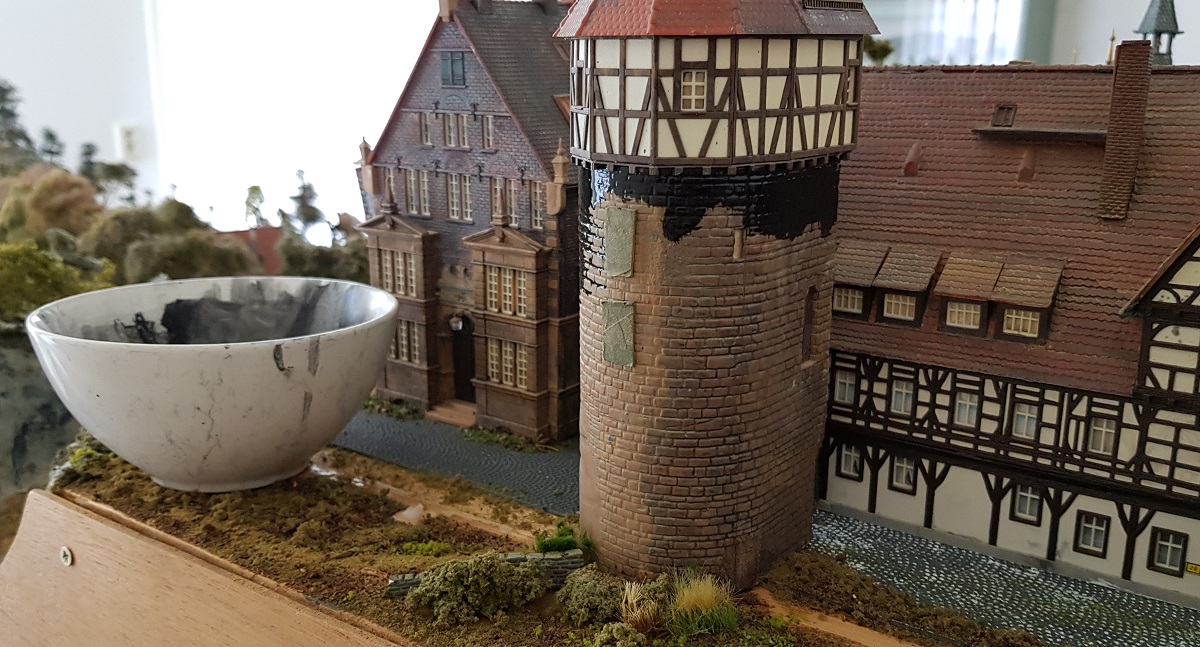
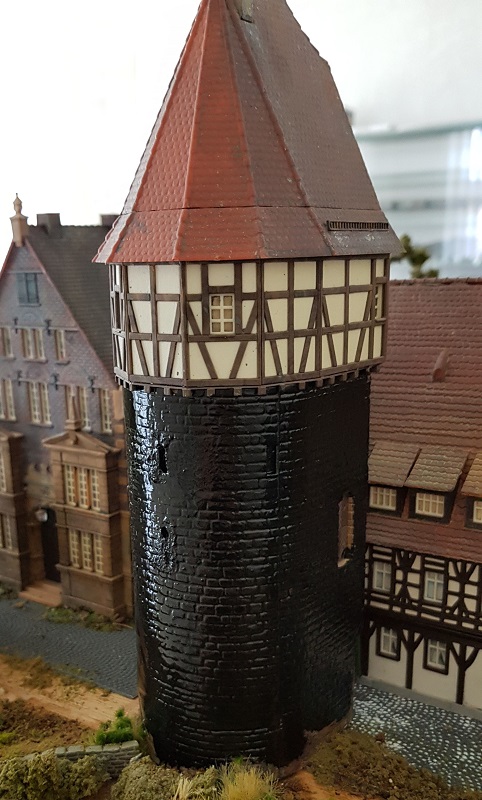
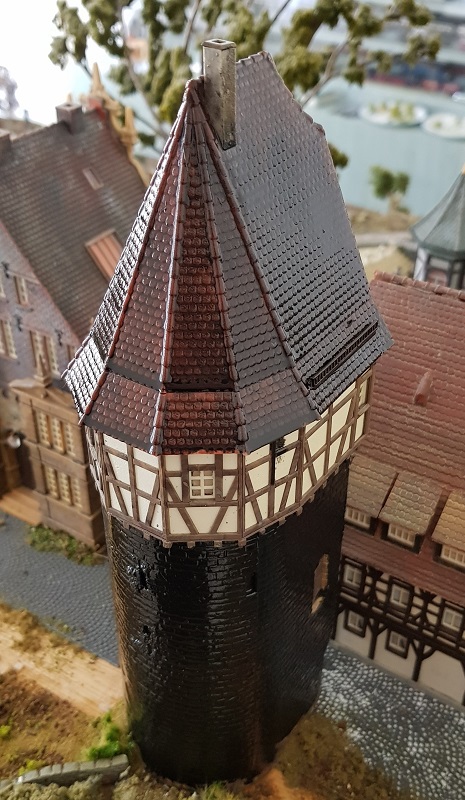
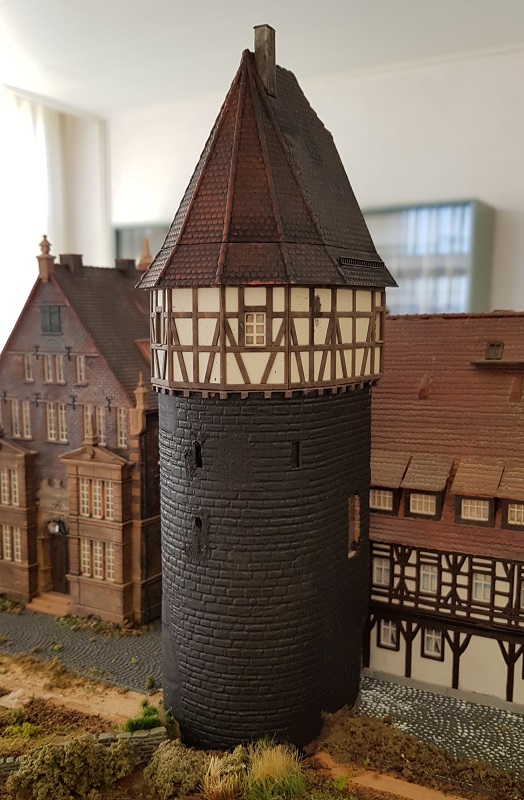
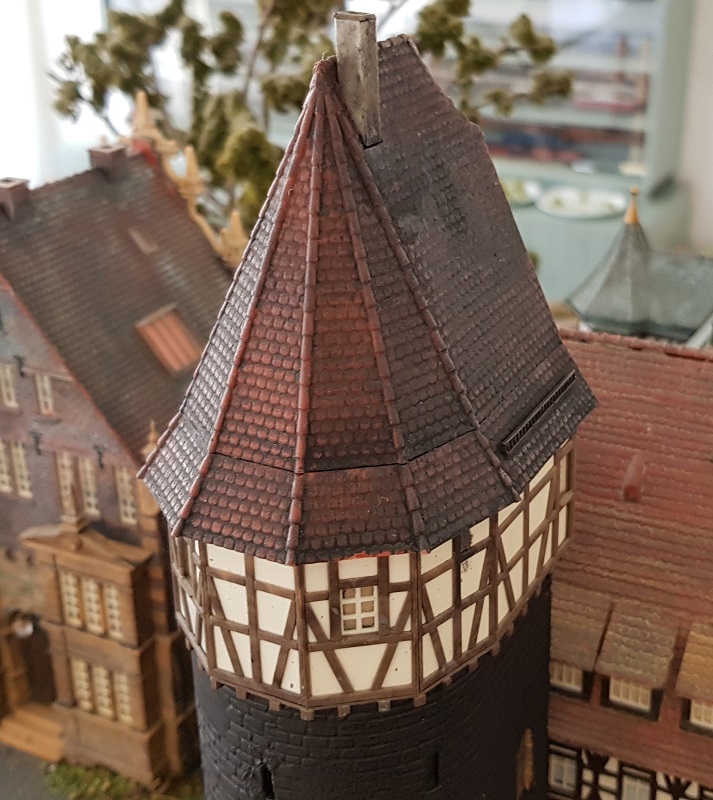
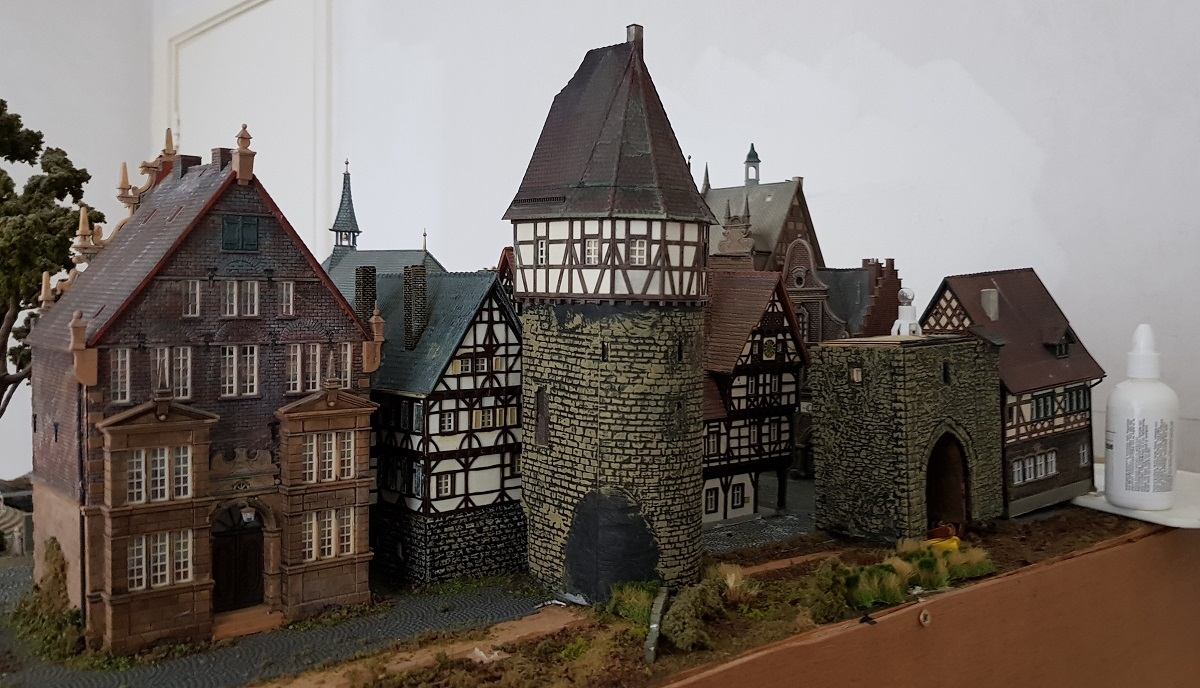
1.8 ~ T h e M i d d l e T o w e r
(April 11 - 12th)
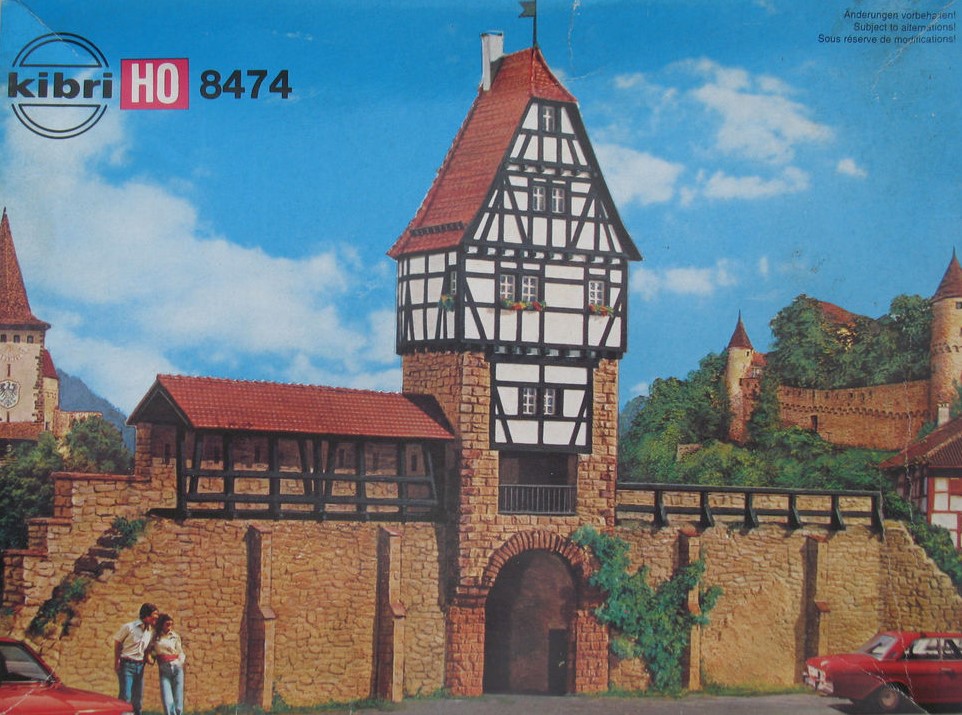
In the collection of the Kibri Ancient City Wall, this 'Wehrturm' (Kibri 8474) fits quite fine!
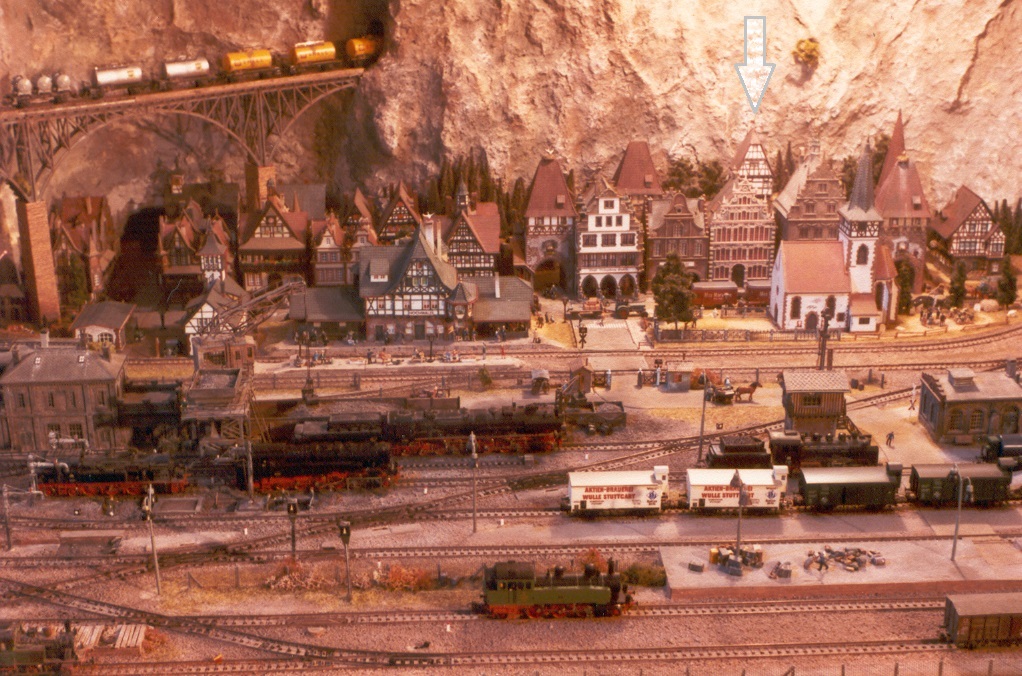
I purchased it somewhere in the late 1970's and it stood in the back of my town, on my dad's layout.
~~~
1.9 ~ M i d d l e H i l l
(April 16-17, 2019)
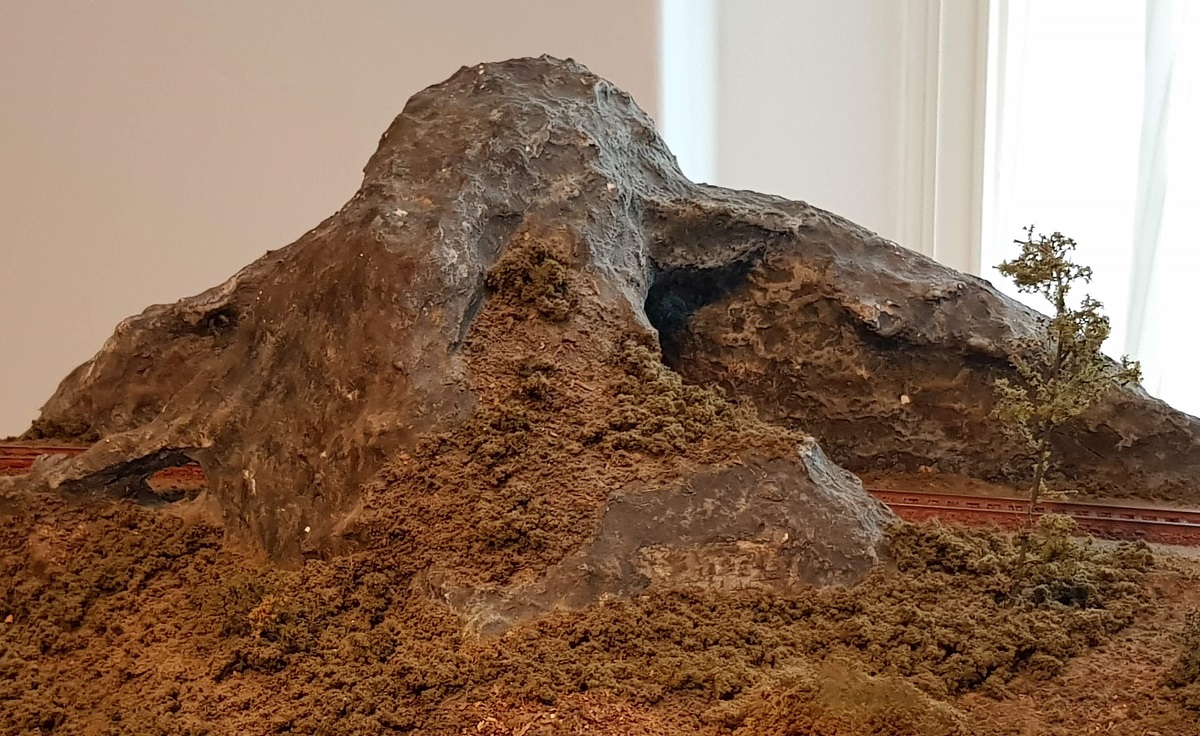
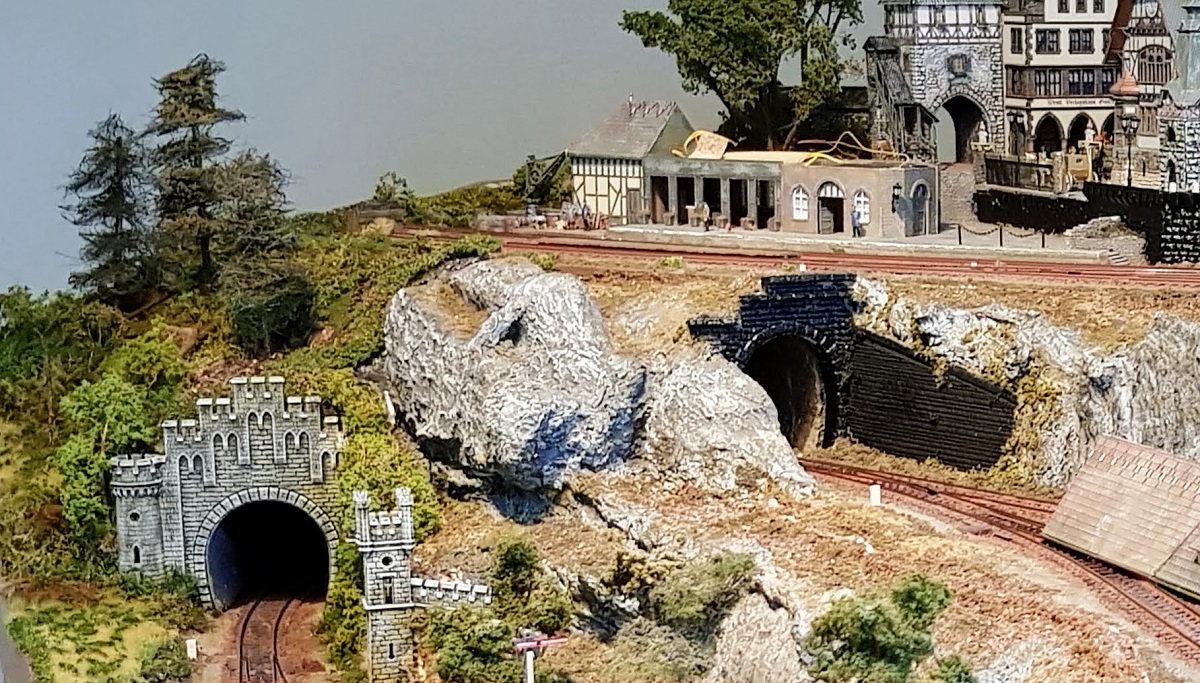
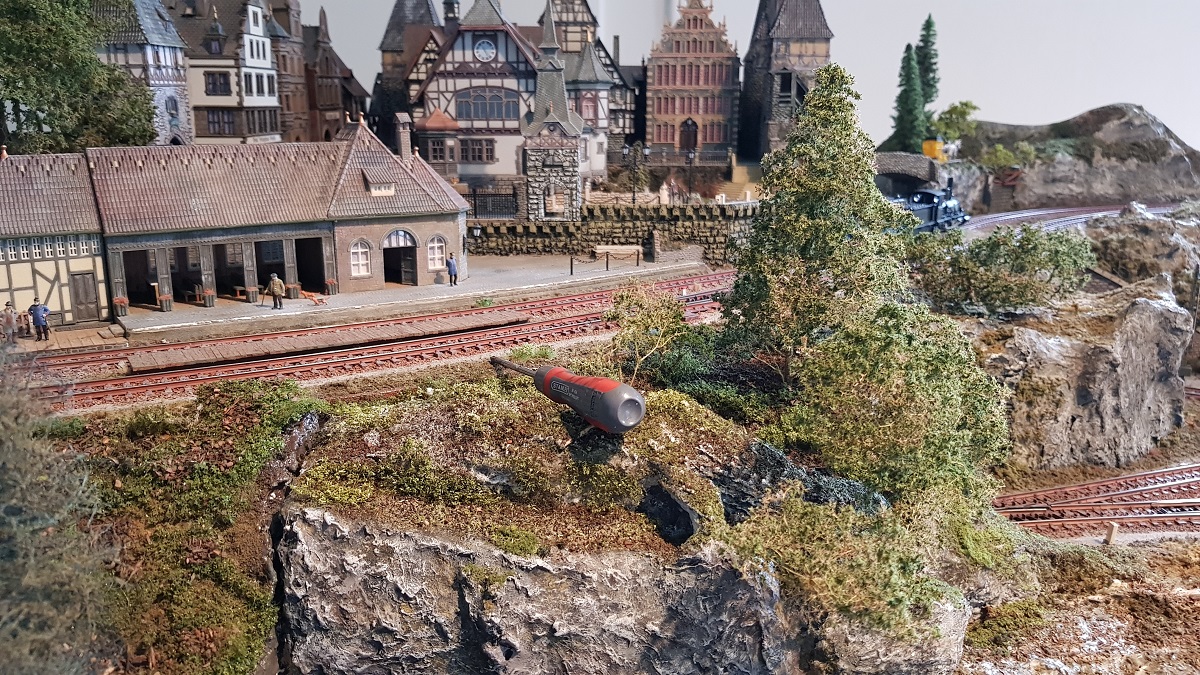
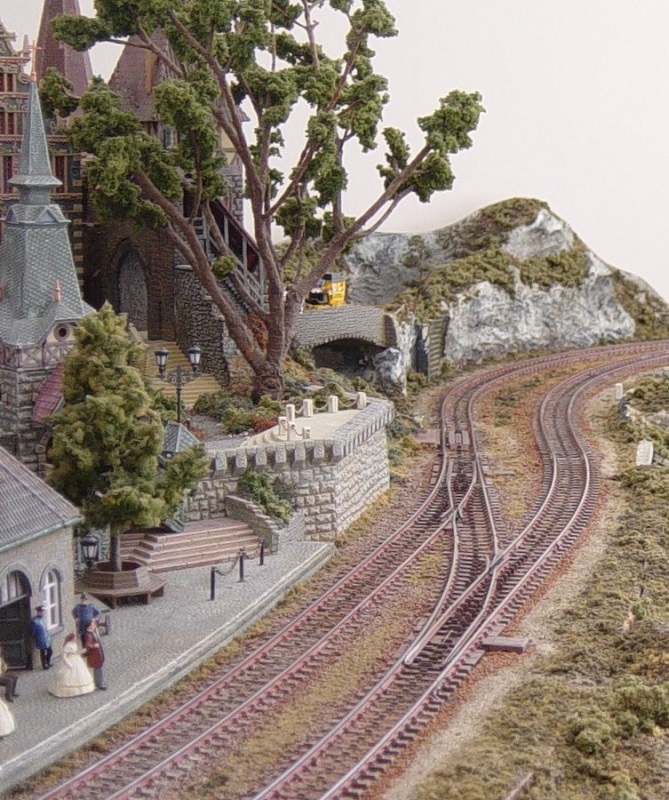
As you probably remember, there is a small hill between Cochem Town and the tunnel leading to the track downhill.
For over a decade it has been rocky and grey, desolate like Smaug.
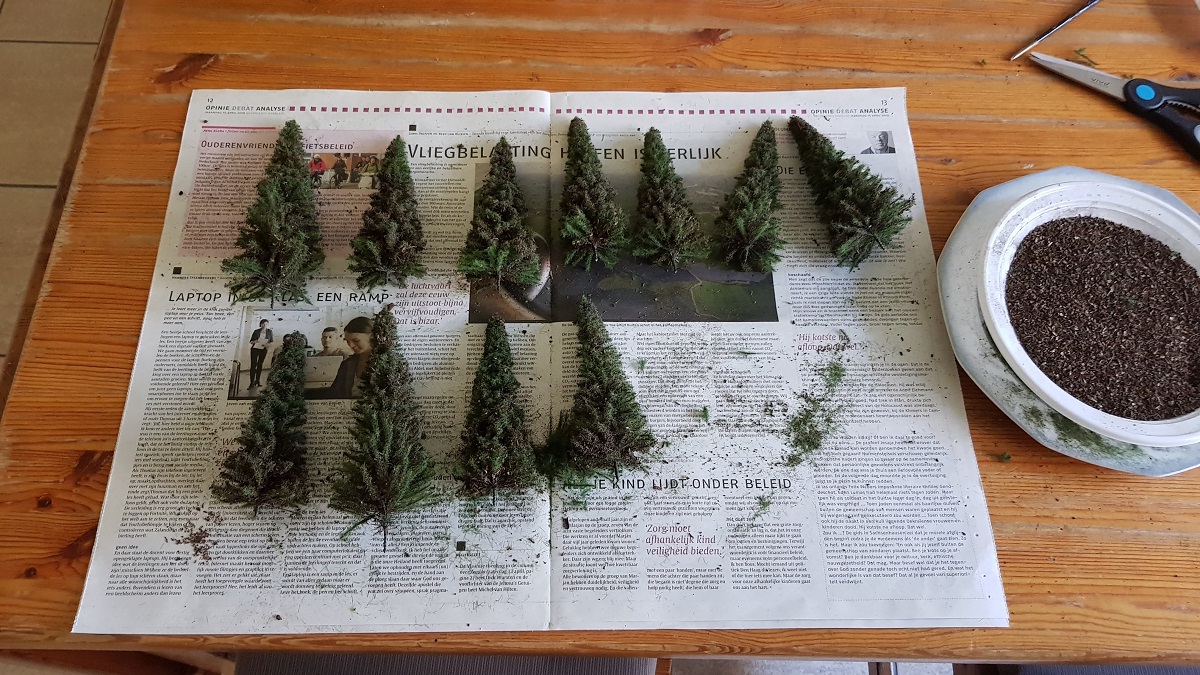
Since I purchased this Noch box of 18 Fir Trees (Noch 24530), I finally did what I always had in mind:
some three or four Fir Trees on top of this pretty dull and isolated rocky formation.
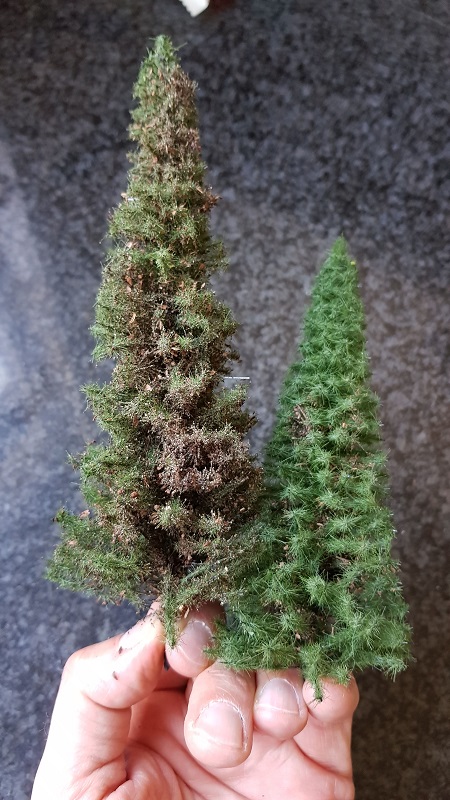
Although they are pretty good 'out of the box', I think that they need a hand or two...
I was too careful with the right one! Come on, play a little rough!
First of all, I had to remove the vegetation that has been affected by this irretrievable layer of dust...
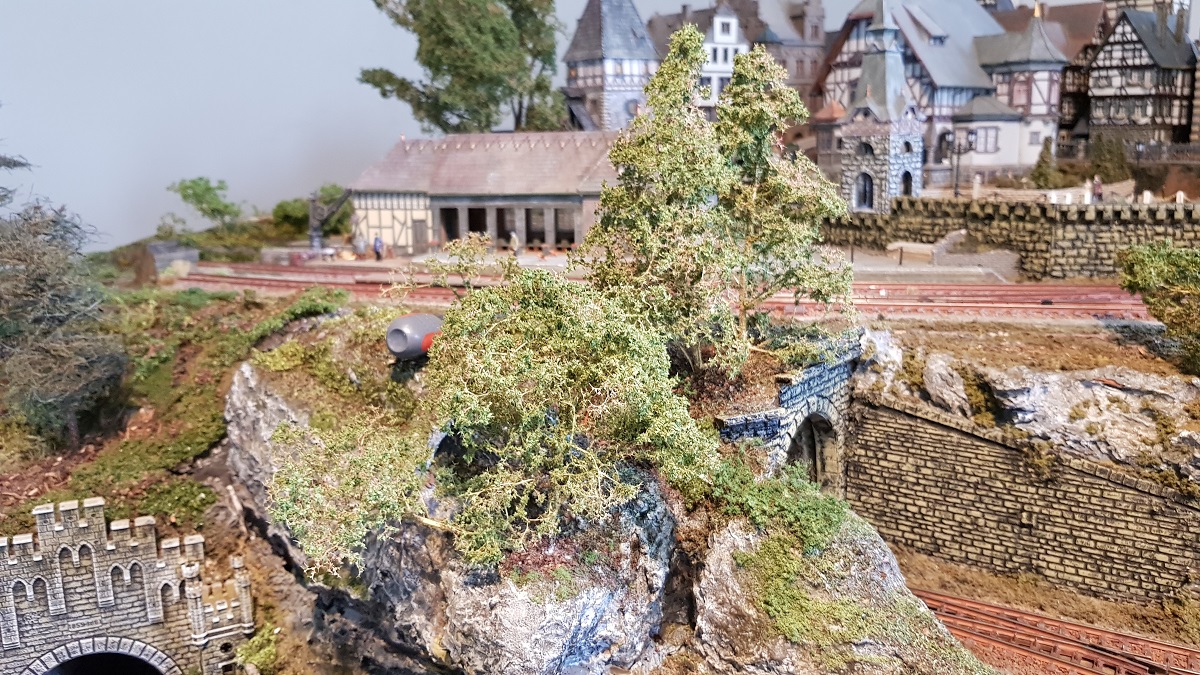
I thought that the trackside could use some new vegetation as well, as if the train is running through a forestall environment.
Here we go. A layer of green and brown vegetation to begin with, for covering most of the rock.

Since it was late at night, these shots were taken with artificial light...
One tree standing, another will join in a minute.
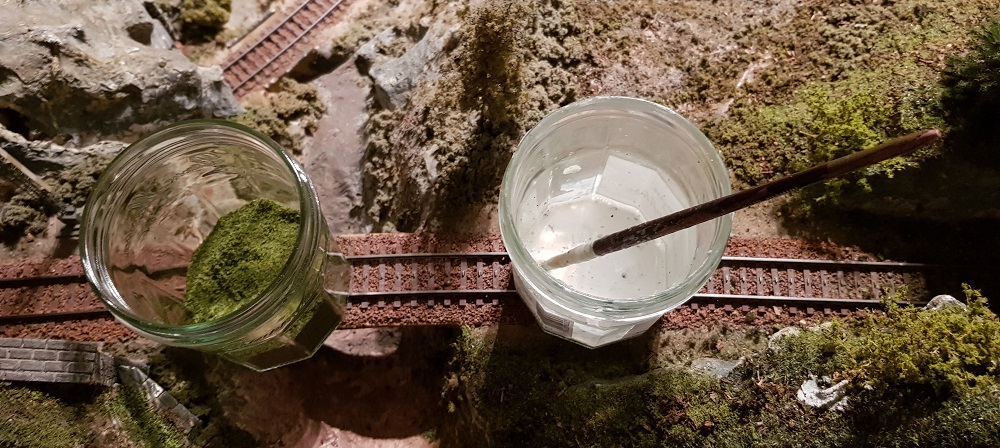
Before heading for my bunk, I wanted the finish the track side with forestall vegetation, so it might dry overnight.
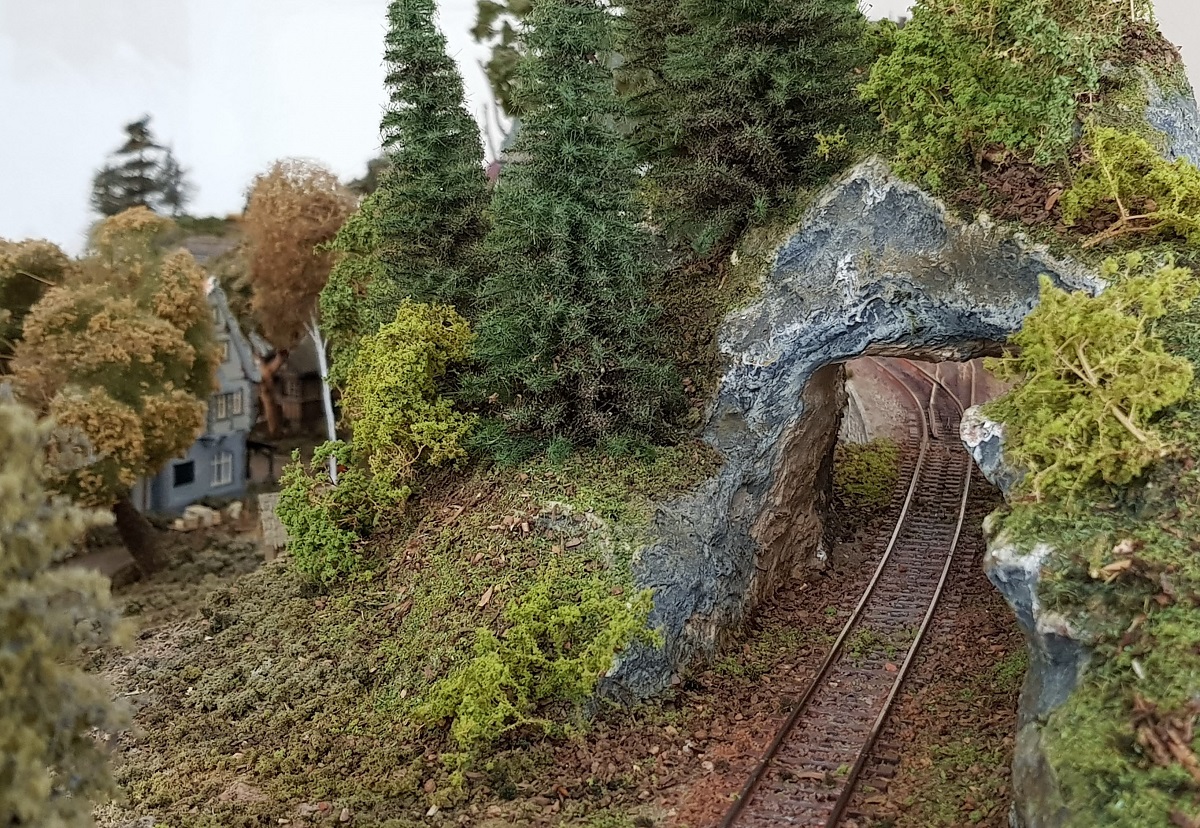
The next morning...
...in bright sun light:
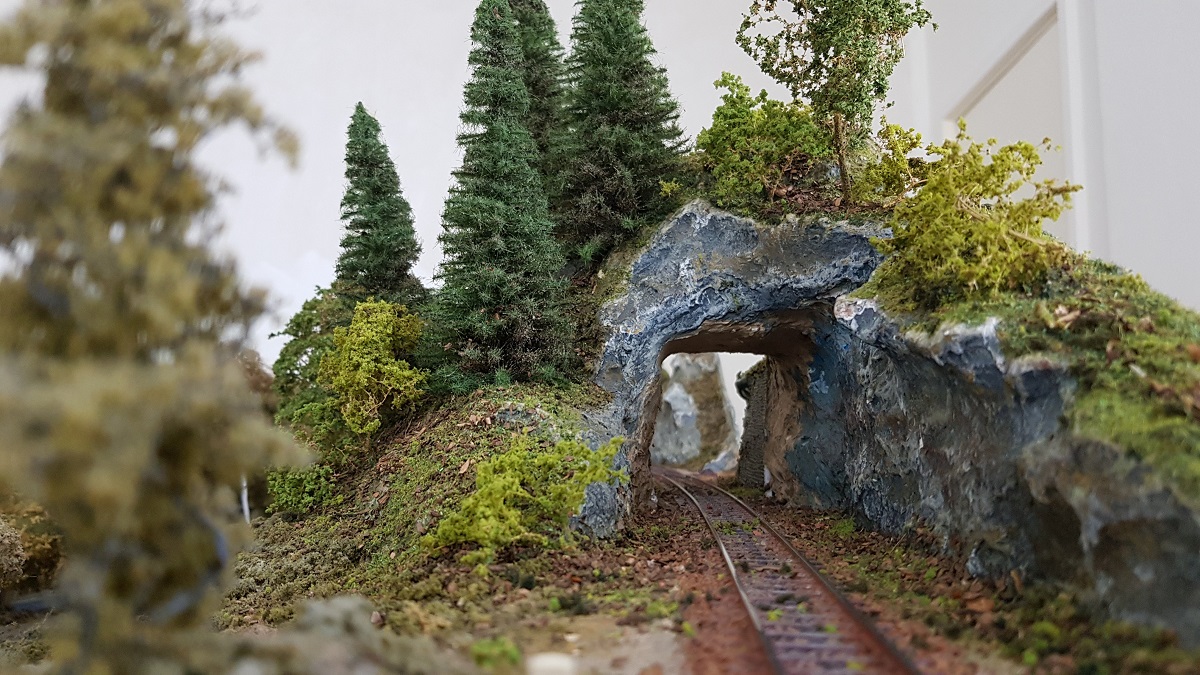
I love it...!
~~~
1.10 ~ I n t e r m i s s i o n
(April 18th, 2019)
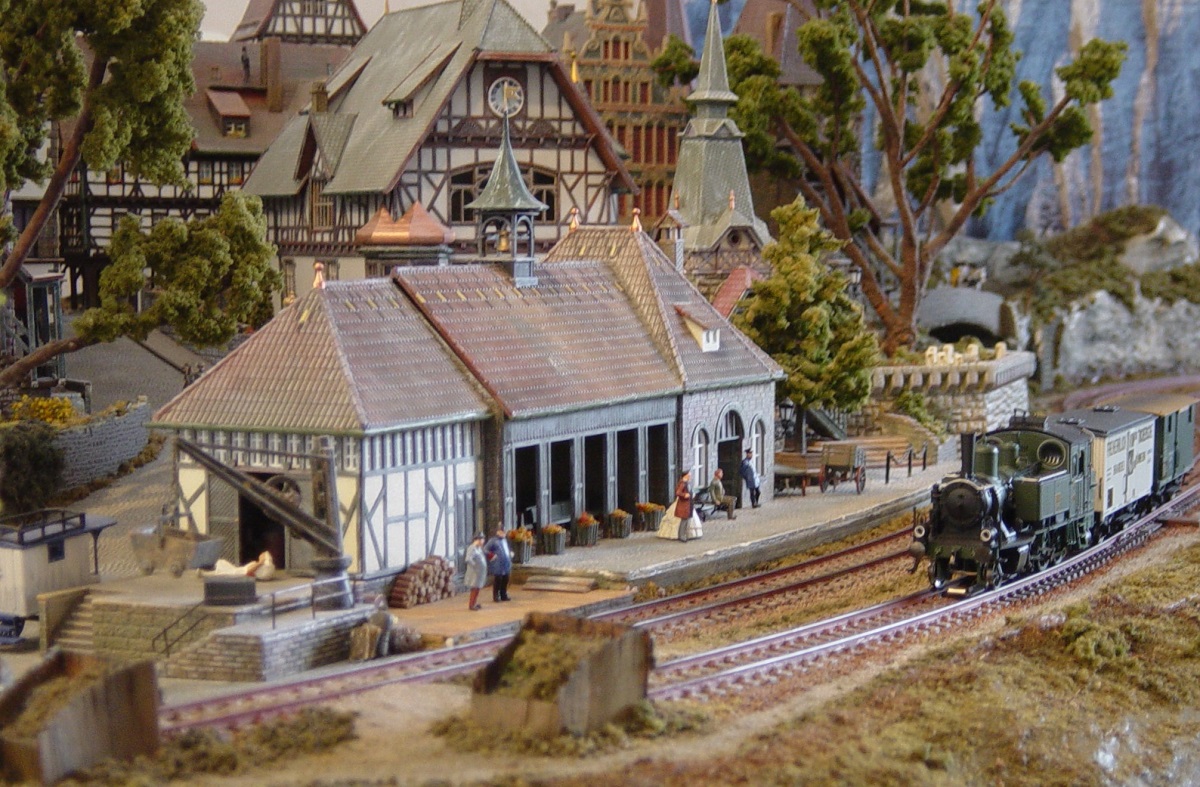
When I constructed the Endbahnhof (Faller), I added a Bell Tower on the roof.
If I recall correct it comes from a Pola kit (Stadtturm)
Pola 130
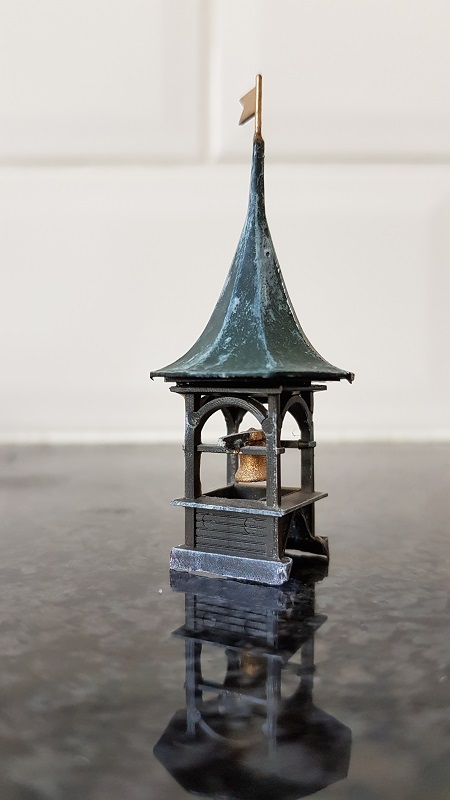
The thought just occurred to me: Why not paint it white?
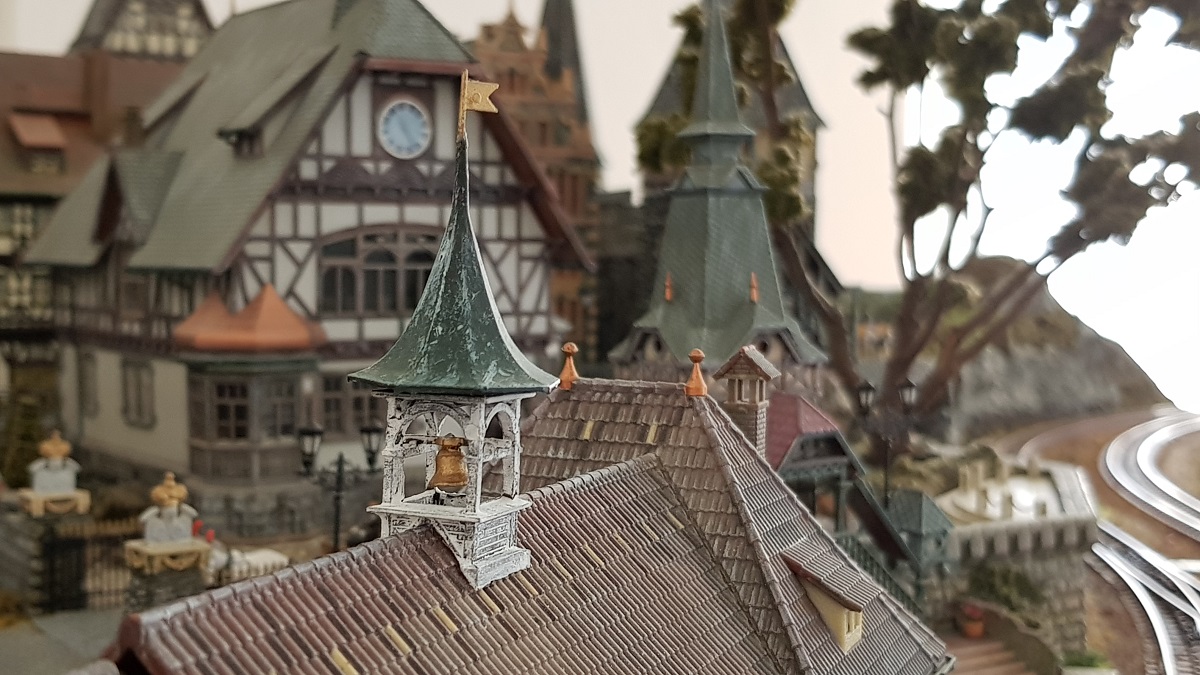
Mmmm... nahhhh! The bottom part needs some altering indeed...
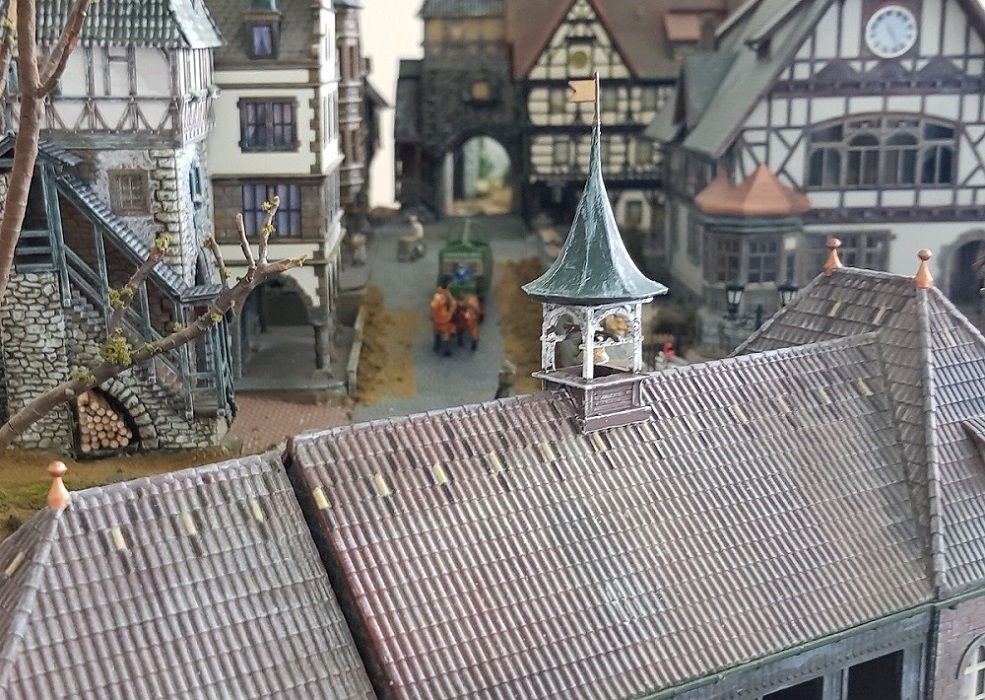
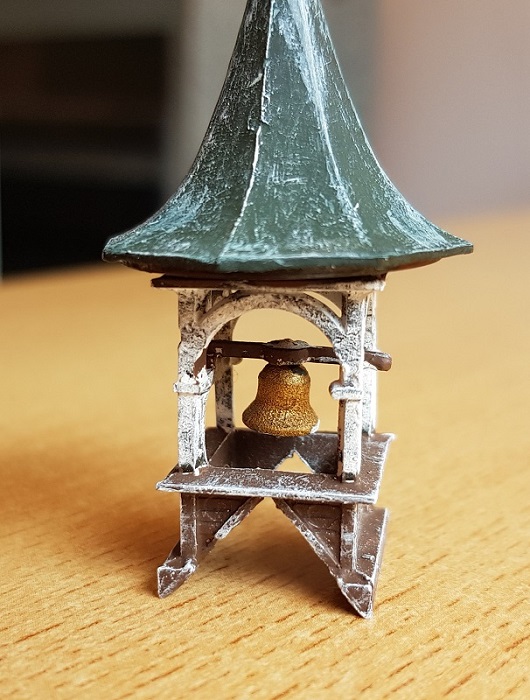
Now that's more like it! June 7th 2019
~~~
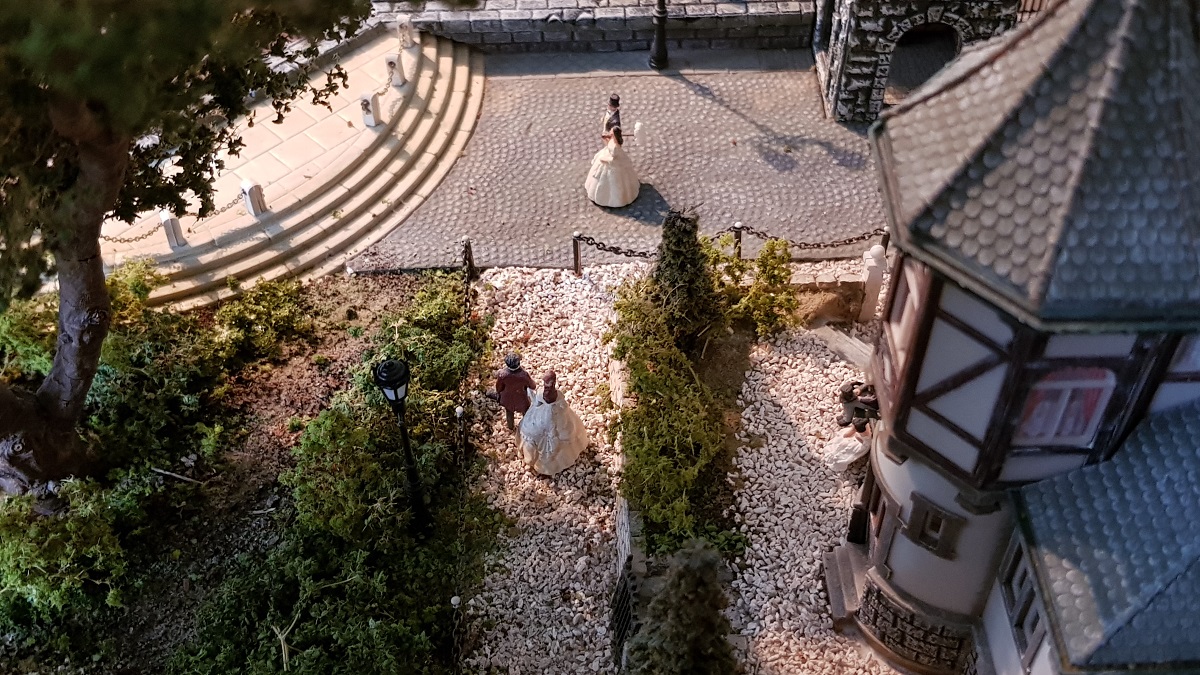
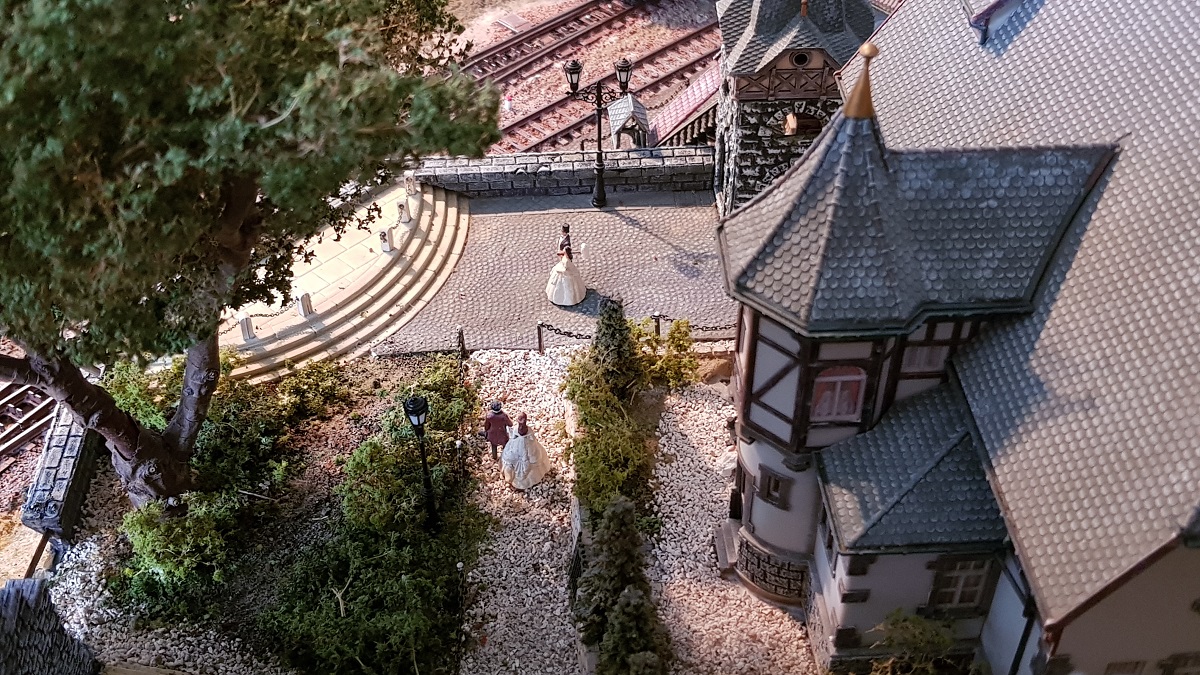
1.11 ~ T h e P a r k
(6/2019)
You probably remember pictures of the Park at the first chapter of this Journal, which was situated at the Old City Wall.
My second large tree had to be renewed as well as the park around it.
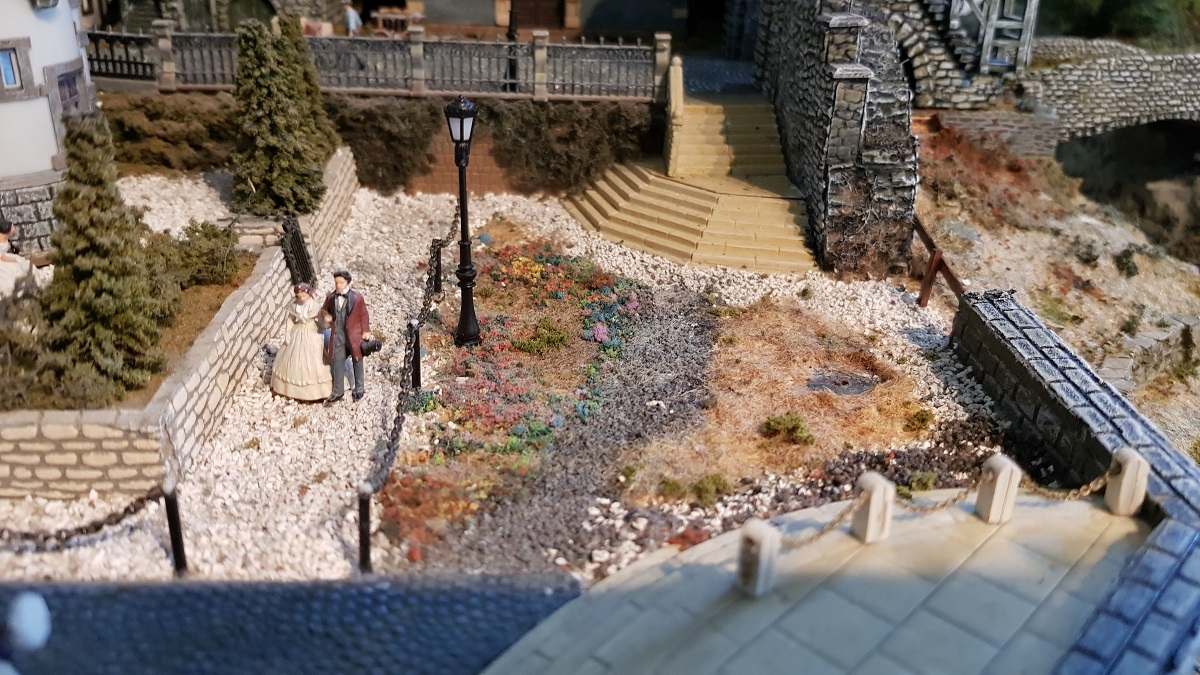
In the month of June, I decided to renovate the park between the restored Wall and Down Hill.
After stripping off the area from its bushes, I first had in mind to use high autumn grass in the back.
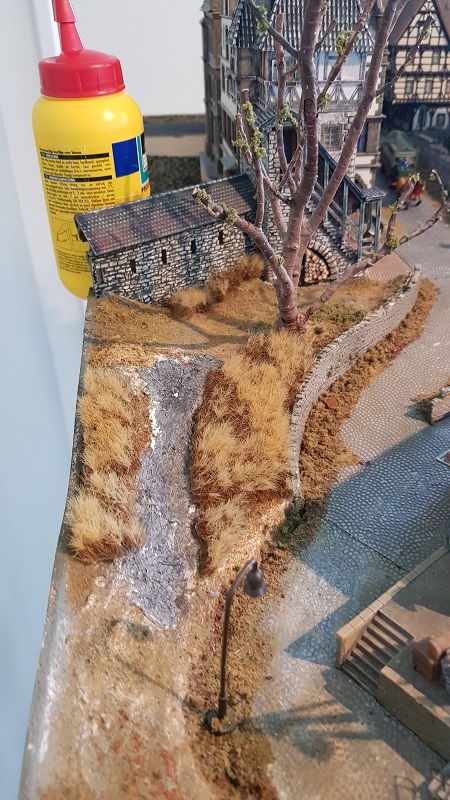
However, the lower part of the wall got too much out of sight and the dry grass didn't fit in like I wanted.
Therefor I decide to use lower grass and some bushes instead.

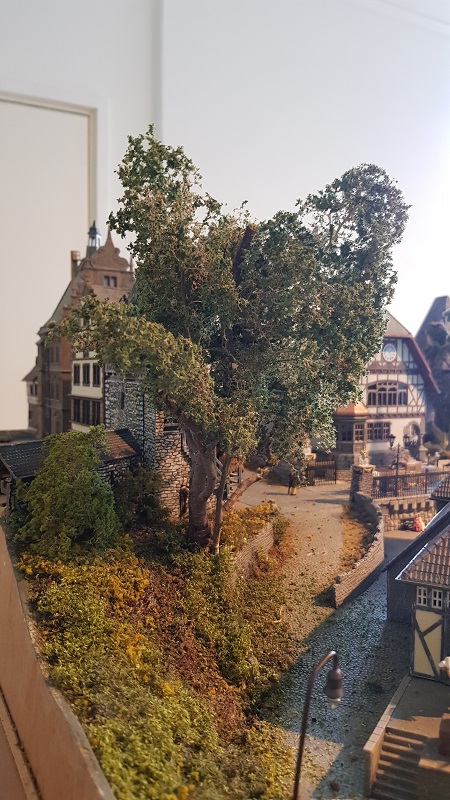
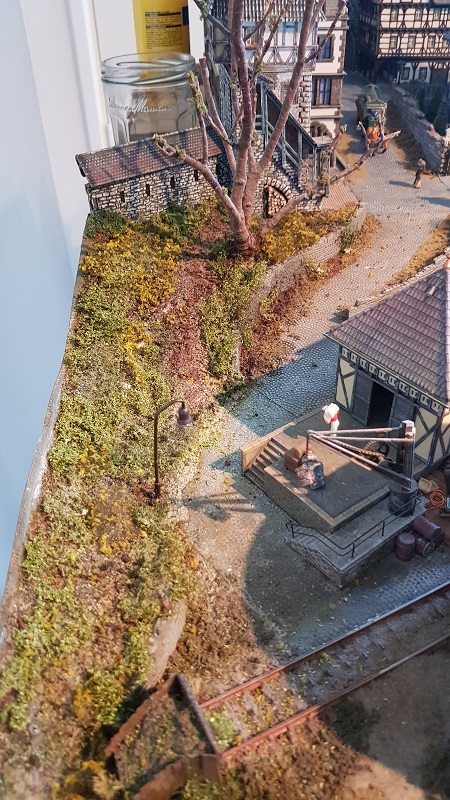
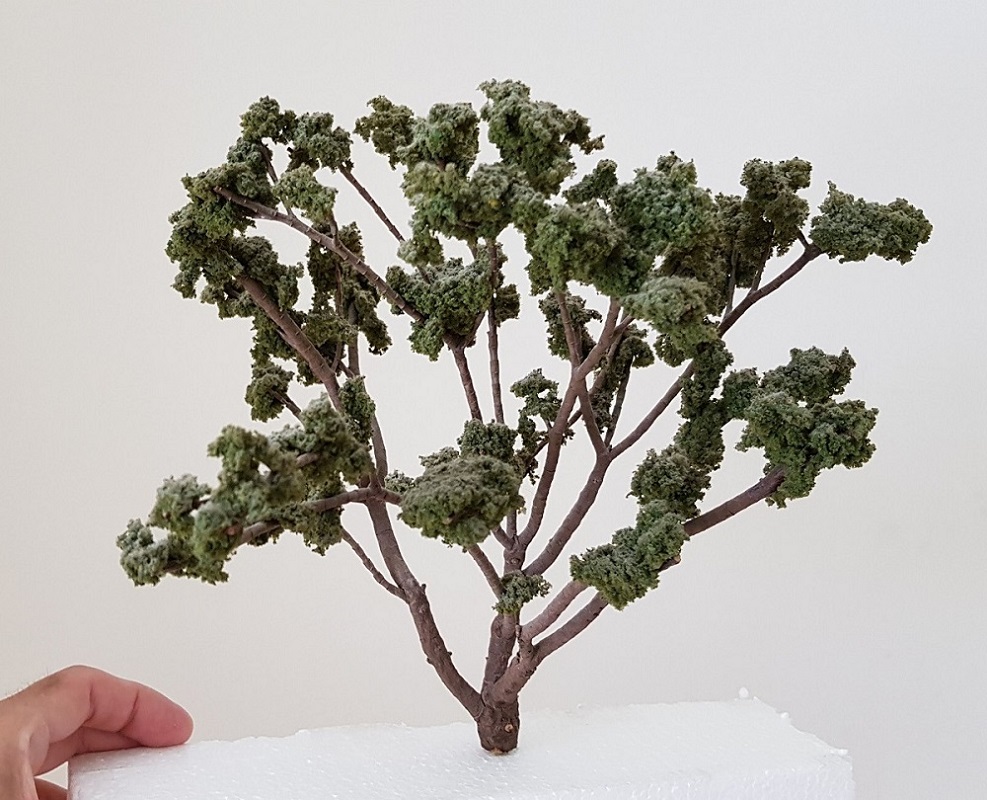
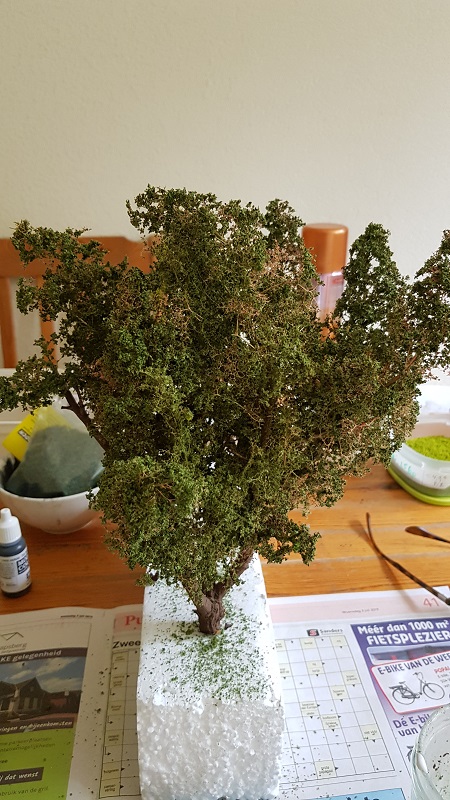
Then the tree had to be given new foliage. It took at least six (6!) handmade bushes of Seemoos to make a crown.
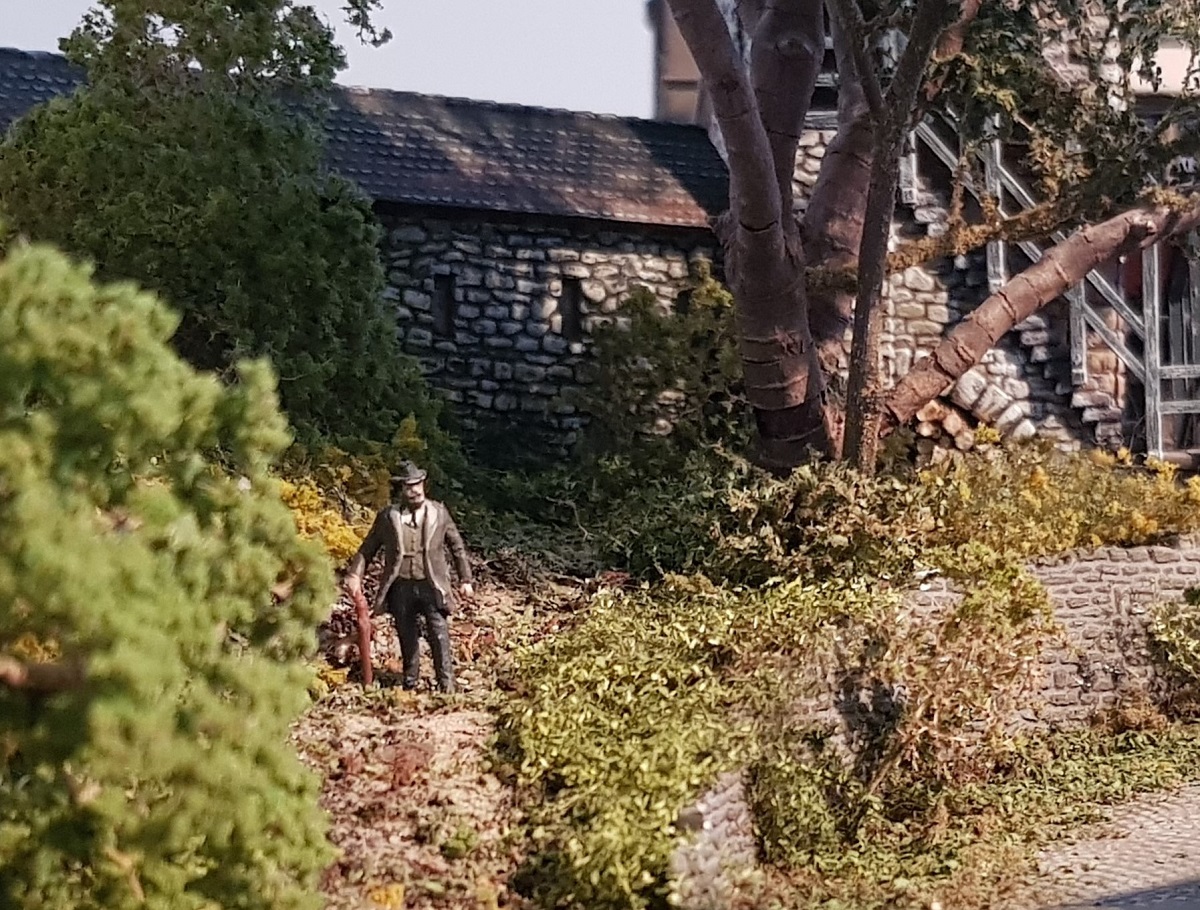
Time for a stroll. Smell the fresh air of spring, coming from the mountains... (lateron this guy will star in a video)
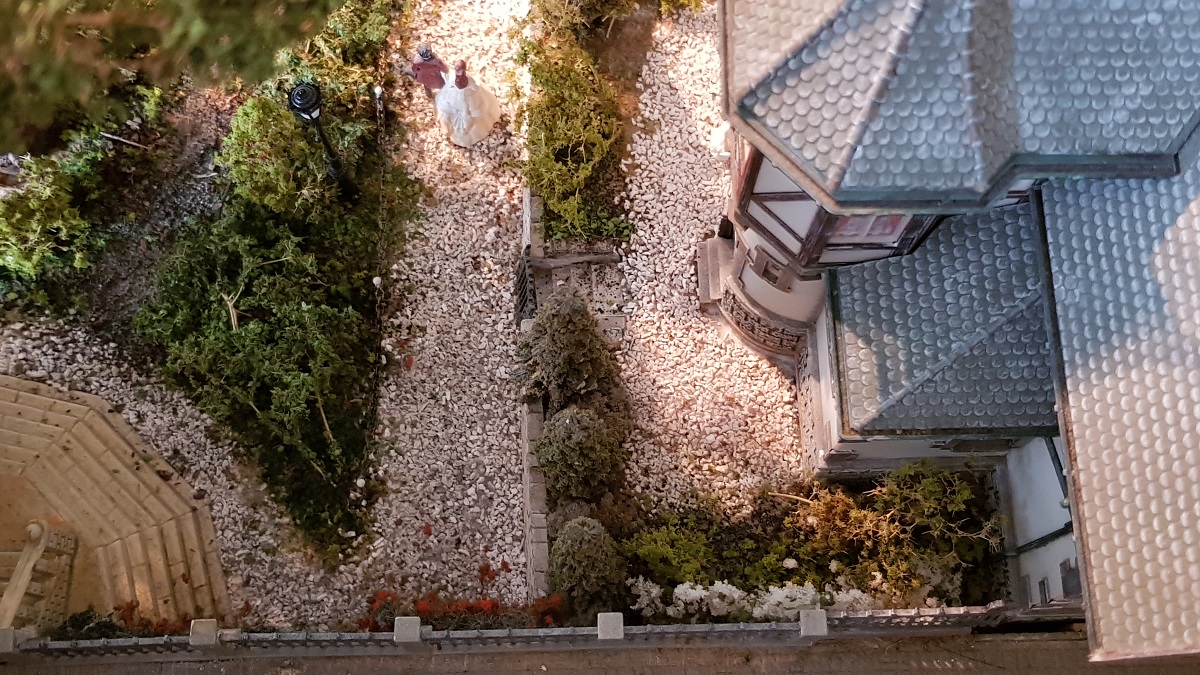
Even the edges and borders around the platform are now overgrown with bushes and weeds.
You might make a comparison: as it was in the beginning...

... is now, and will... well... to be continued for a while!
~~~
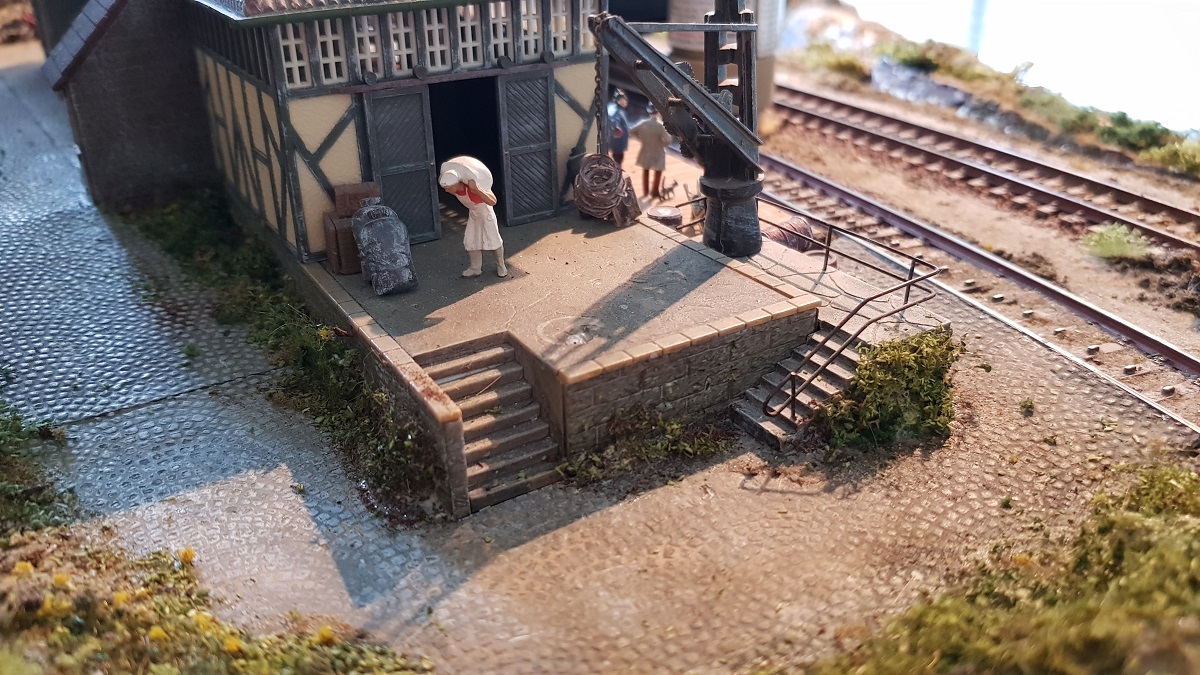
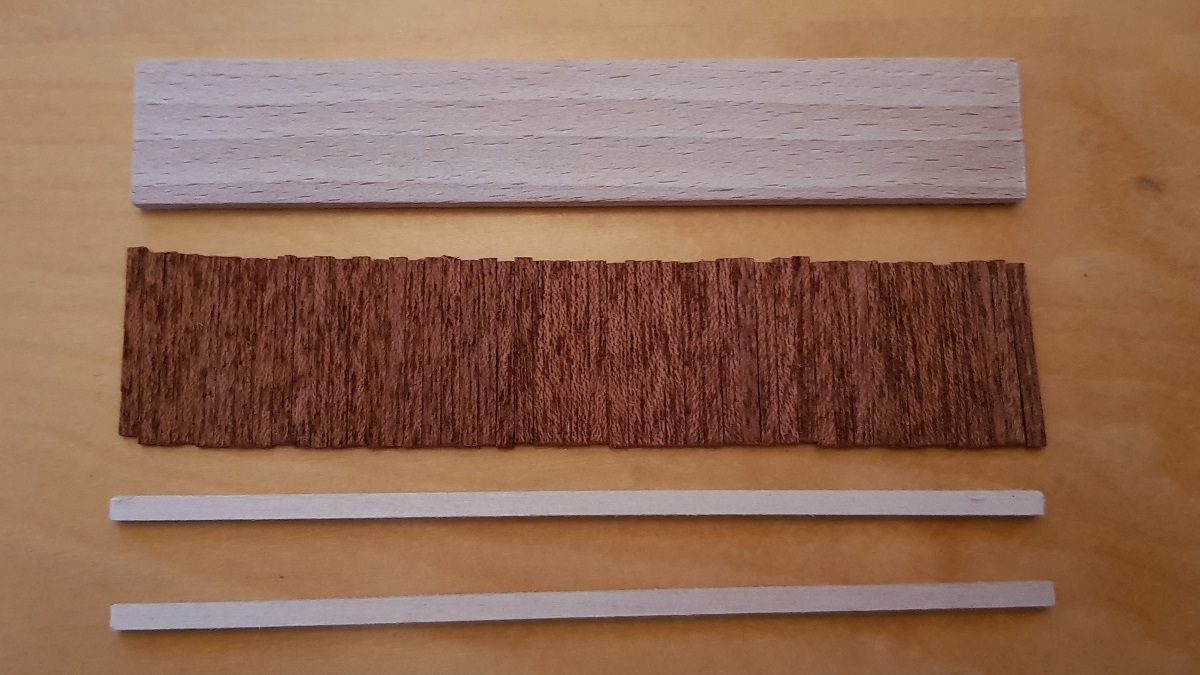
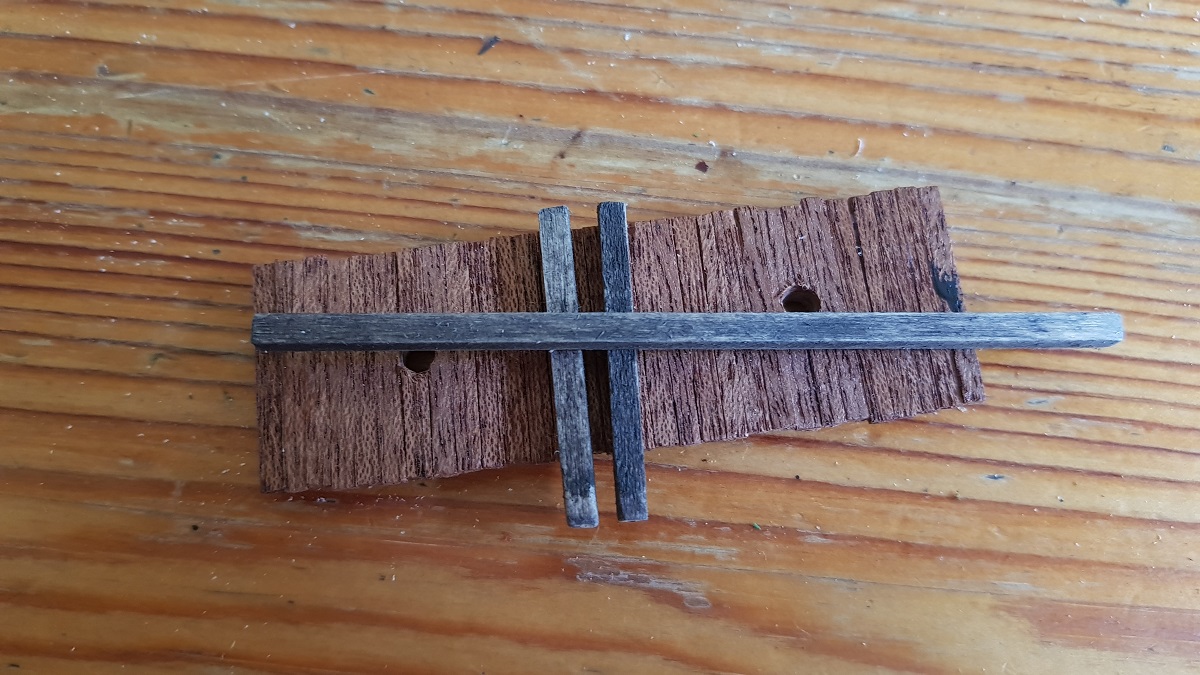
1.12 ~ Another Platform at the Endstation
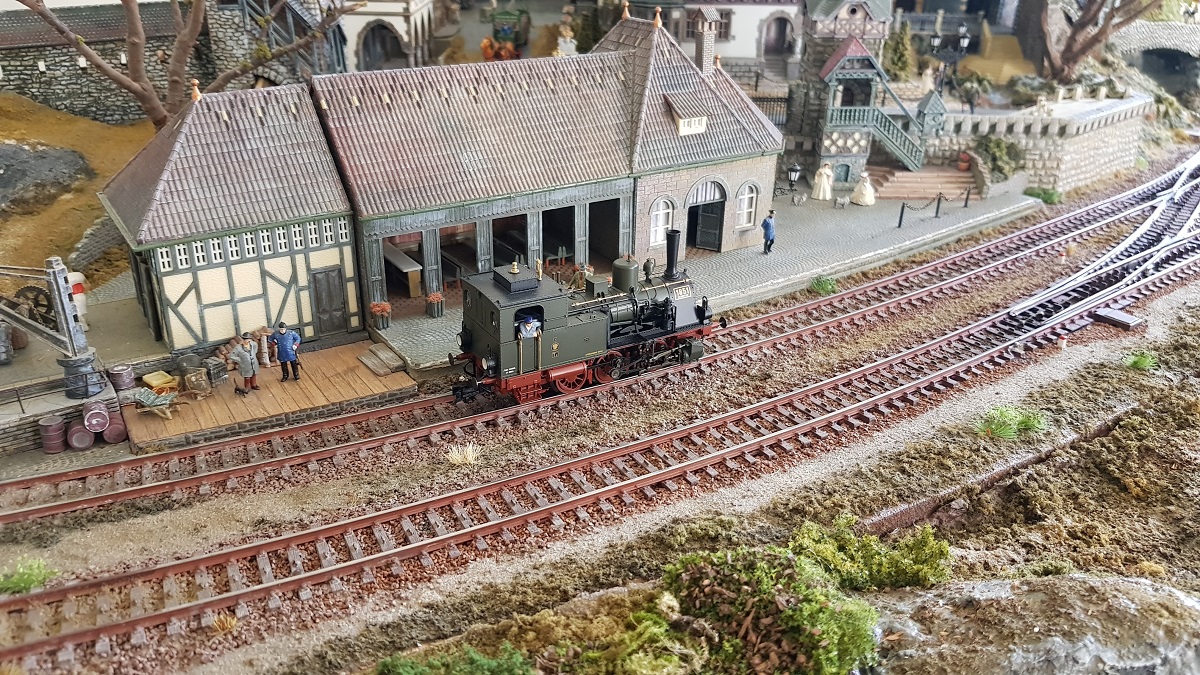
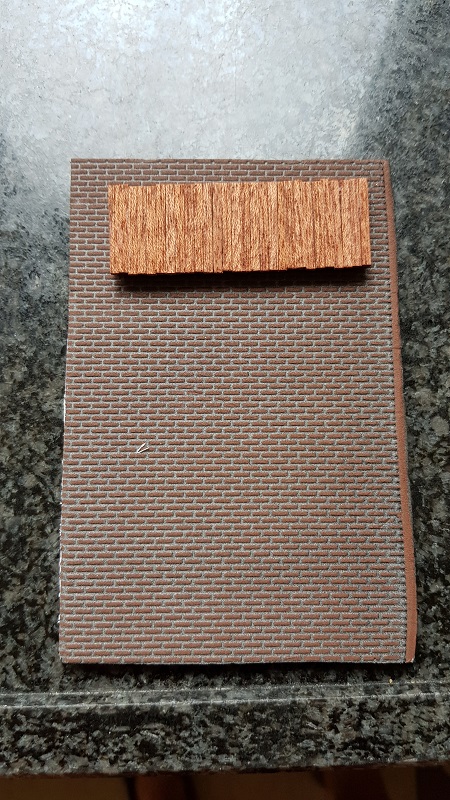
Since I wanted something like a platform at the Endstation for some time, I decided to make one!
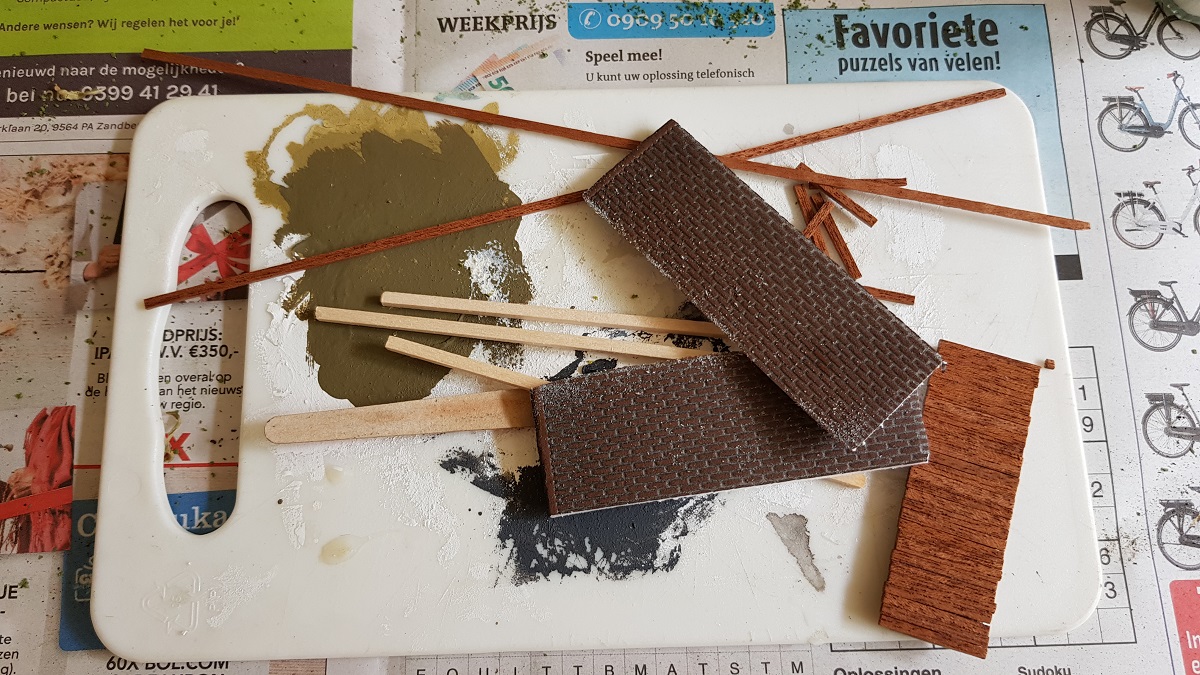
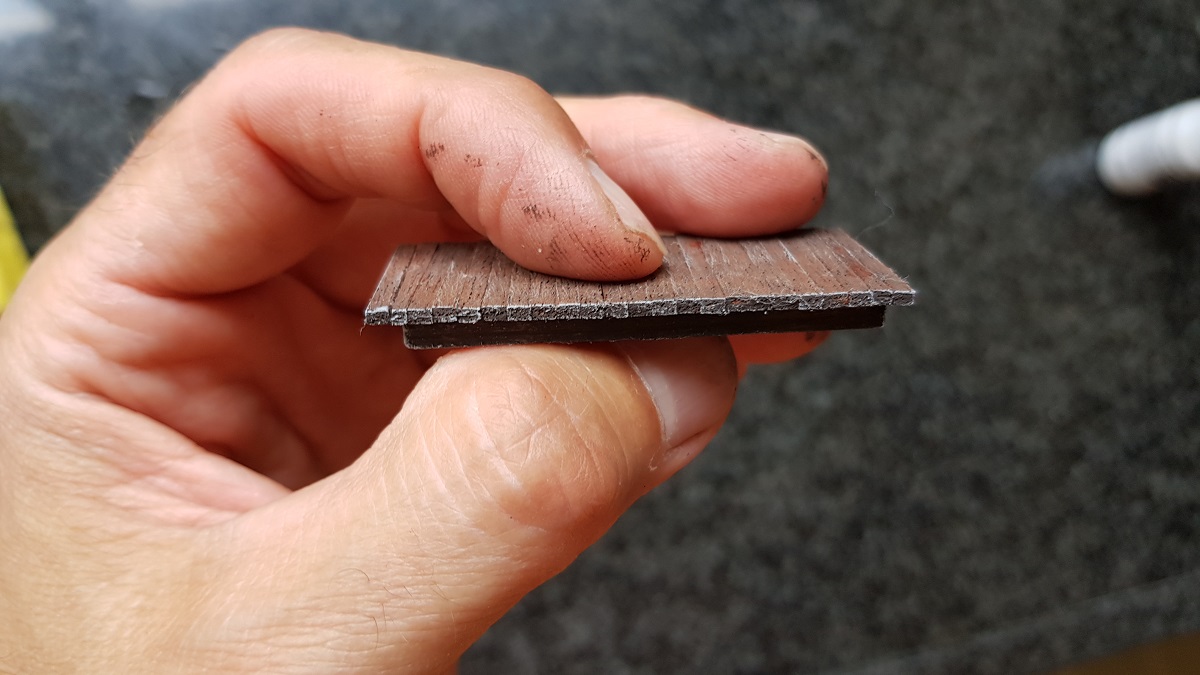
Simple and rather narrow... just a small gem, handmade with separate planks of mahogany.

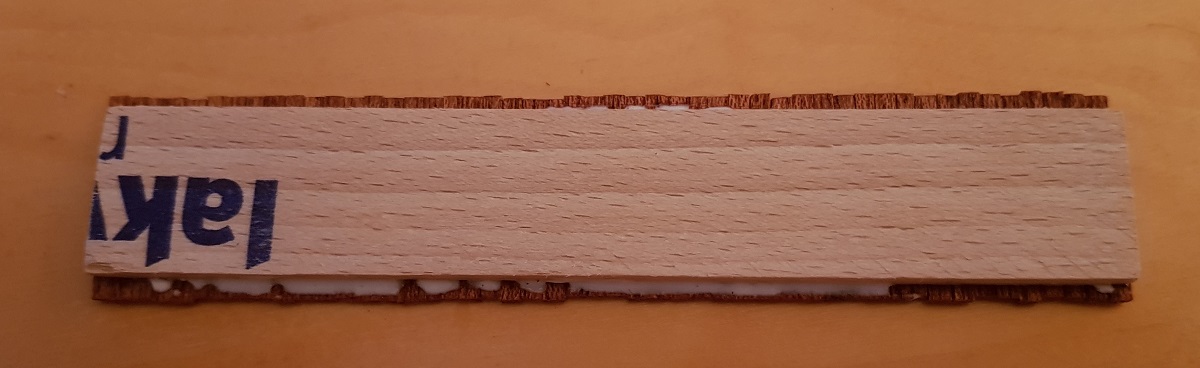
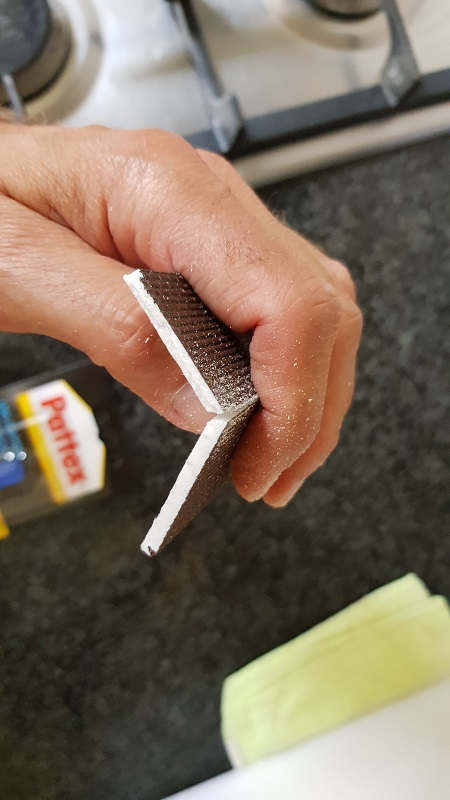
Bending two girders for a base...
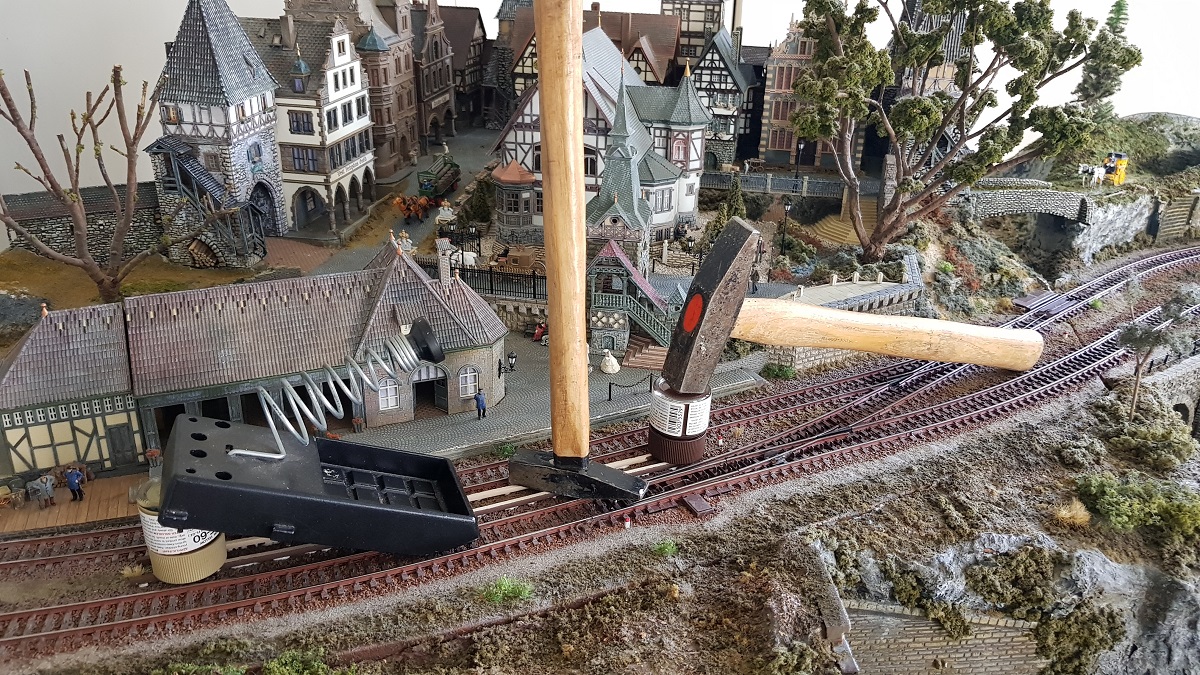
... and fixing them on the spot
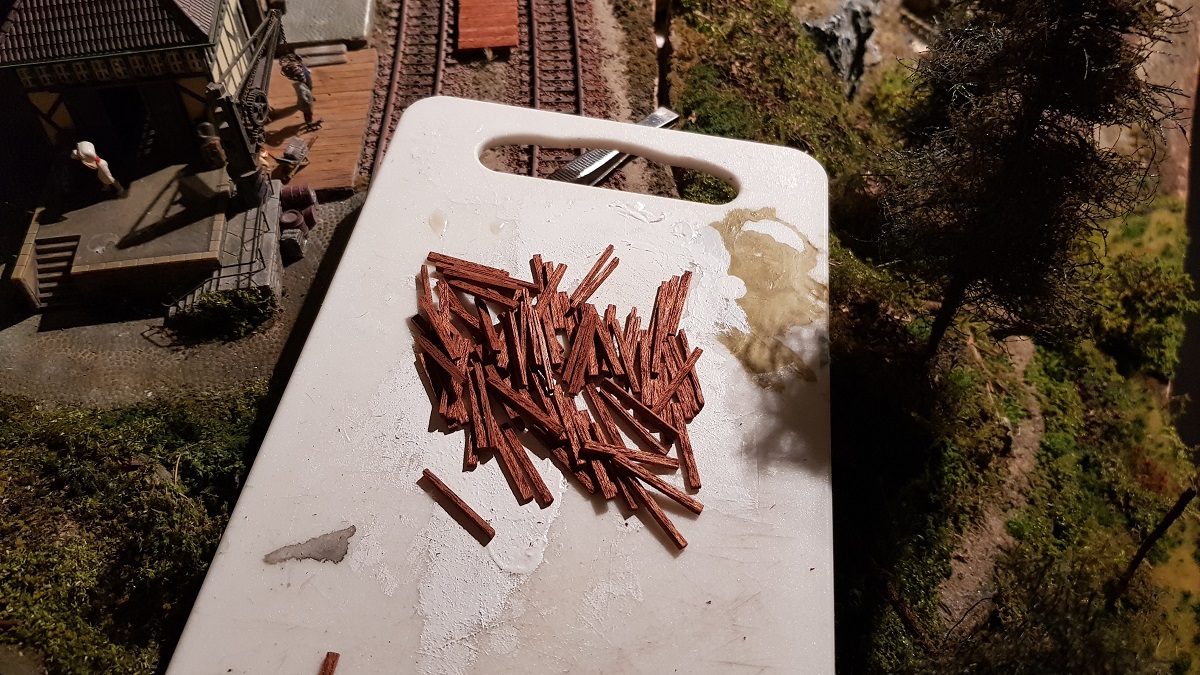
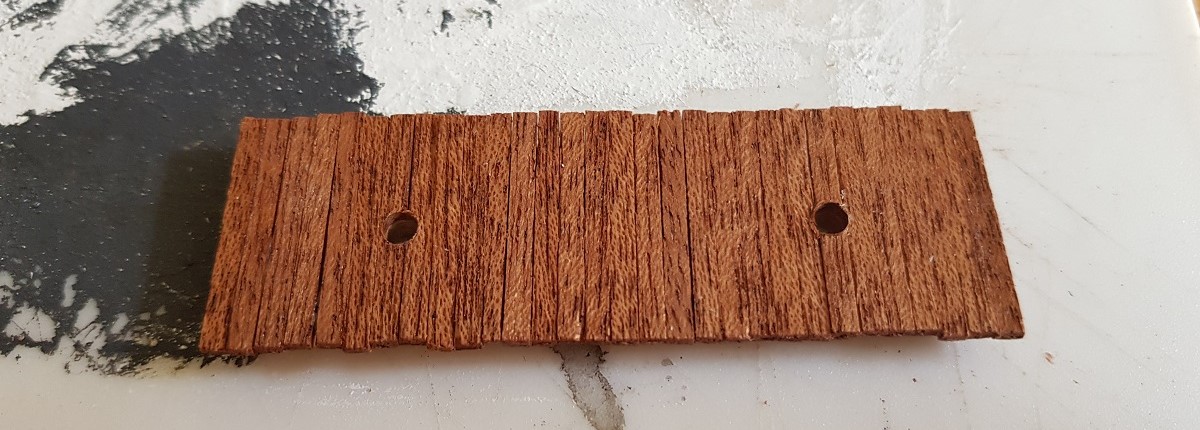
Quite a few planks indeed...
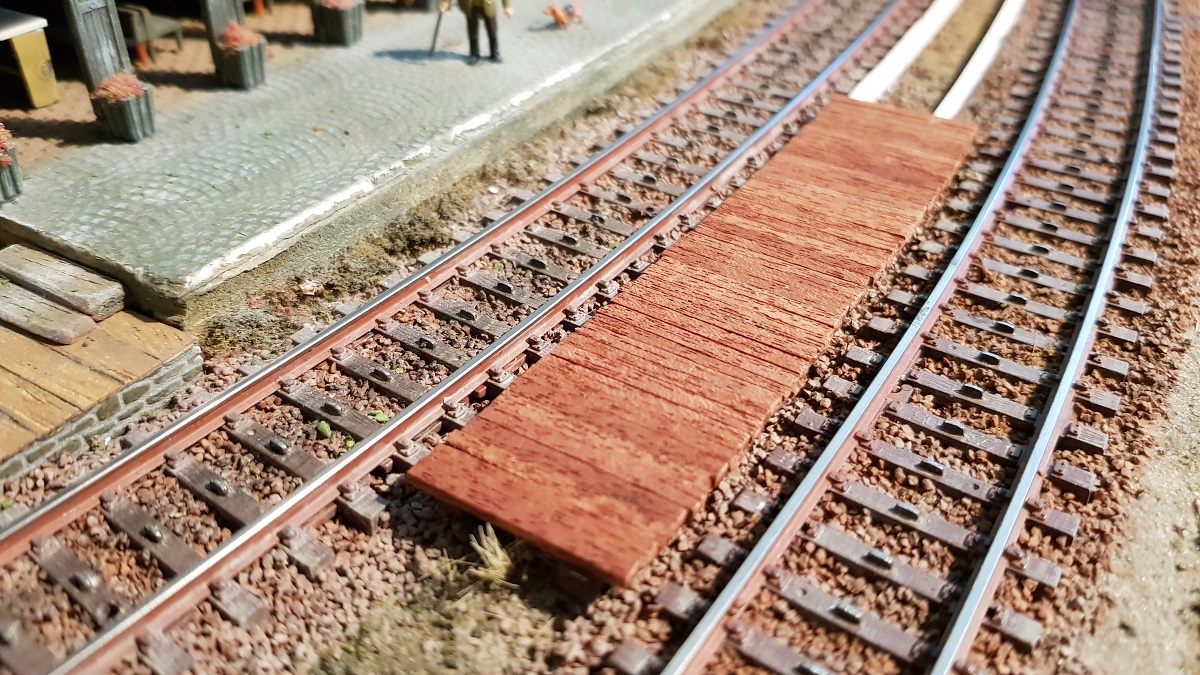
After the glue has properly dried, I will give it some wheatering...
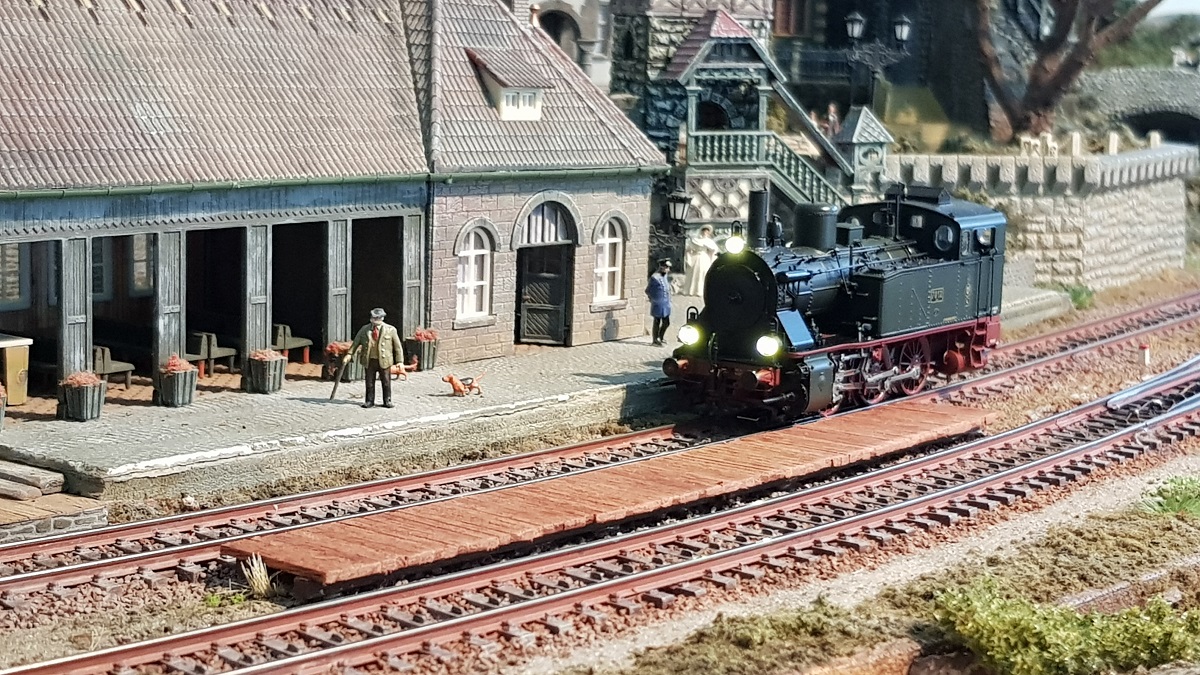
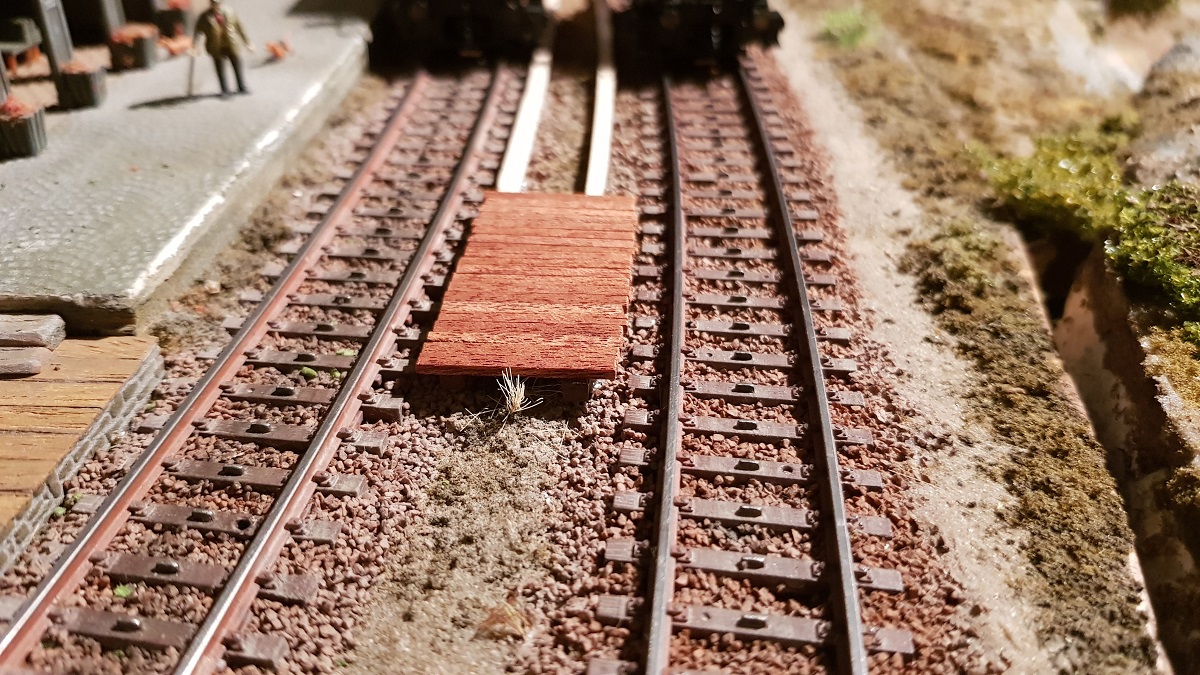
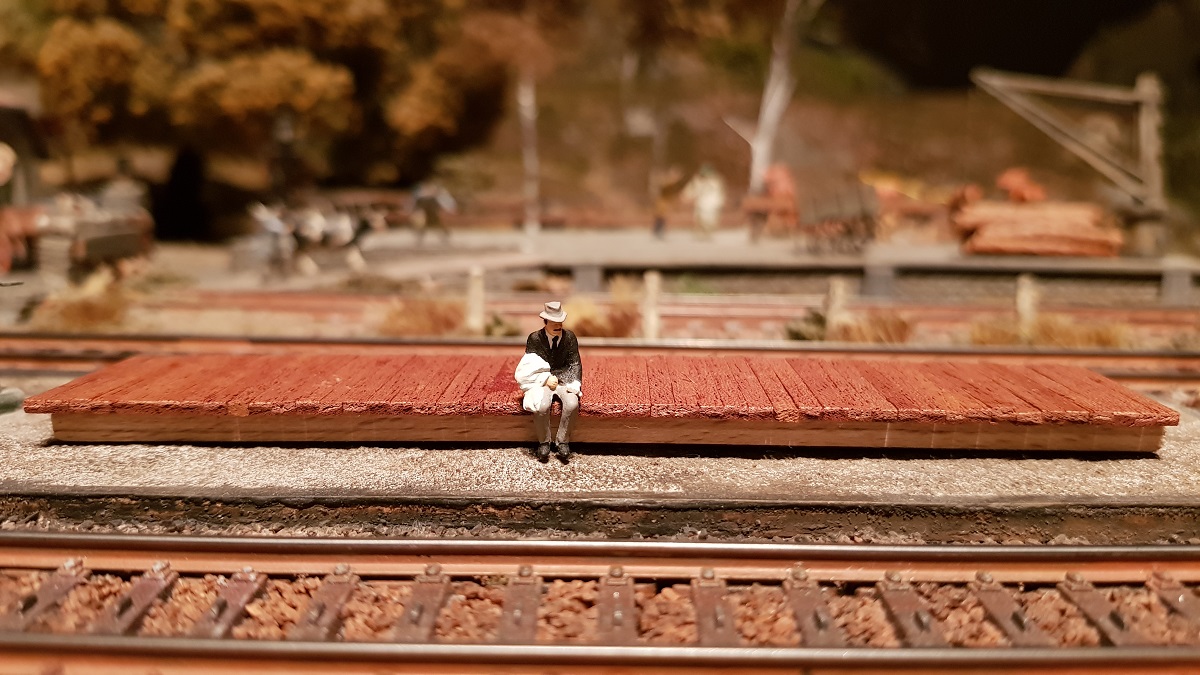
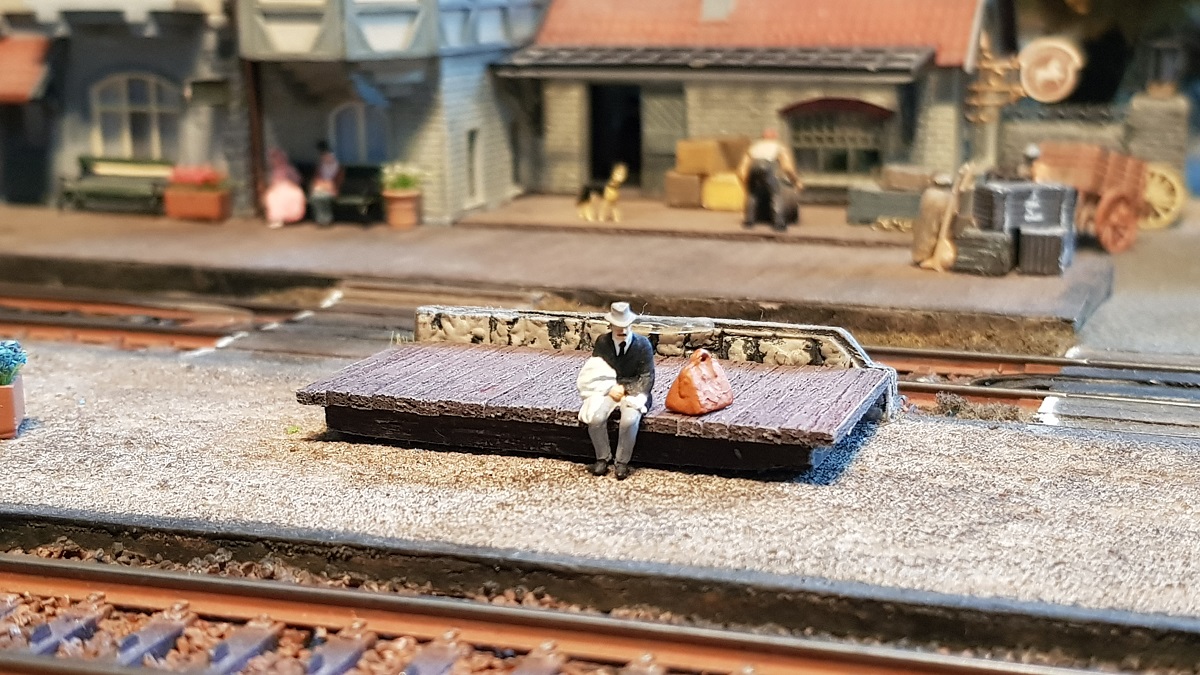
In the end I choose to still shorten the platform some 3 inches. Less is more...
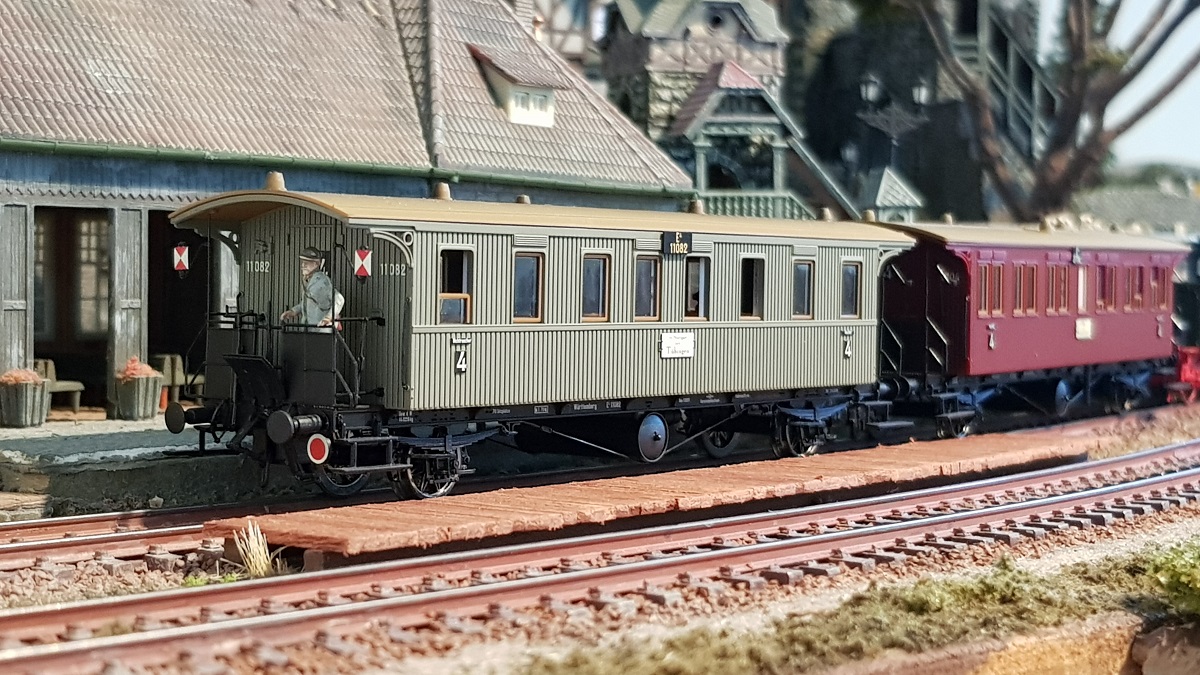
I would love to step on this train for a holiday's journey...
~~~
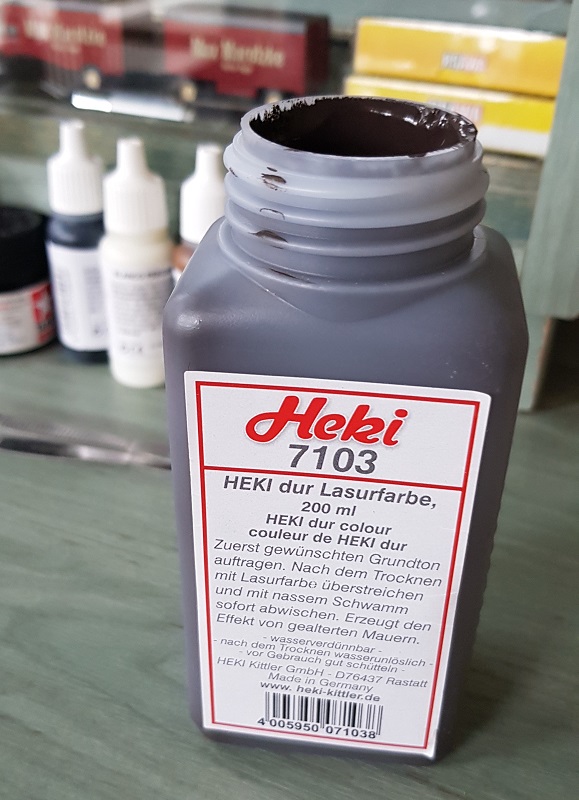
On June 27th, I finished my platform with Heki Dur Lasurfarbe and the slightest white dry brushing:

~~~
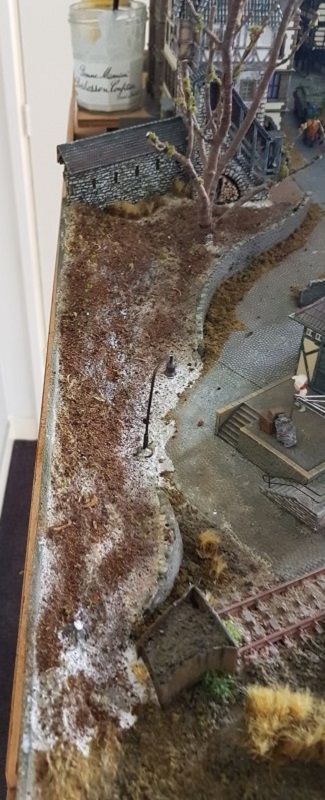
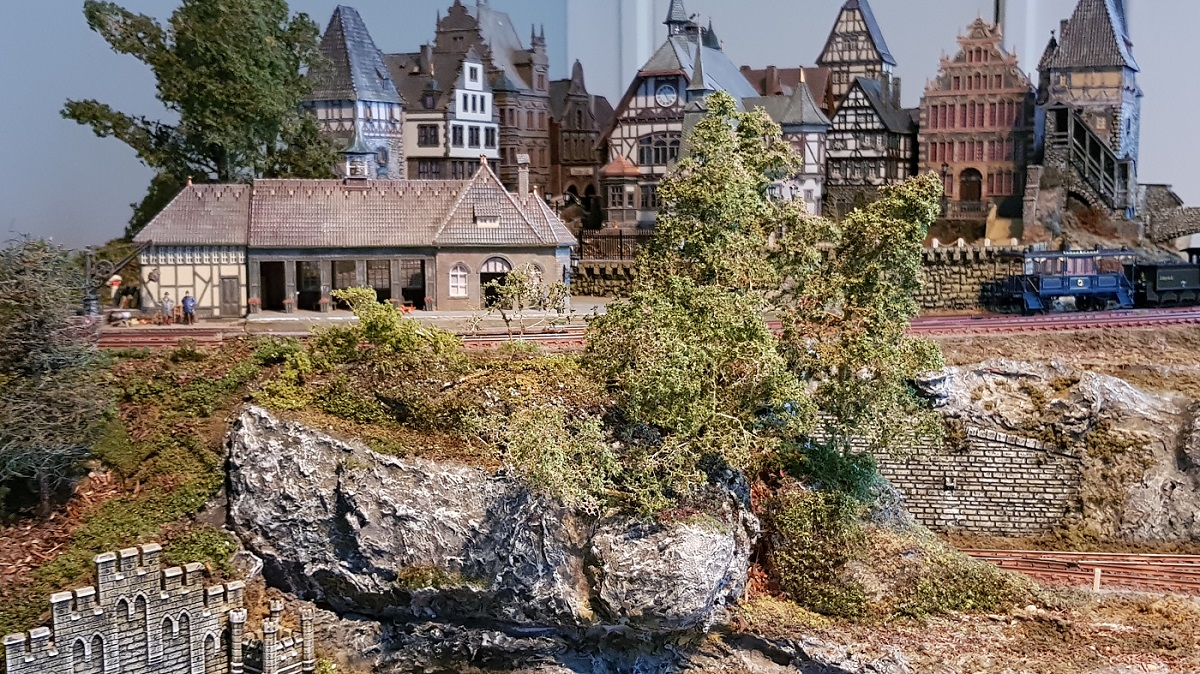
1.13 ~ Beyond Down Hill
(June 27, 2019)
Since I made many more bushes and trees with Seemoos and Noch foliage,
I got the hang of it in continuing renovating beyond Down Hill, opposite the platform.
Last night I started painting most of the brickwork in the same way as I did with the masonry and brickwork in town
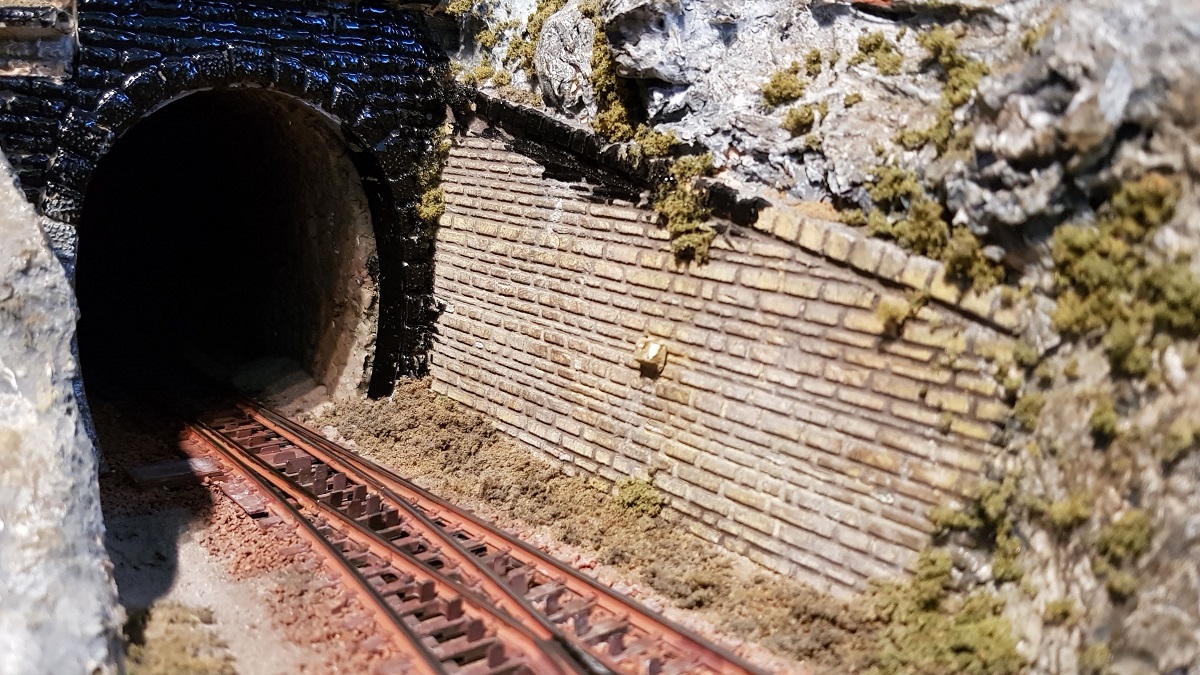
As happens more often: while obvserving a specifi spot on the layout, there's something that irritates me, which usually is a signal for intervention.
A plan is unfolding in my mind and... here we go again!

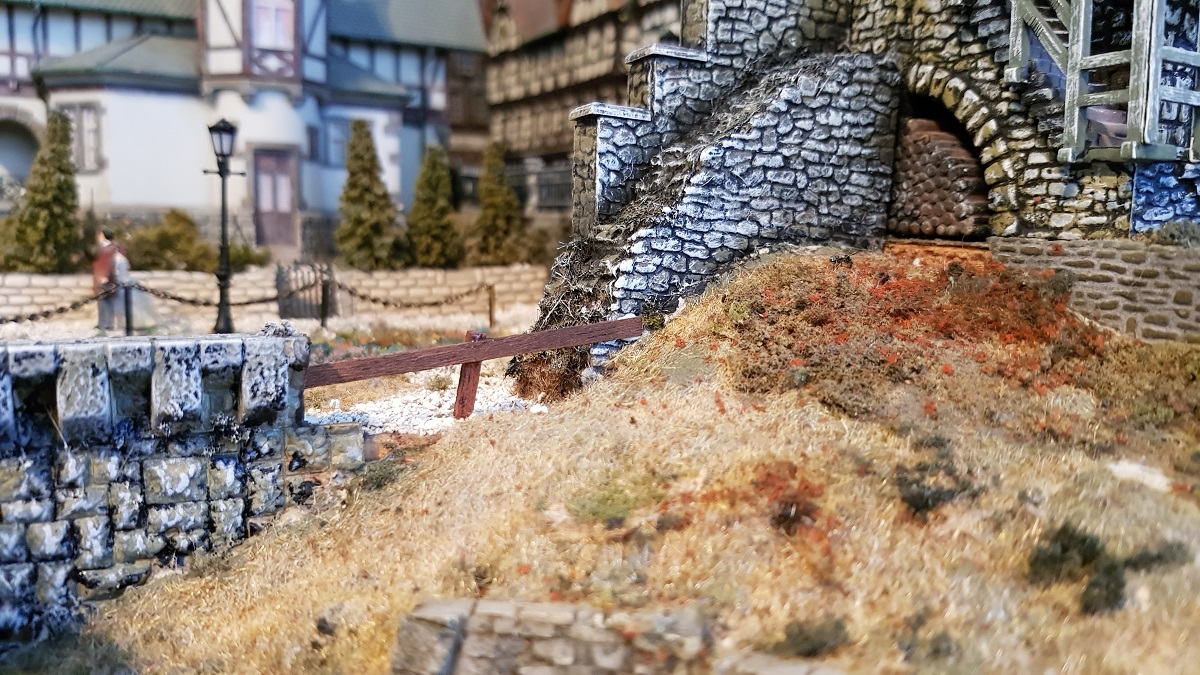
For instance, this brickwork, originally meant as the remnants of an old bridge...
Then the thought occurred to me last night, that there must have been some wooden beams or so, now putrefied...
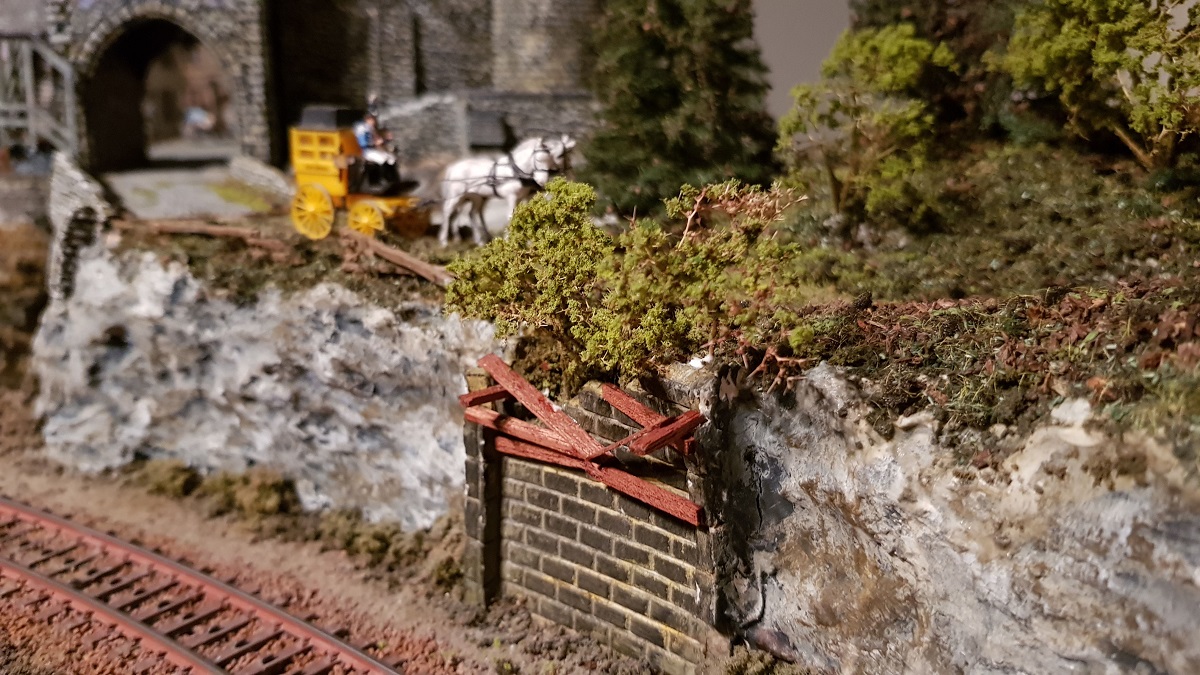
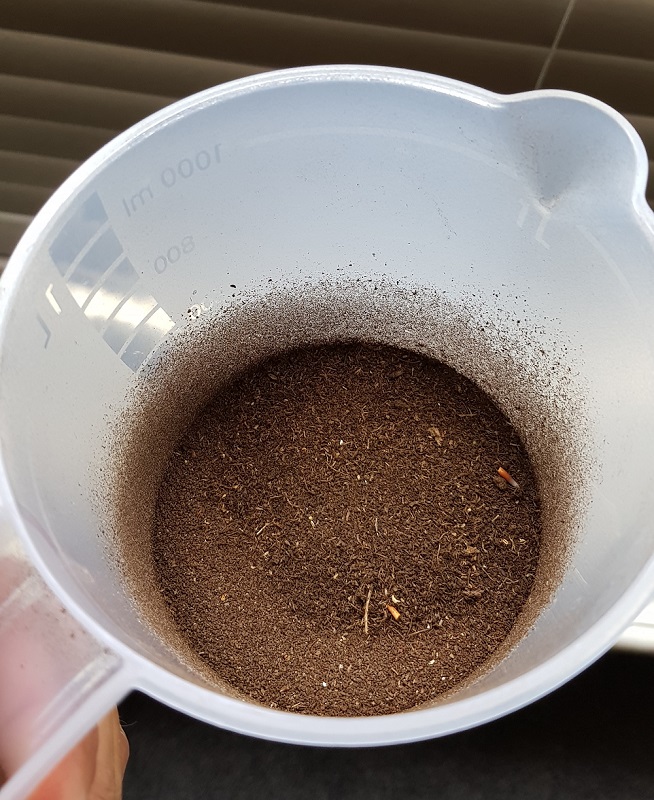
This very morning I went to the forest to find myself some real material like dark brown coarse turf for ground covering in the forest.
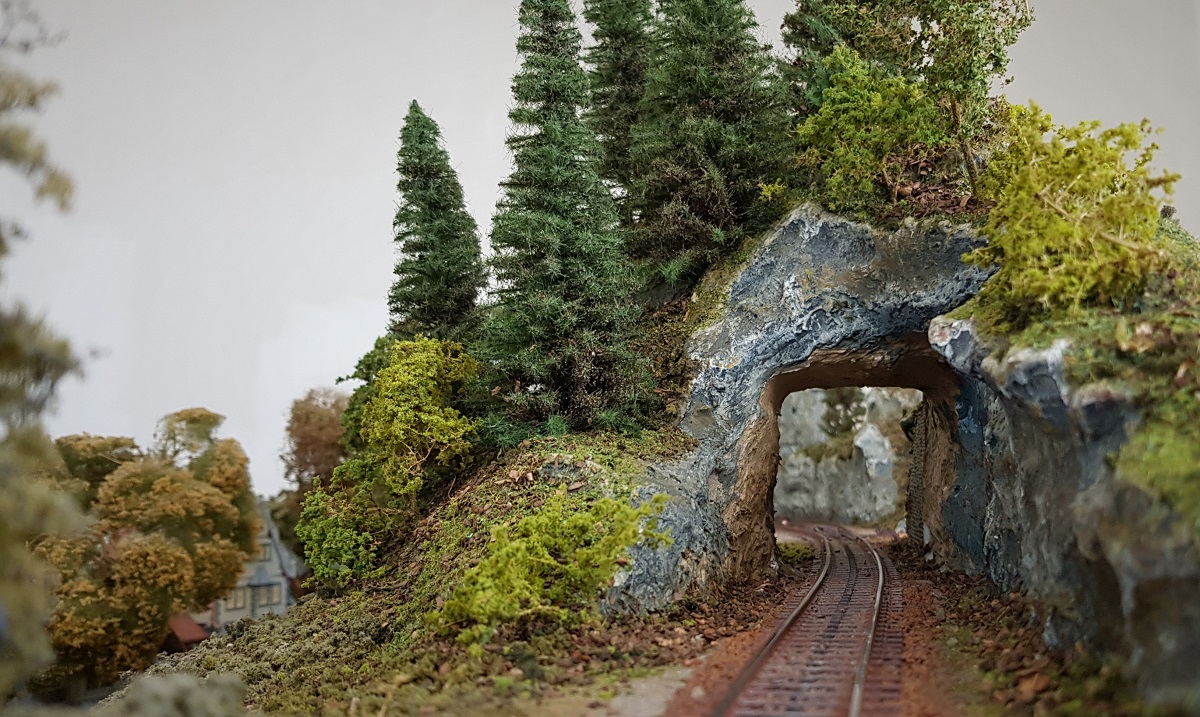
Now, this grey rock beyond Down Hill has gotten my attention today!
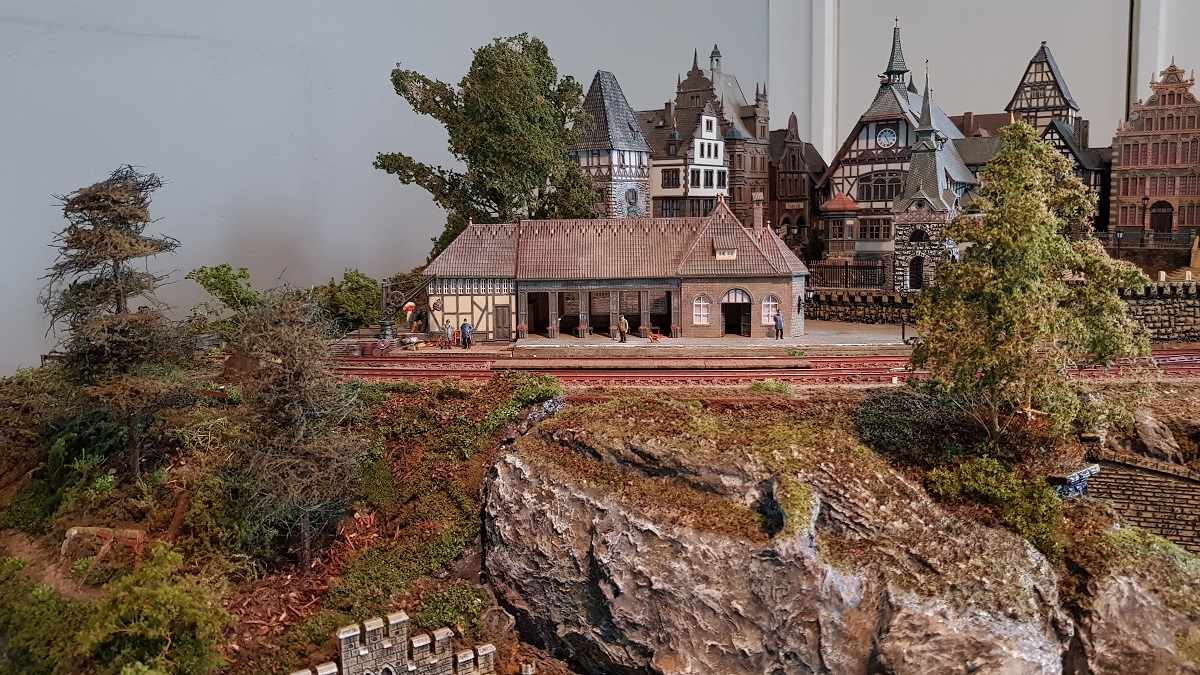
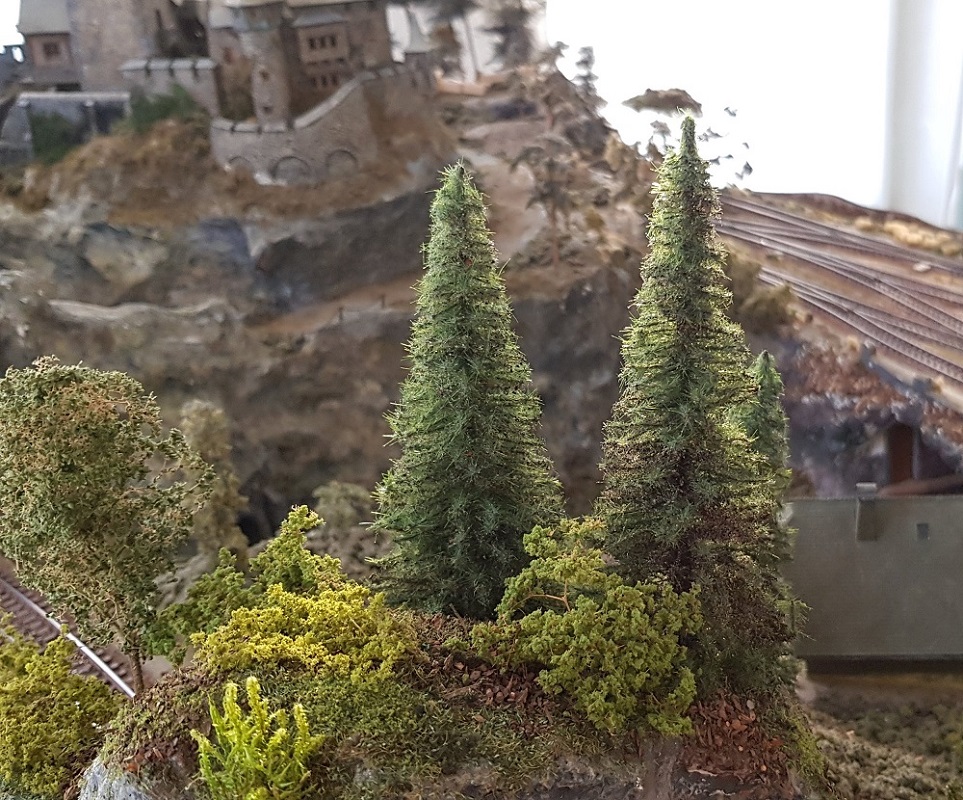
I had in mind to put some Noch Fir trees right on top of it. But one way or another: they just didn't fit in the foreground.
So, I decided to give in and use my precious Seemoos trees instead. I must say: I don't regret it in the least!
The first two (on the right) were kind of "halflings" which I put together as a whole.
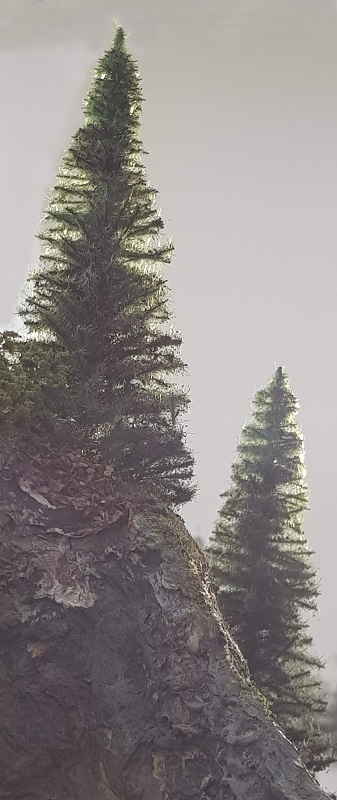
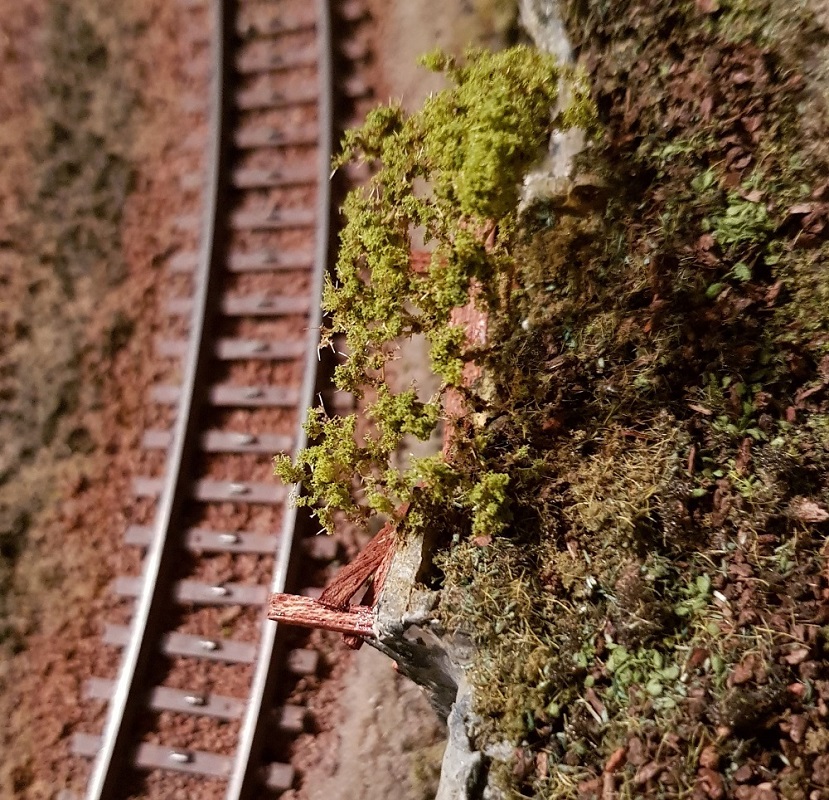
The cliff in the front... just shouted for attention of a cliff hanger!
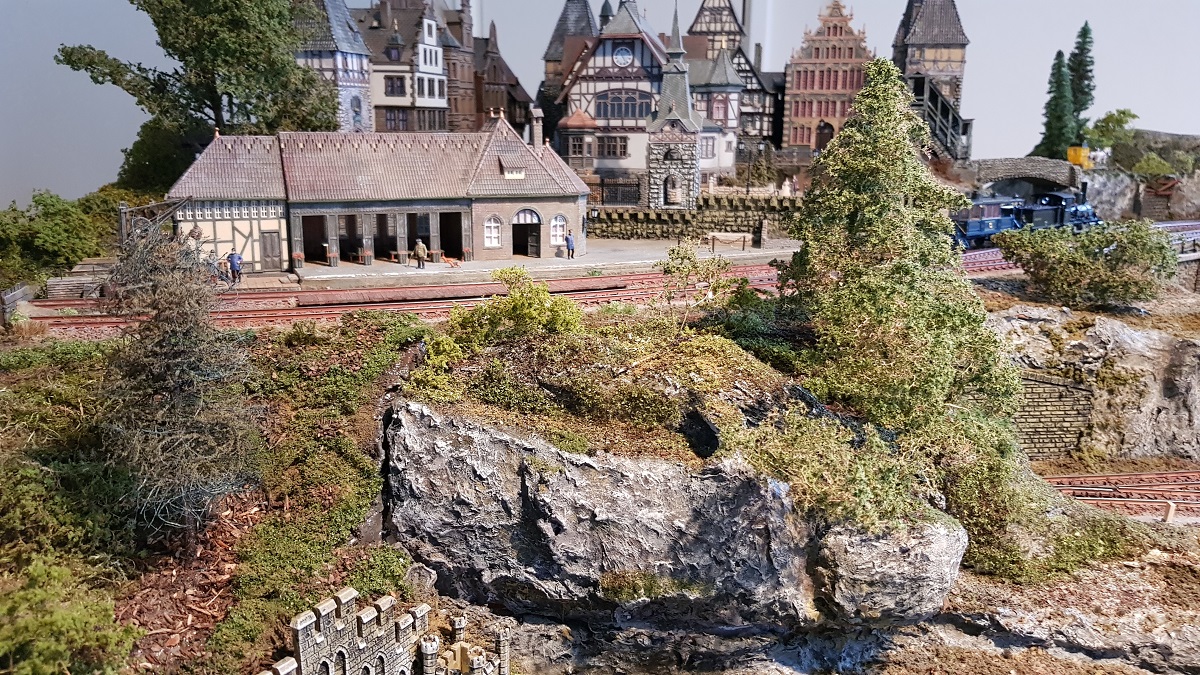
That tree, lying at the right, is going to be the "third in the pack of two" on top.
I will position it on that small cliff near the tunnel's entrance.

Right there!

In the mean time I painted the brickwork with a white dry brush.
This lovely chasm calls for some deadwood which fell down from above...
Finally, today's labour.
~~~
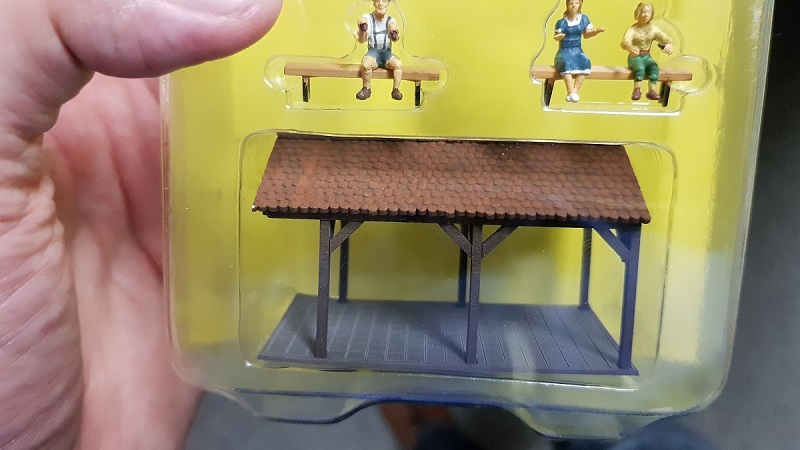
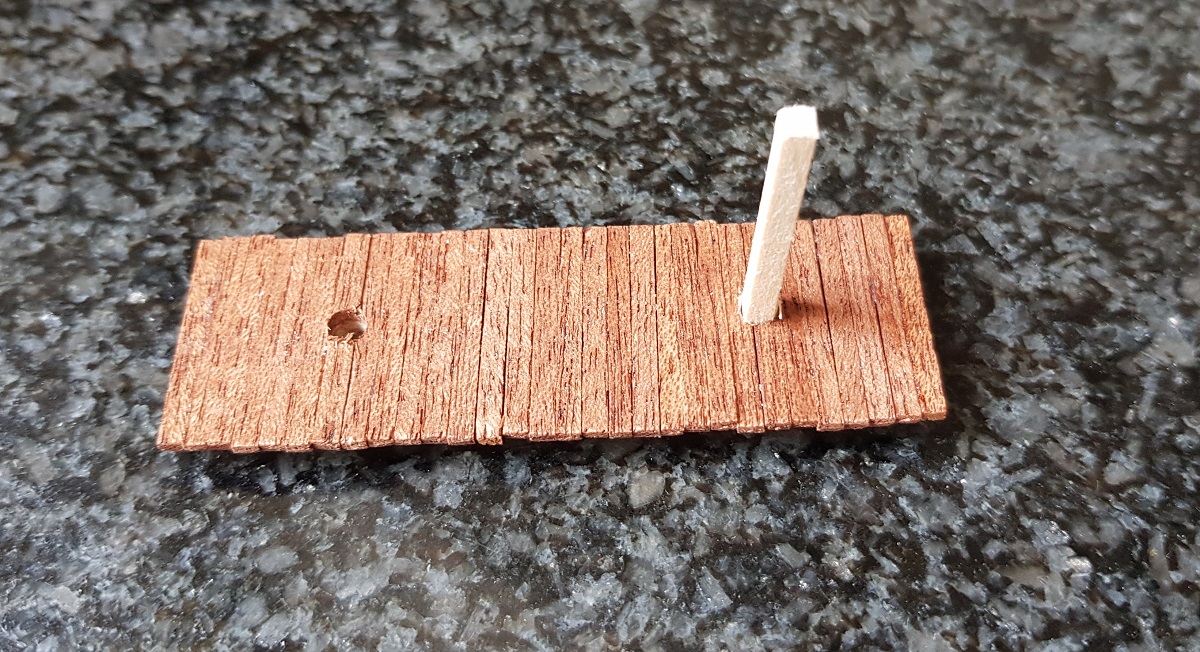
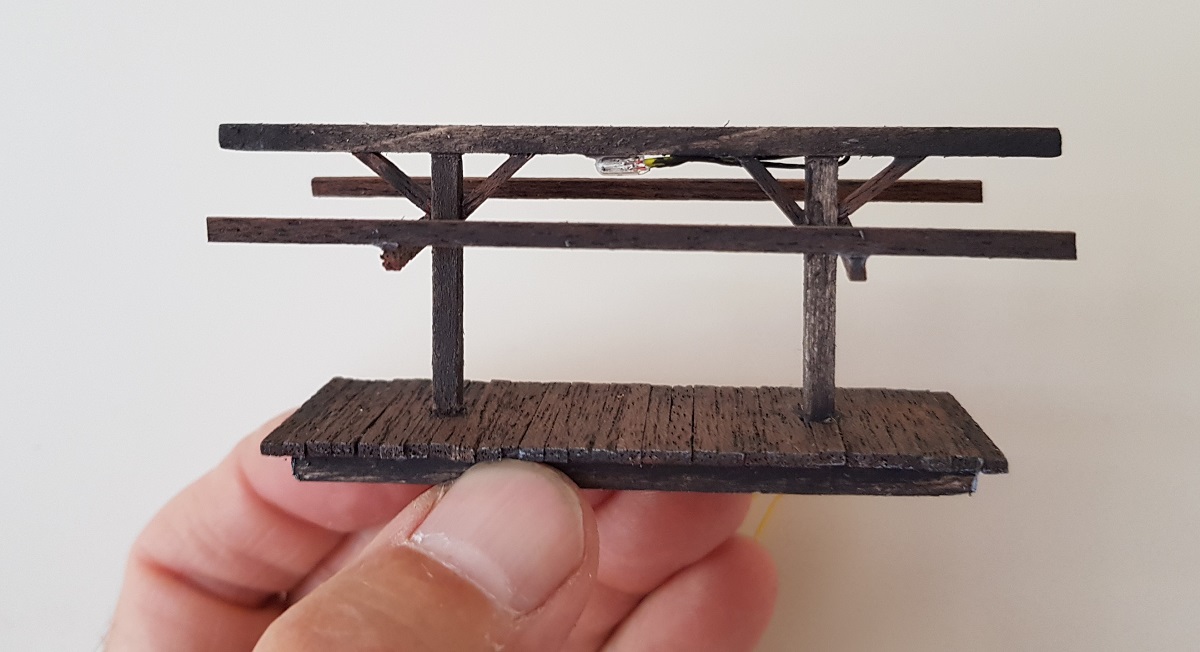
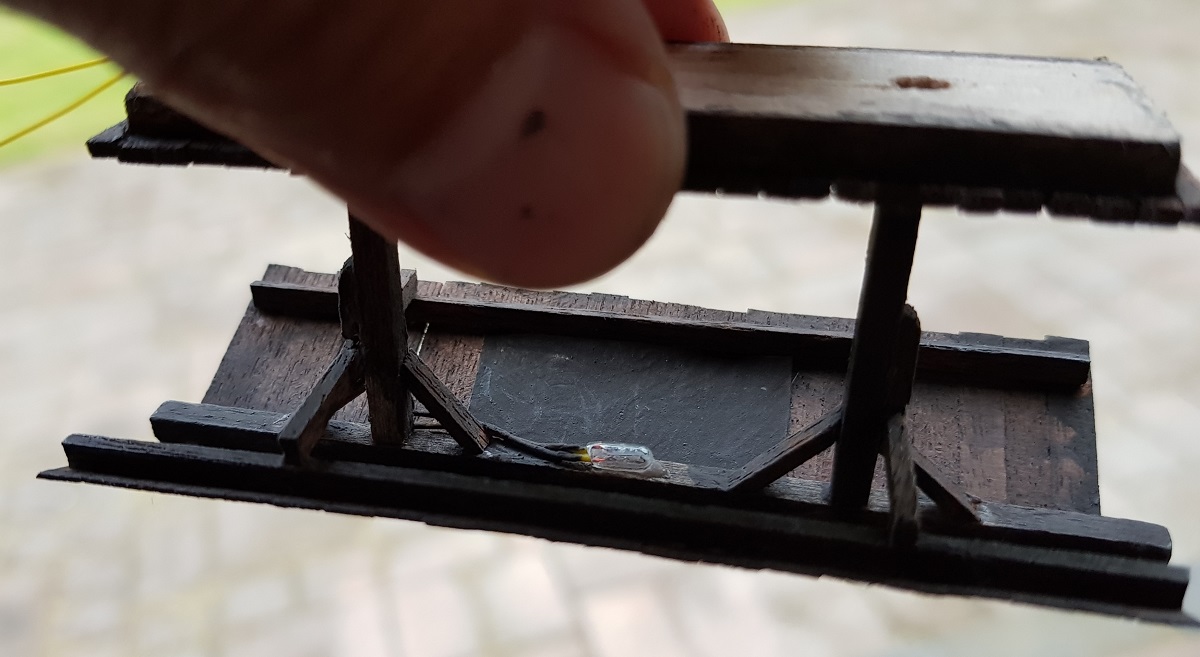
1.14 ~ P l a t f o r m B e n c h
An idea derived from the Efteling Diorama
(July 4, 2019)
Lately, I've been thinking... of adding a roof like the one in the Efteling Diorama (14.7.2014).
Another platform at the Efteling Diorama (14.7.2014) shows this cuddly wooden bench.
I consider bringing both ideas together!
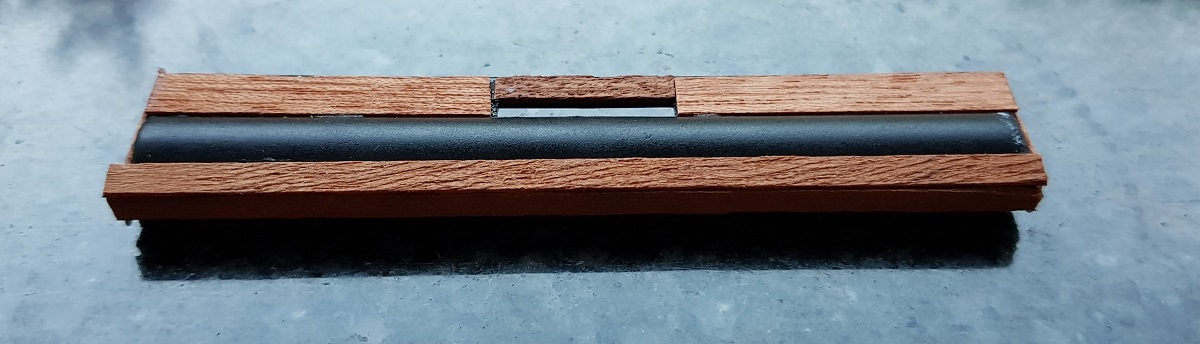
Considering the measurement of the Efteling's bench... mine is way too wide!
So I cut it in two...
At my dealer's shop, I saw this gadget. It gives me the right idea how to position the wooden beams for carrying the roof.
And no, I didn't buy it! I'll dew it myself!
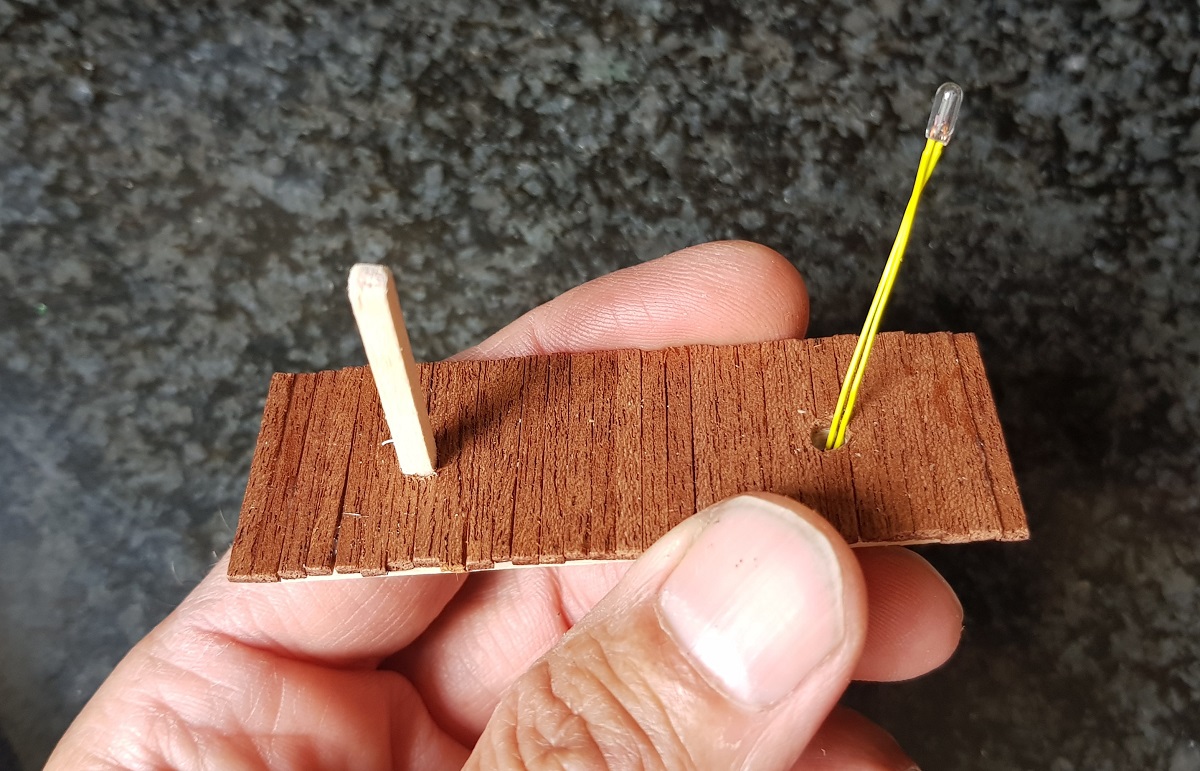
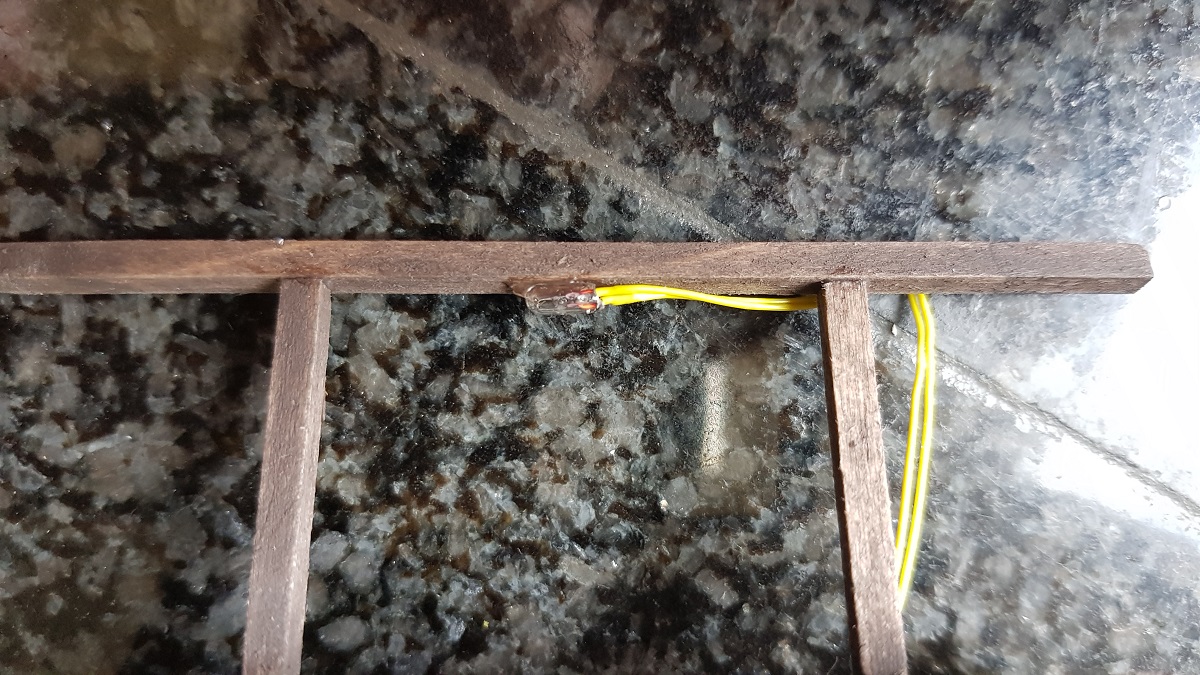
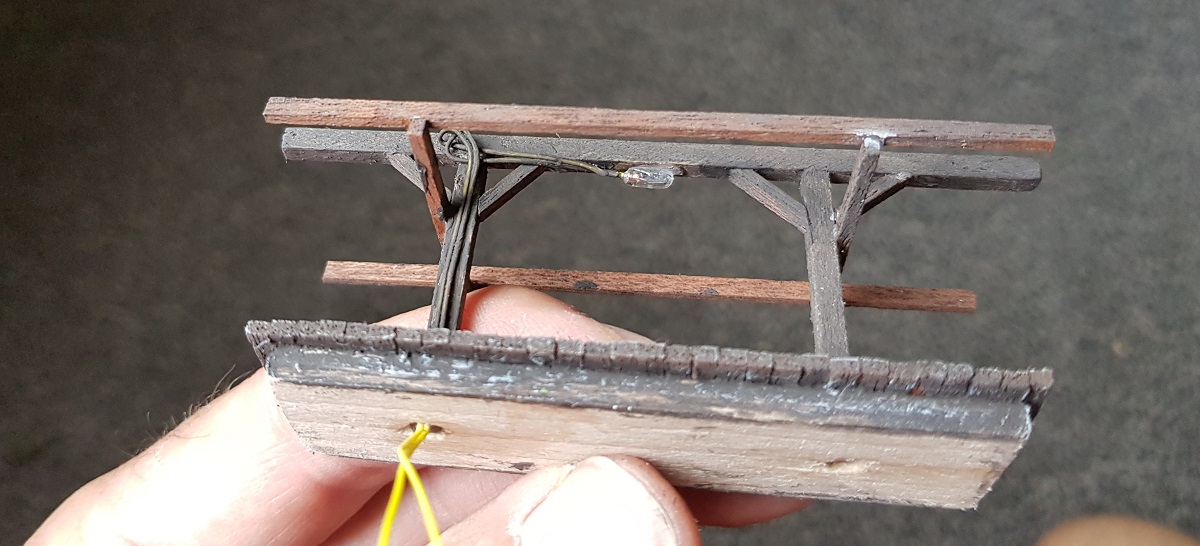
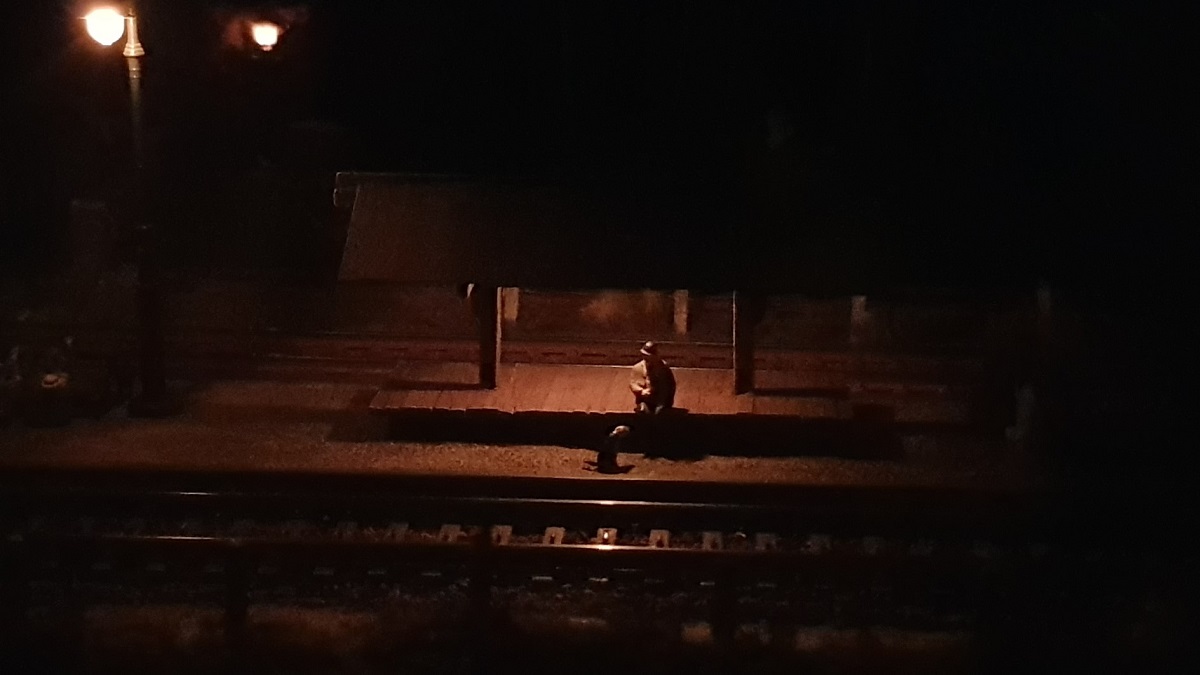
With a sagged roof and a small and shining lamppost inside the vault...
Forget the Diorama!
And then: Heki Lasur Farbe!
To me, it's the invention of the century!
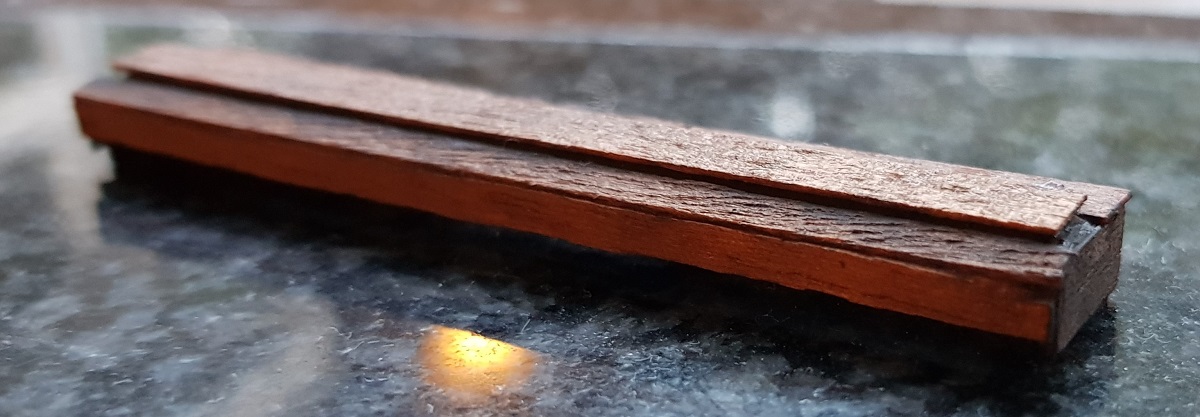
Here's the other (half of the) platform...
The other one will have a roof with lamp, which is going to be situated at the far right end of the platform:

At this point I am still wondering how to go on: where to put the beams and supporting beams?
But... in the end this is what is was going to look like!
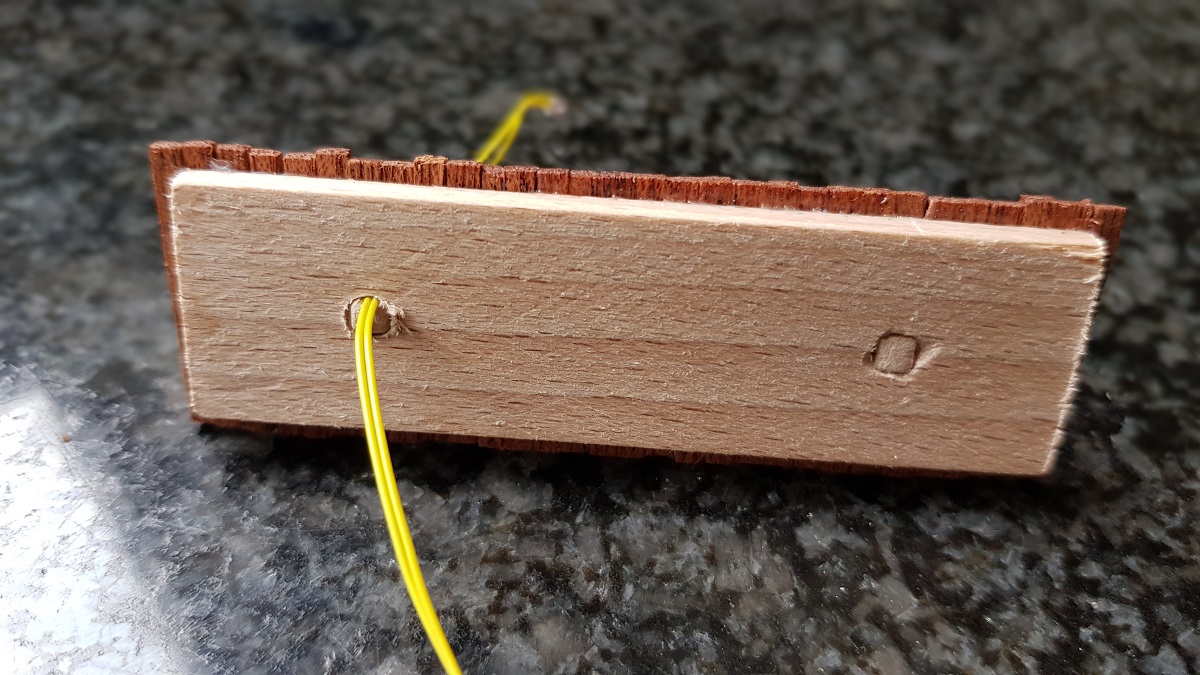
With such a delicate concept - all made of wood - the Styrofoam roof I intended to use was way to plump!
So...
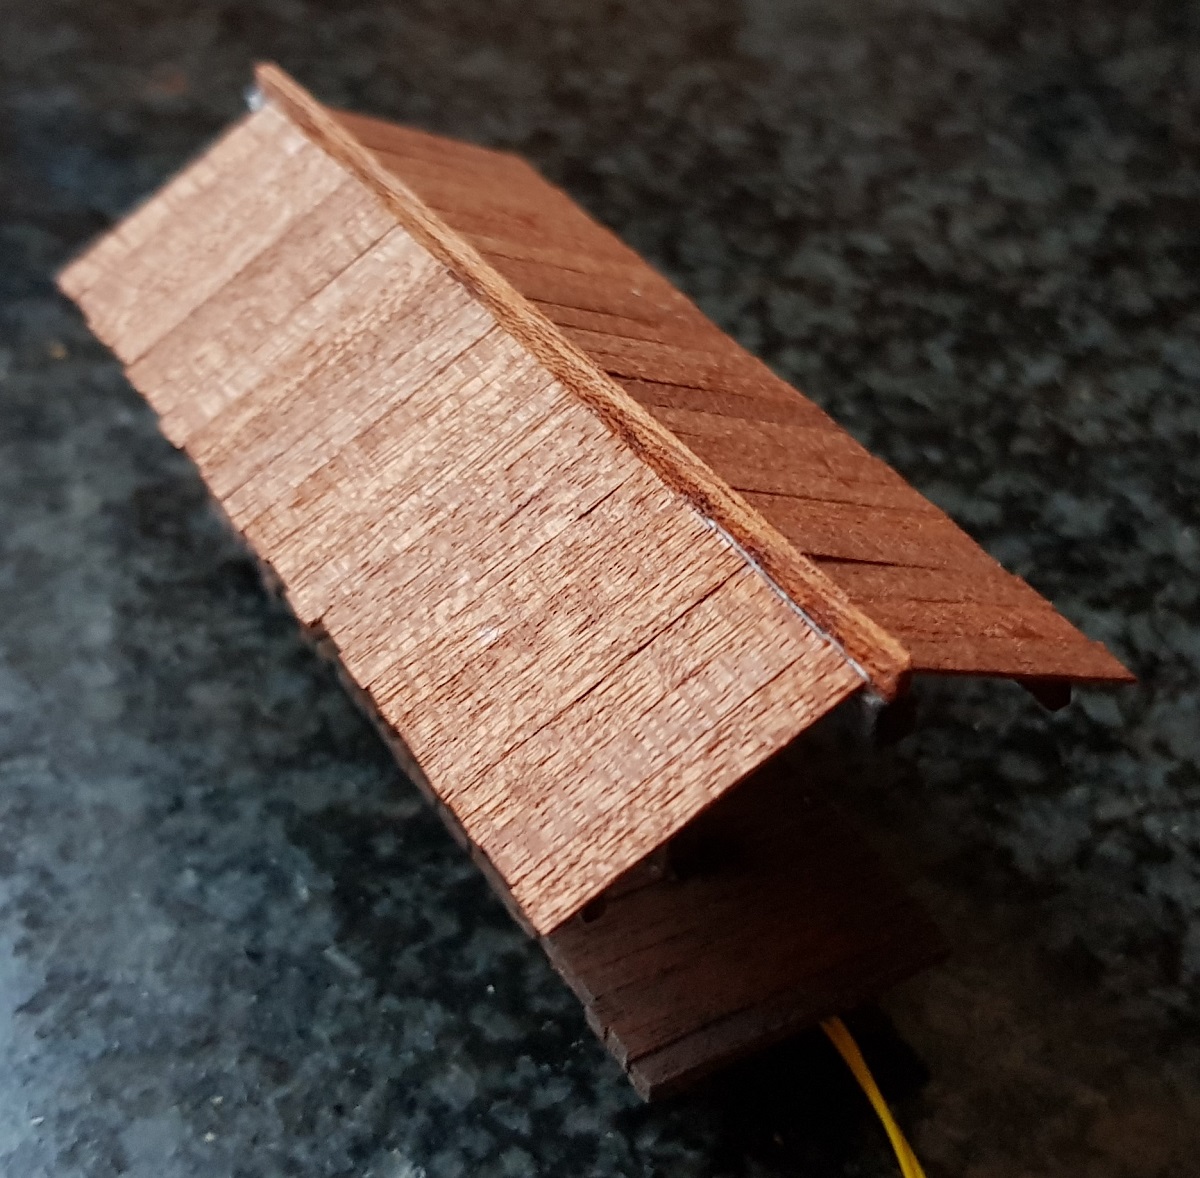
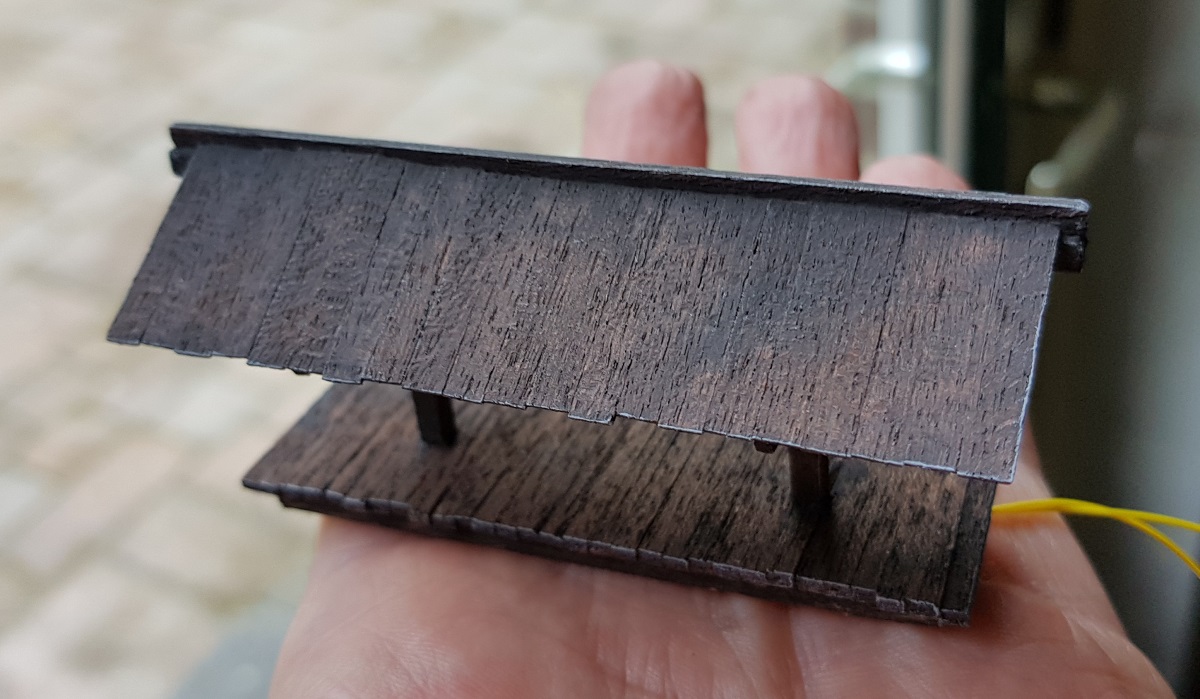
A little insulation will do no harm, preventing light shining through the beams...
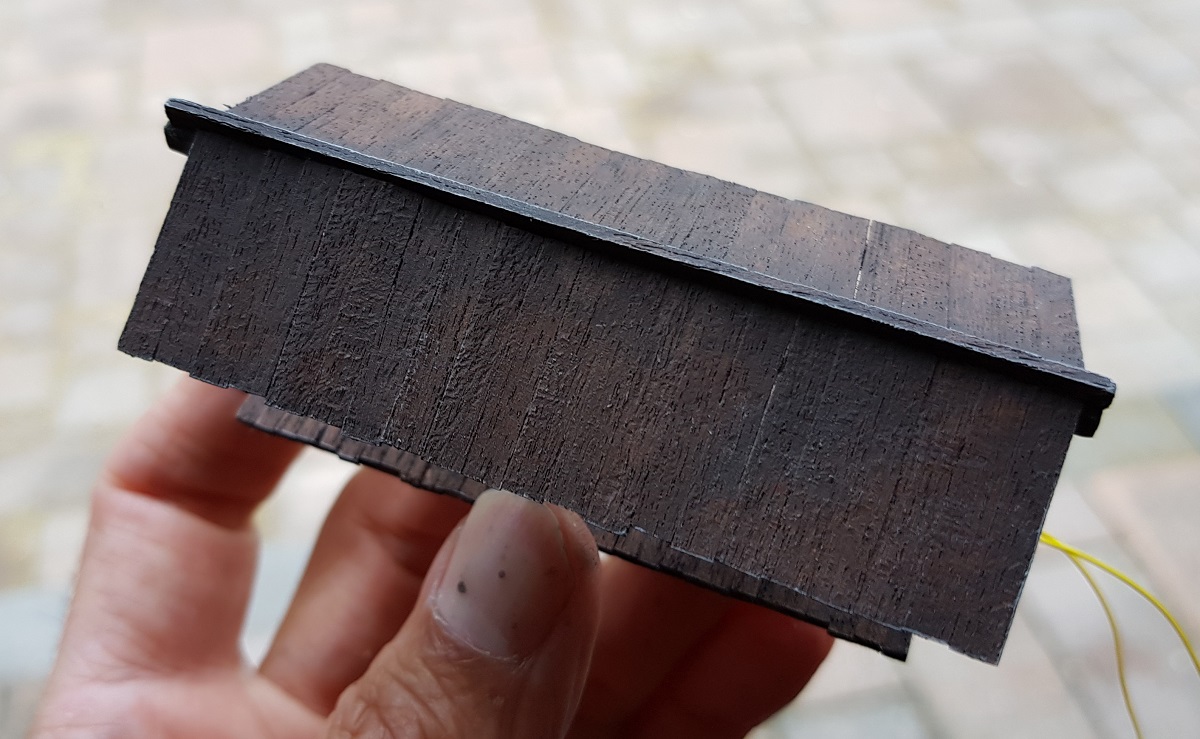
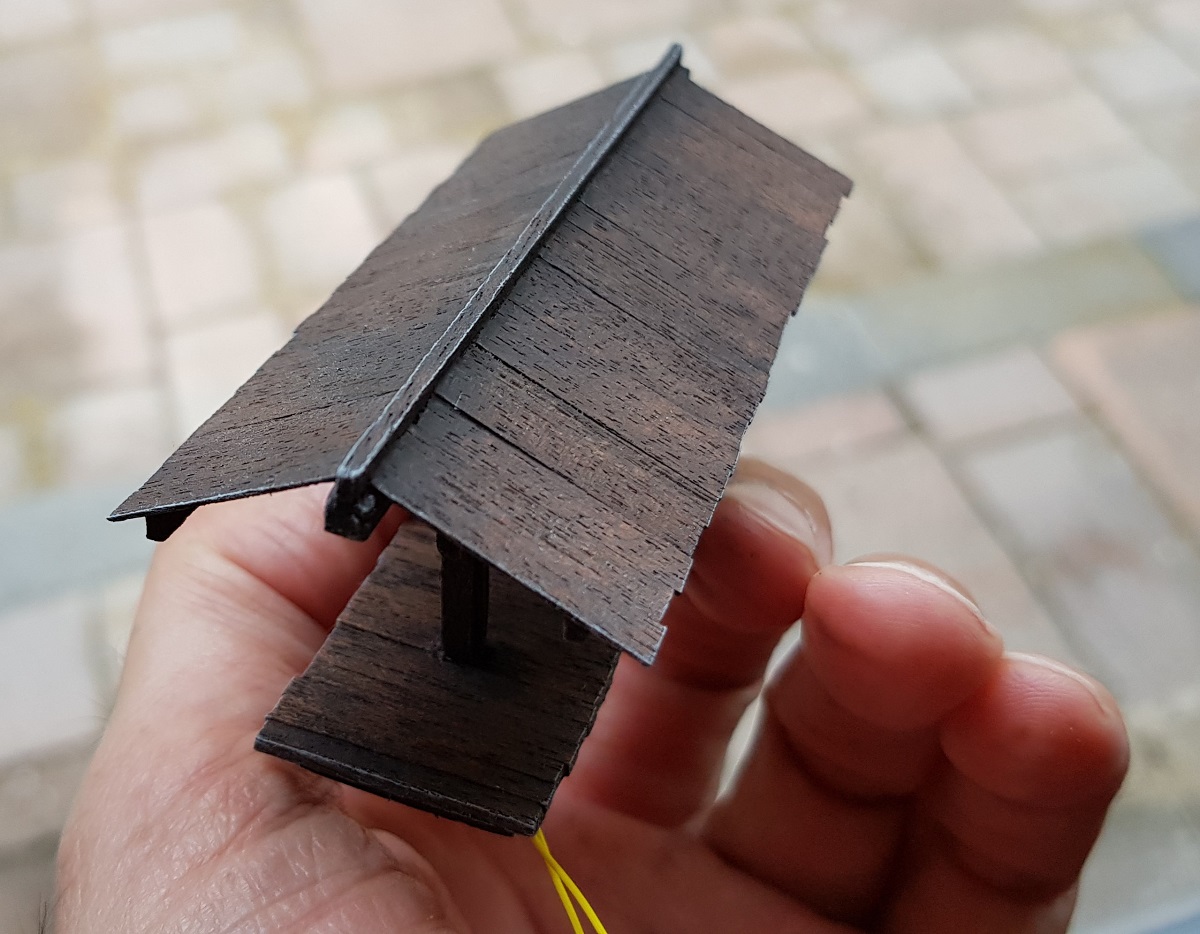
One day's work. But yet, I love it!
Rewarding result!
~~~
1.15 ~ O n c e u p o n a t i m e ...
My very first tree and the first 'green' park! Not anymore!
(July 10, 2019)
In 1992 the very first handmade tree appeared on my layout. This 'huge' oak tree - I guess - was made of a bonsai tree!
The green stuff - meant for leaves - were plain clumps of Woodland foliage.
It served! But now for real!

Here's the park at the left, opposite the town hall. Outside the wall (at the right) is this slope, which was my very first 'green art' work.
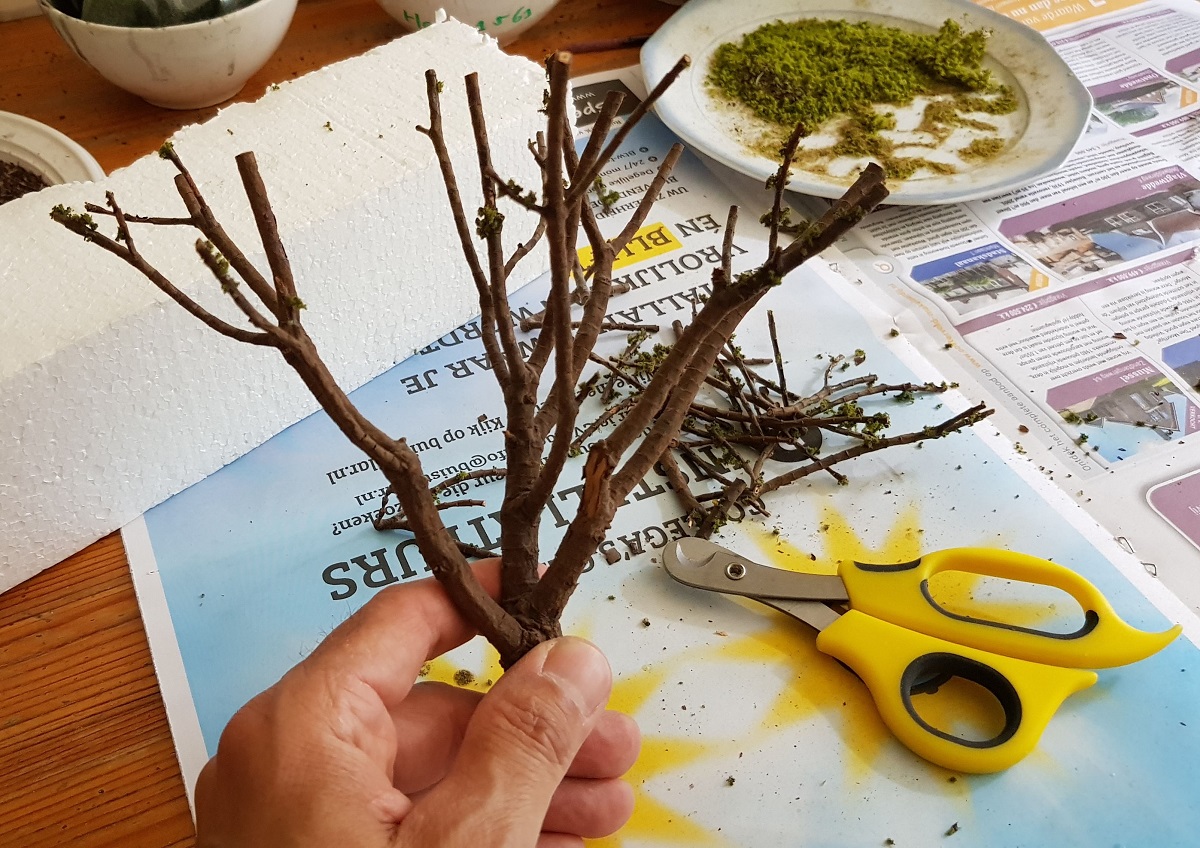
Now let's strip the tree and use the trunk for new foliage: Seemoos (Noch 23100) and green leaves (Noch 07154)

Stripping the park and slope
Adding a new fence (I didn't know that it was open)
This is how the park looked at noon today...

. . . but afterwards!
Now that's more like it!

Kind of same approach with the hillside.
Building in layers: brown dirt, grass, low vegetation, bushes and finally some trees.
~~~
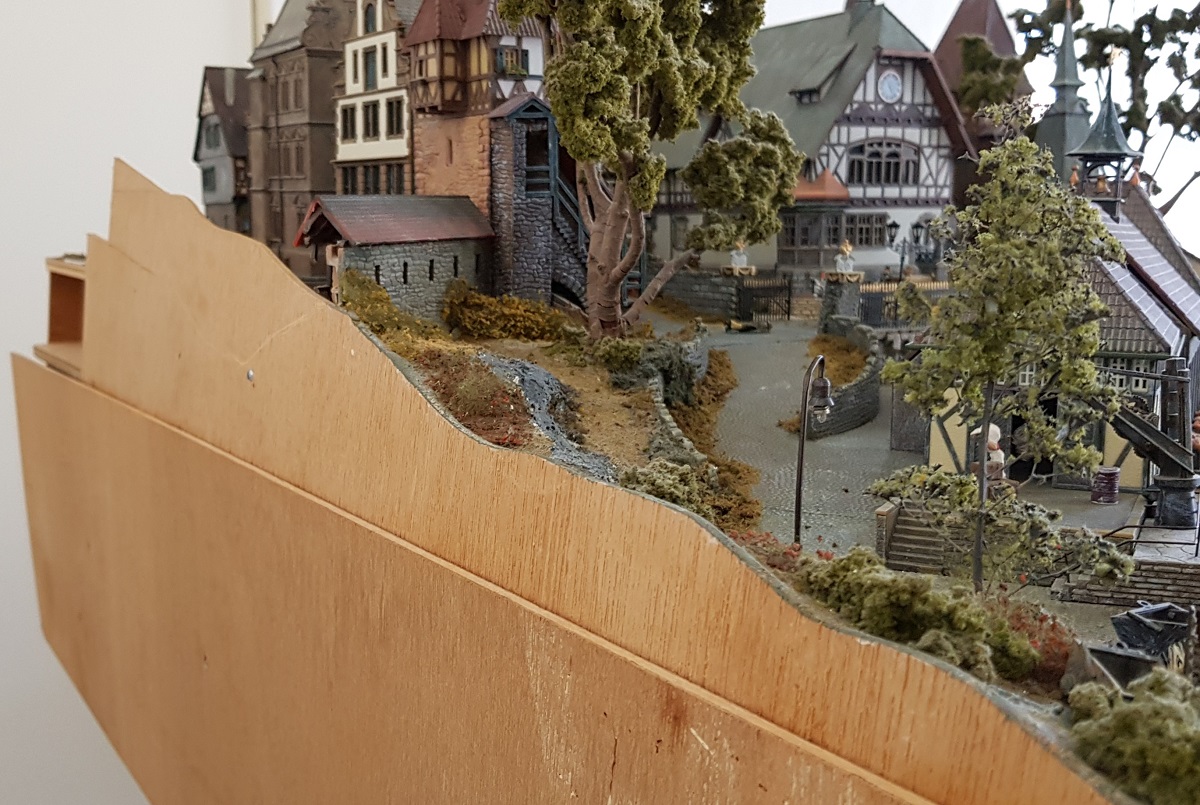
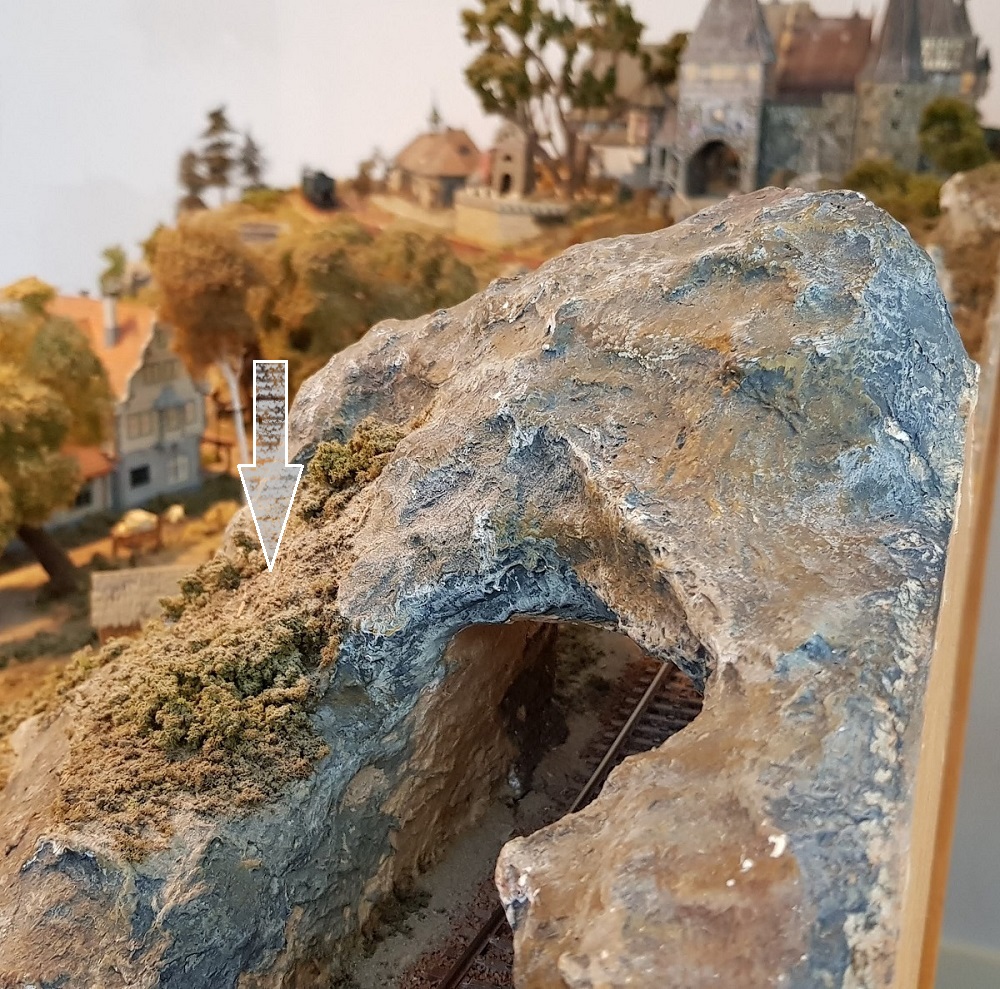
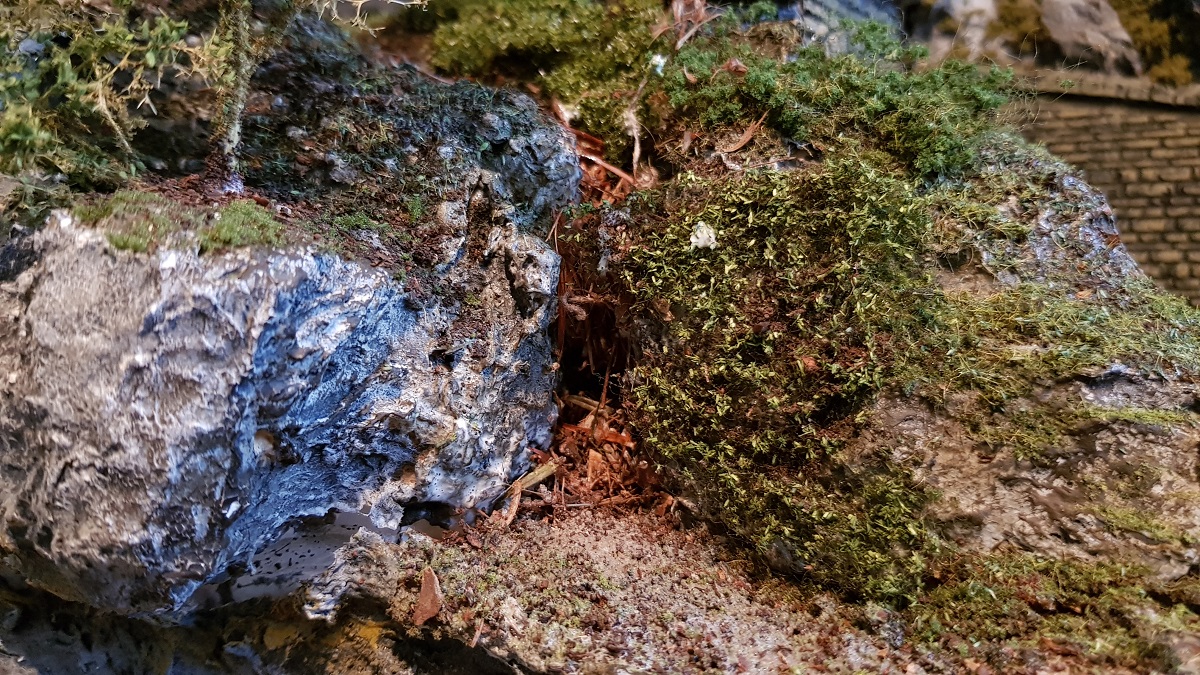
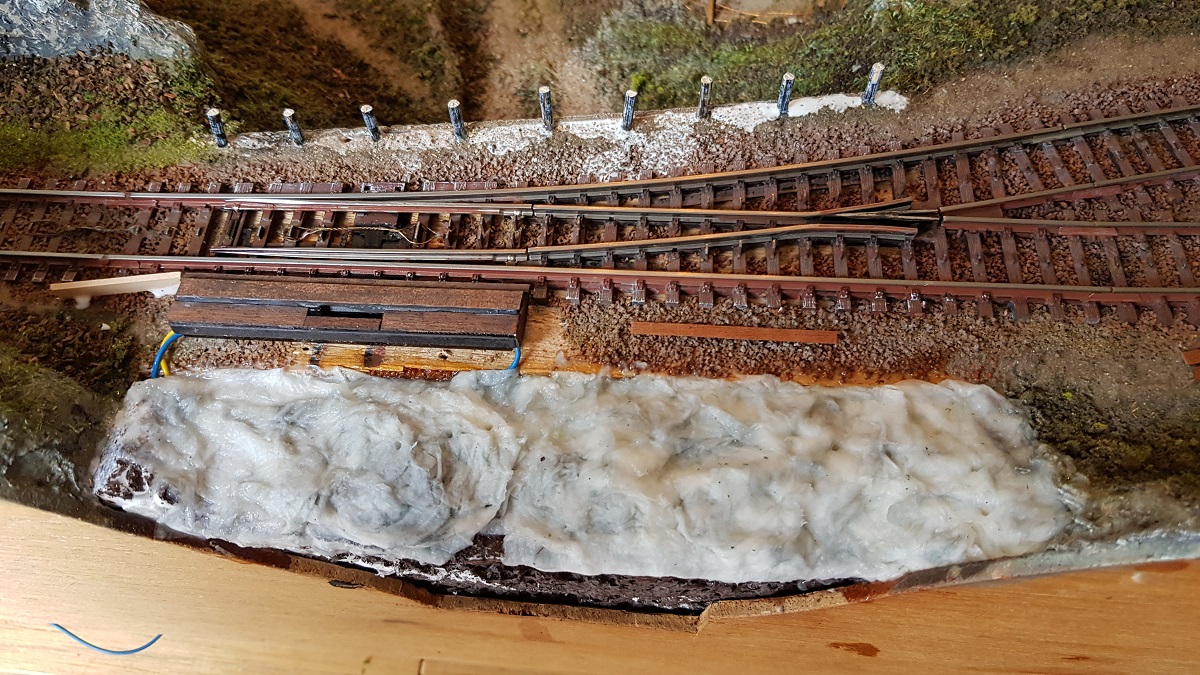
1.16 ~ T h e G o r g e
(July 18, 2019)
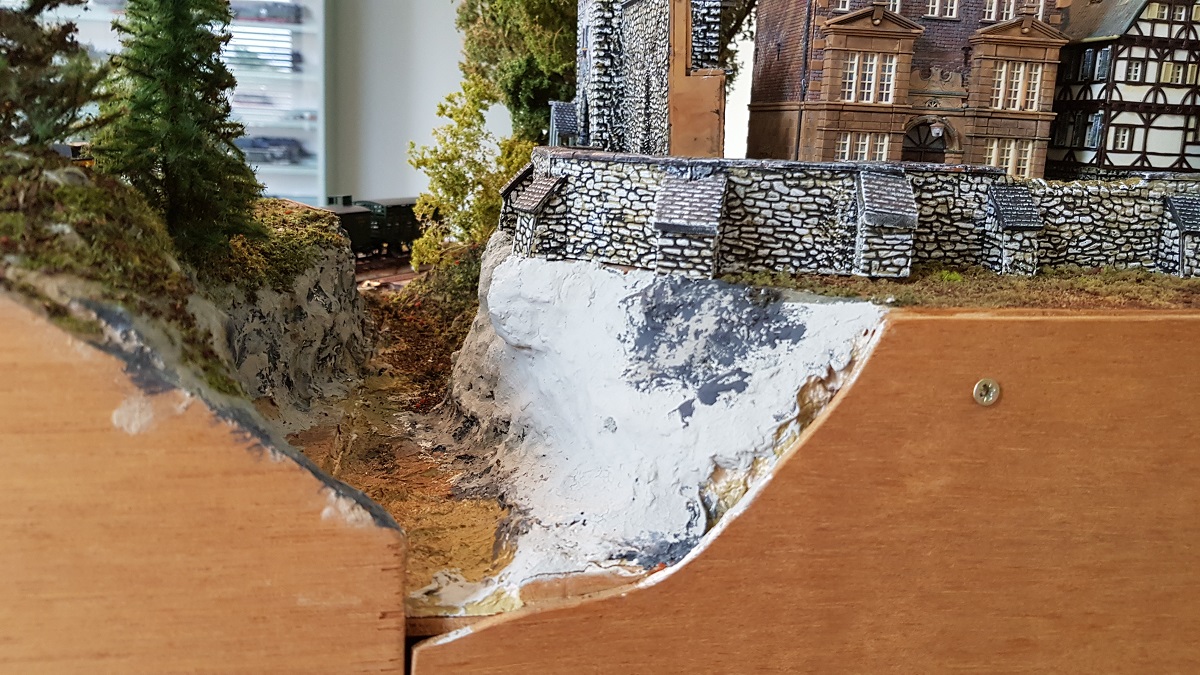
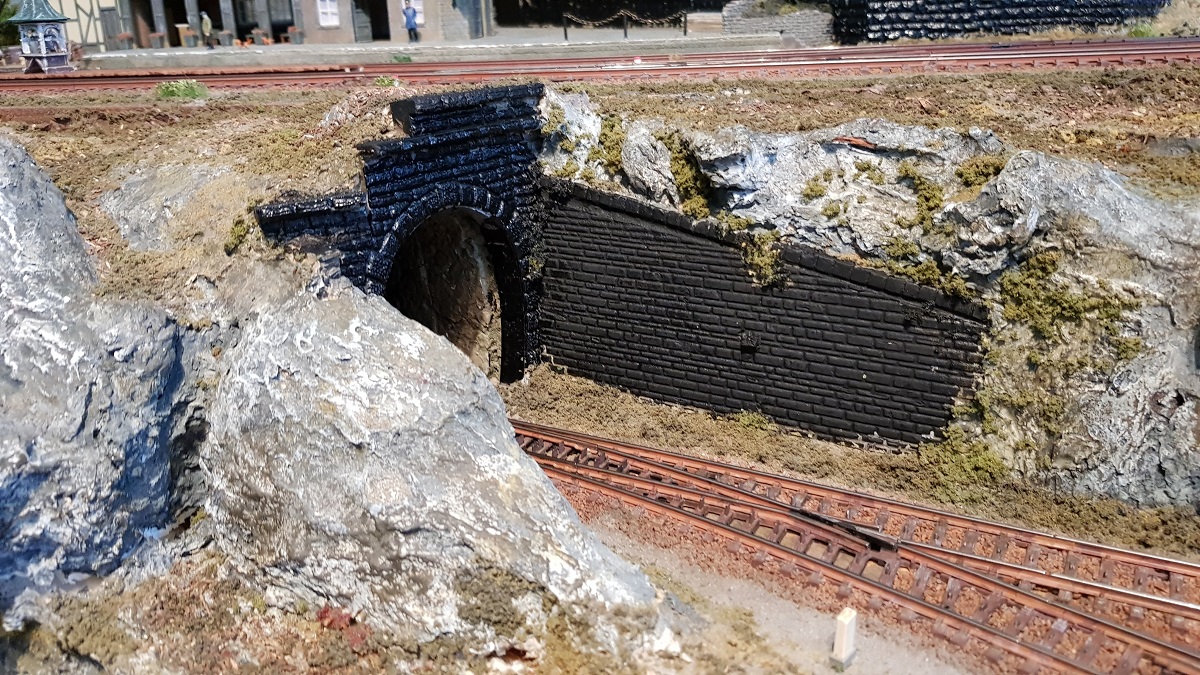
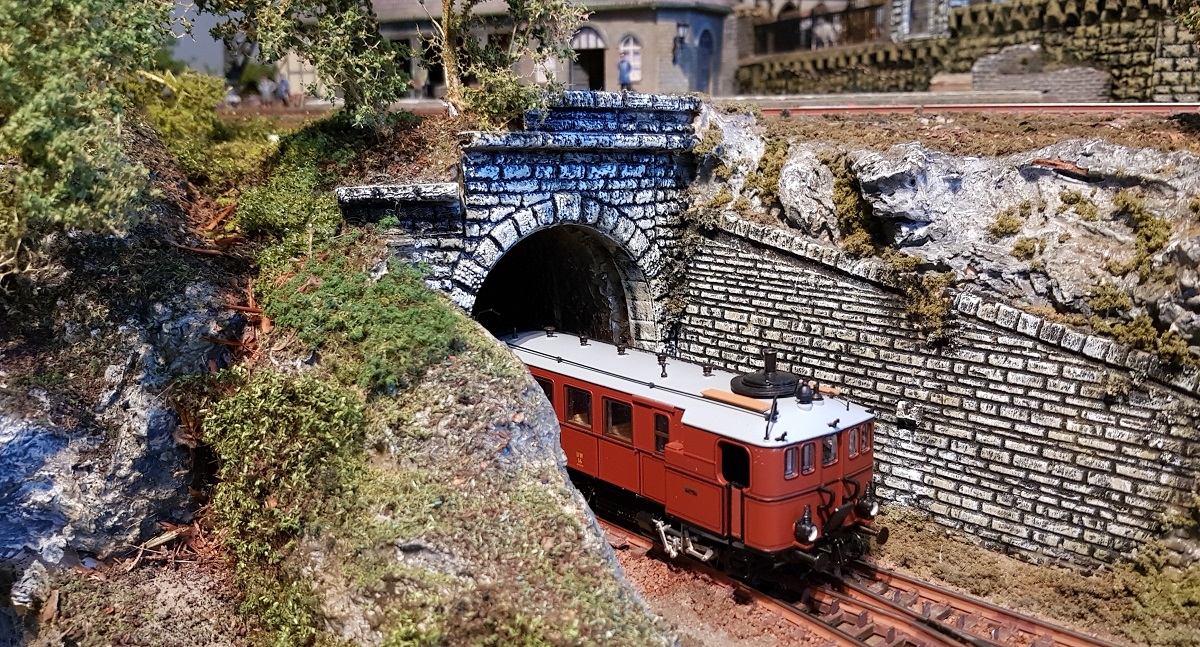
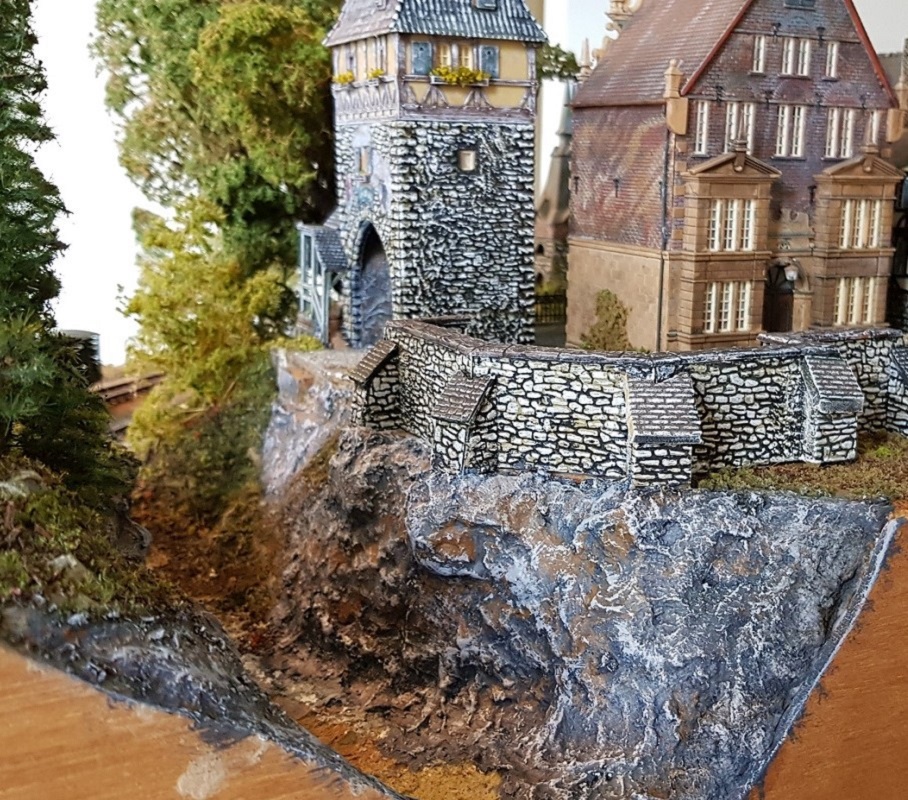
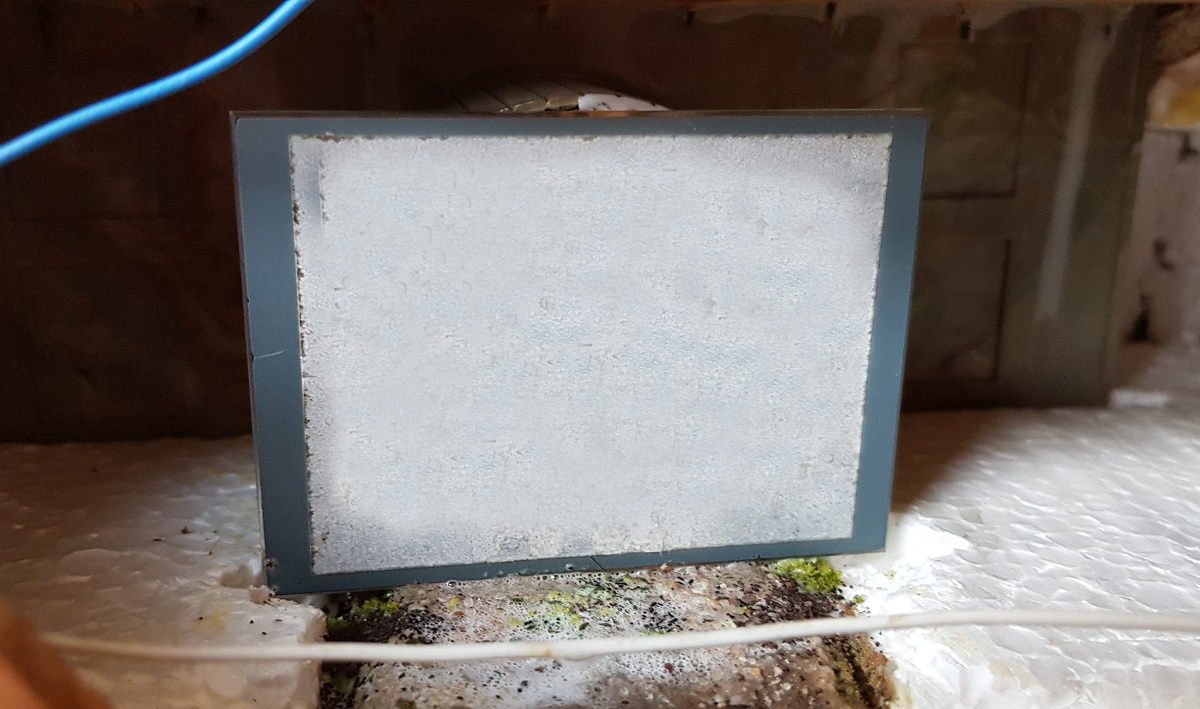
As you will remember, I recently 'painted' the city wall on top of this gorge, turning it from plastic into 'real' stone.
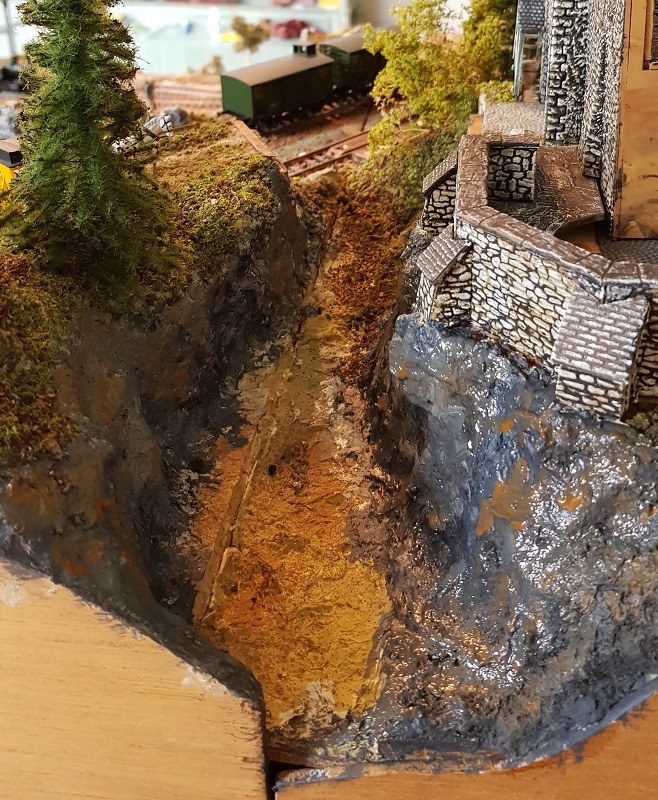
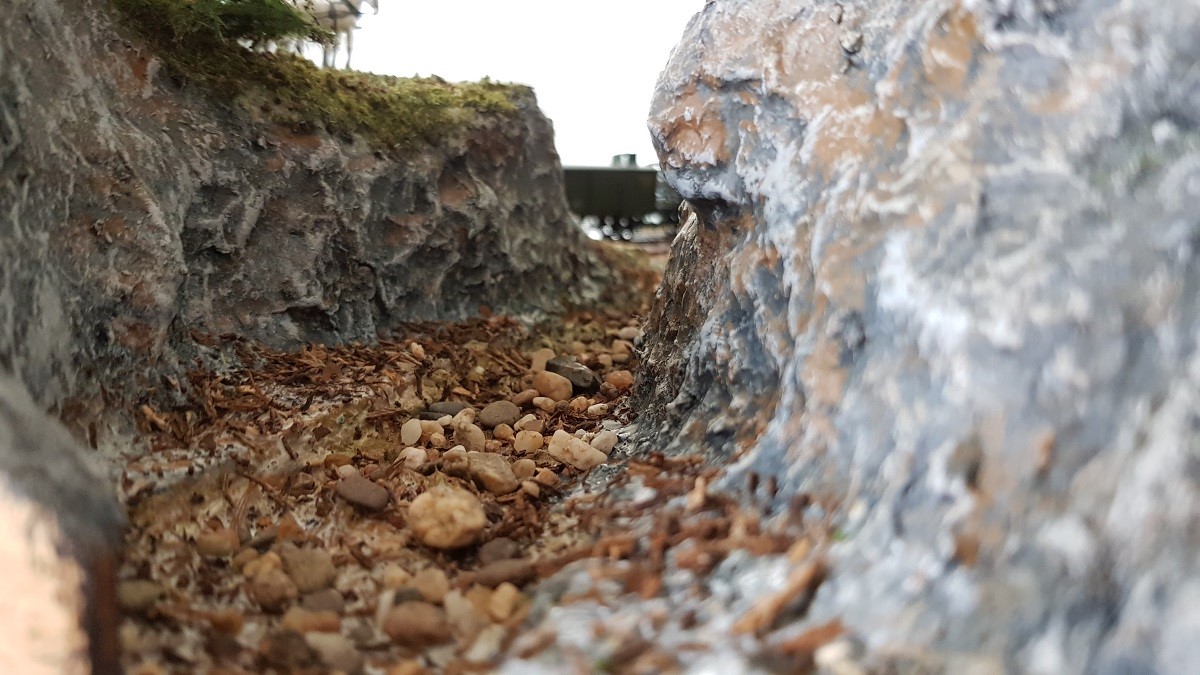
However, I never finished the gorge beneath, always intending to have a small river with water right here.
Since the town is separate form the layout and the cutting is exactly in the bed of the river,
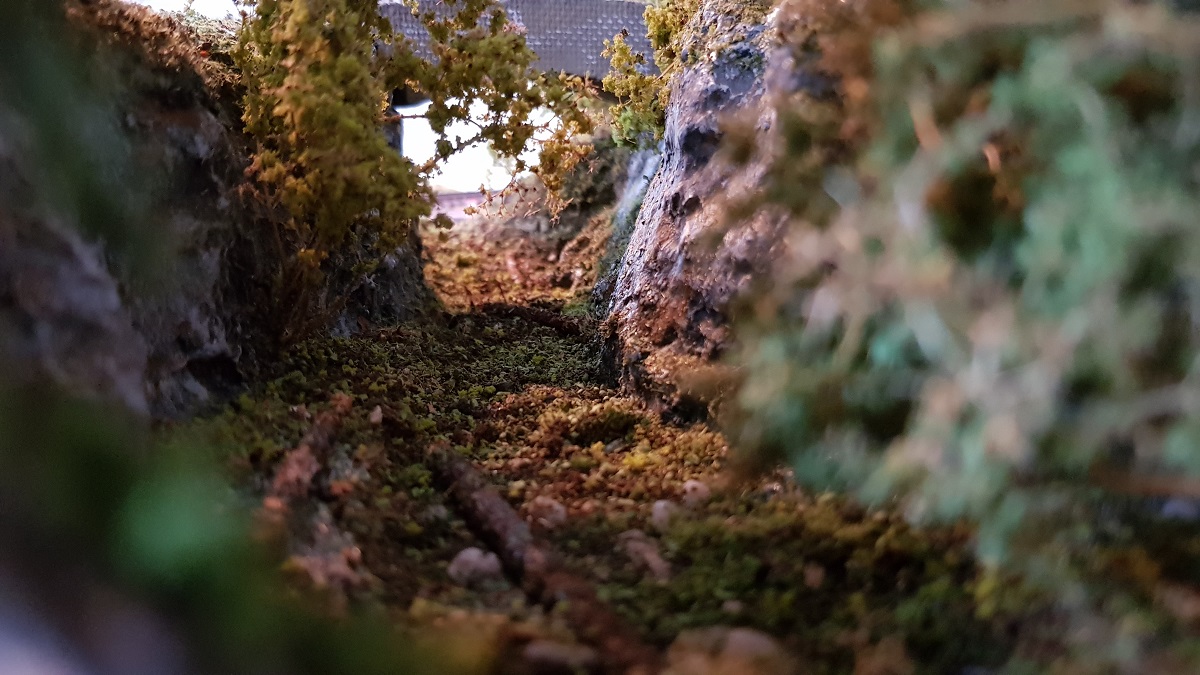
I decided that 'this river has dried out many years ago and forest has taken over...'
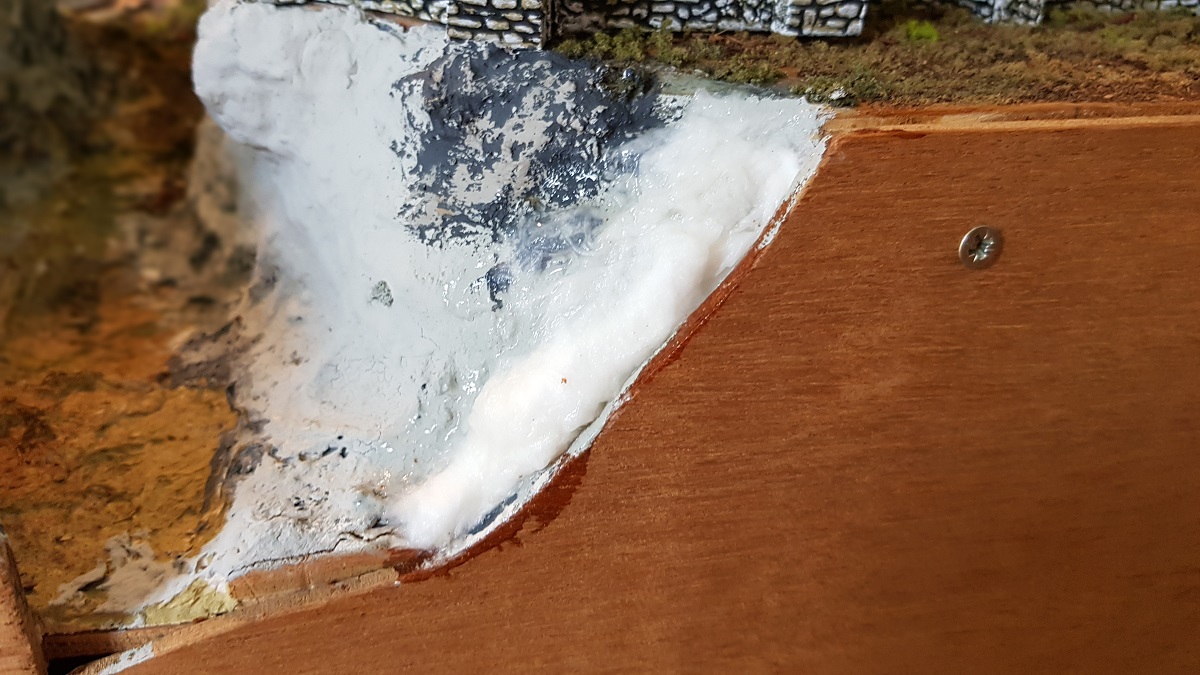
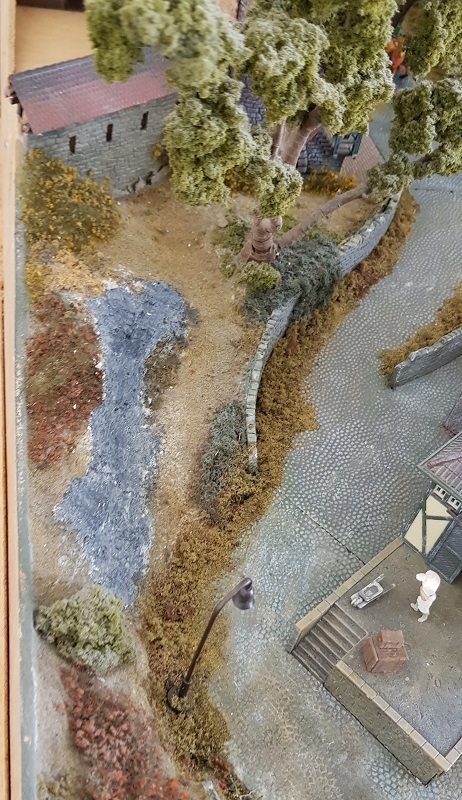
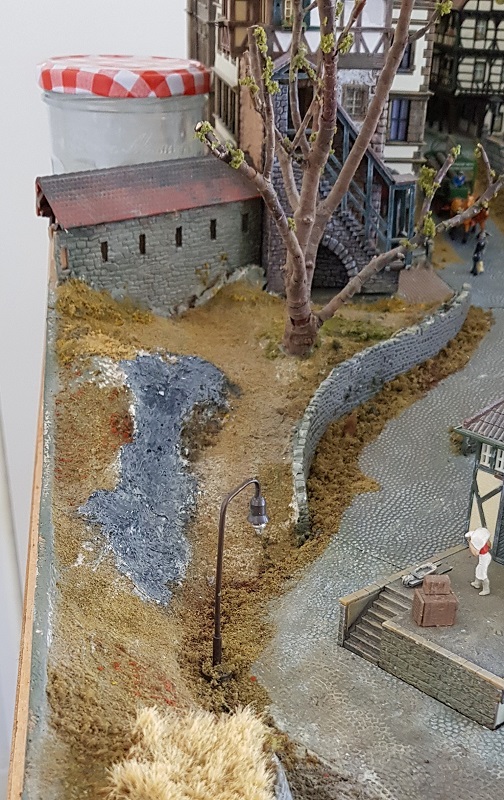
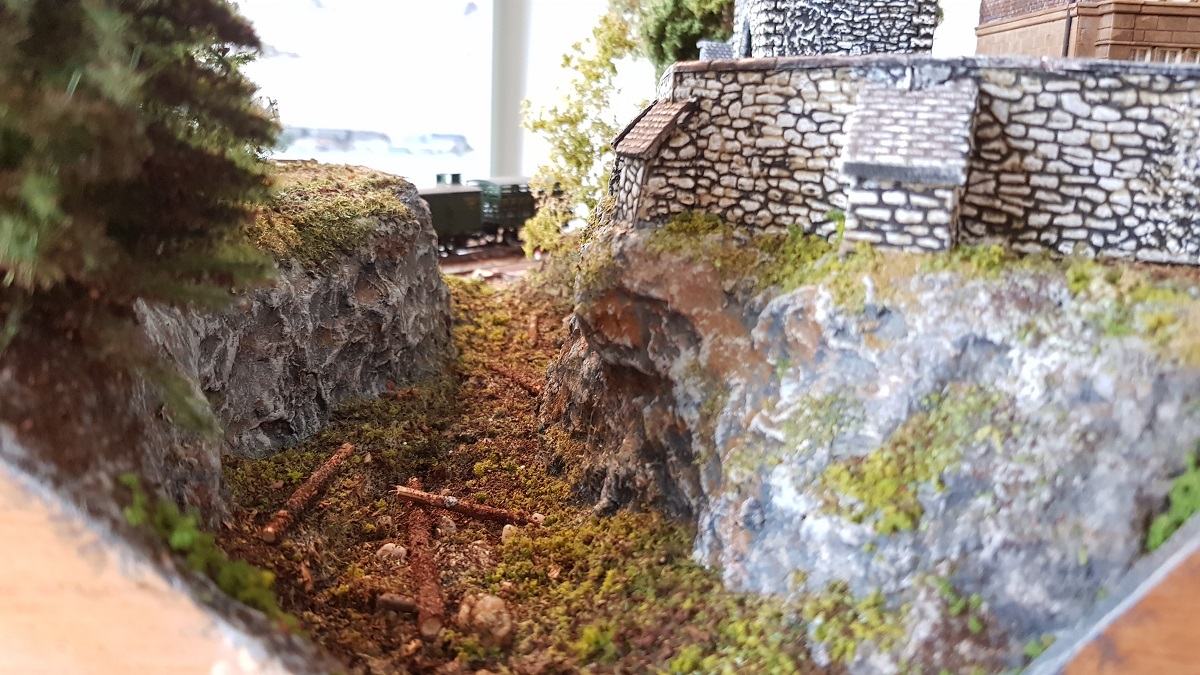
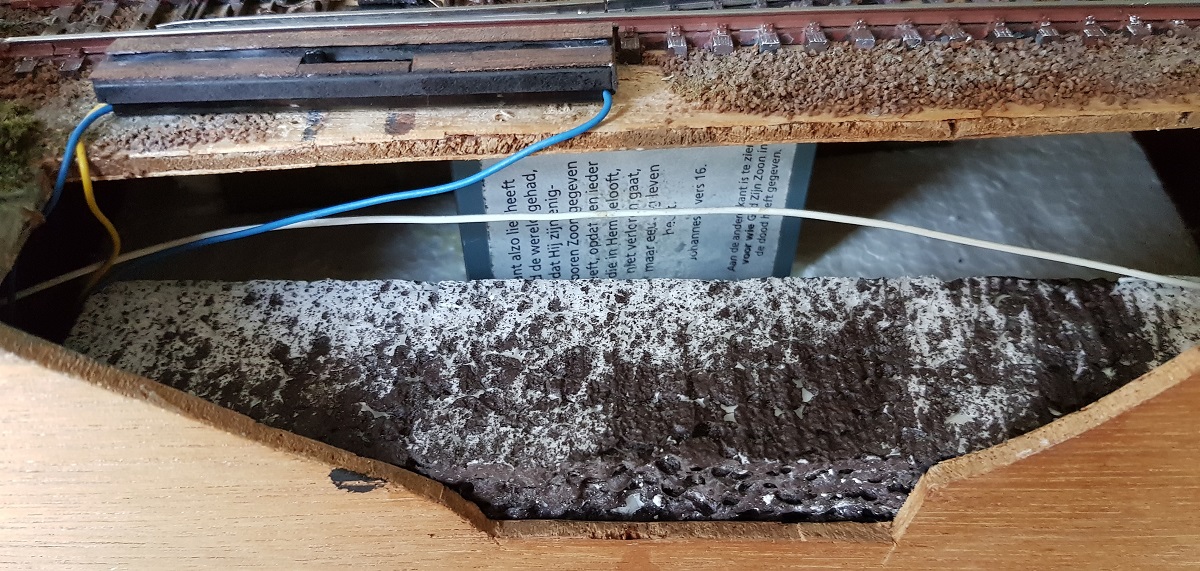
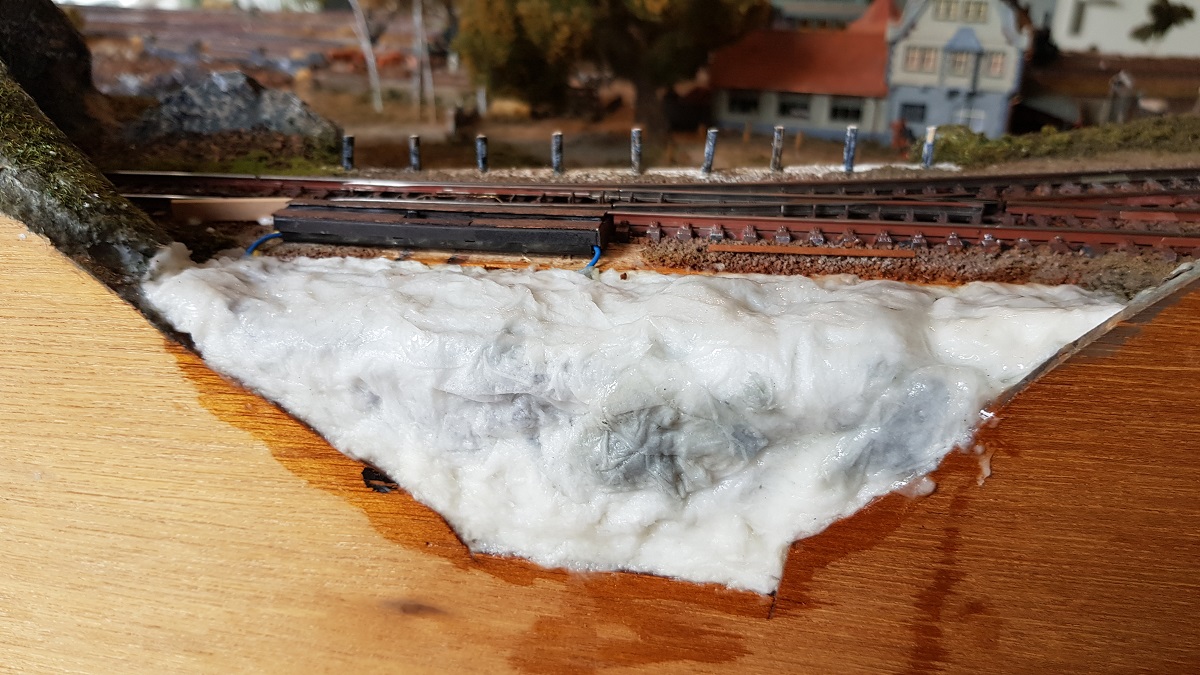
Filling the edges with gluesoaked mashed paper
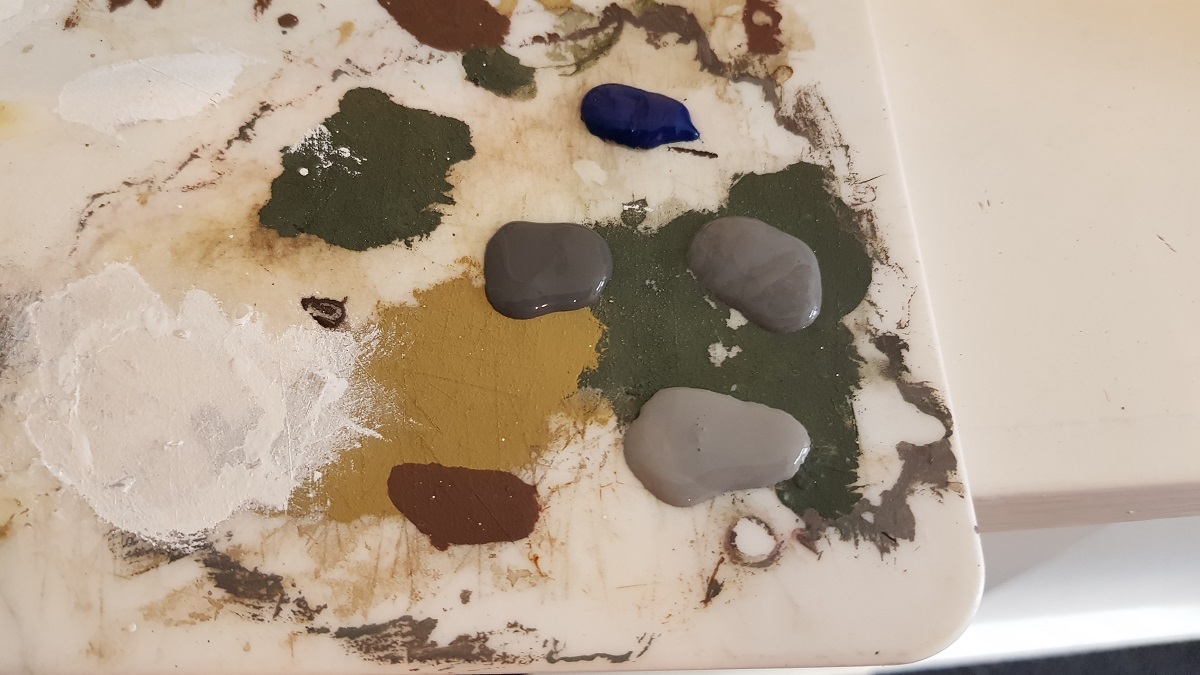
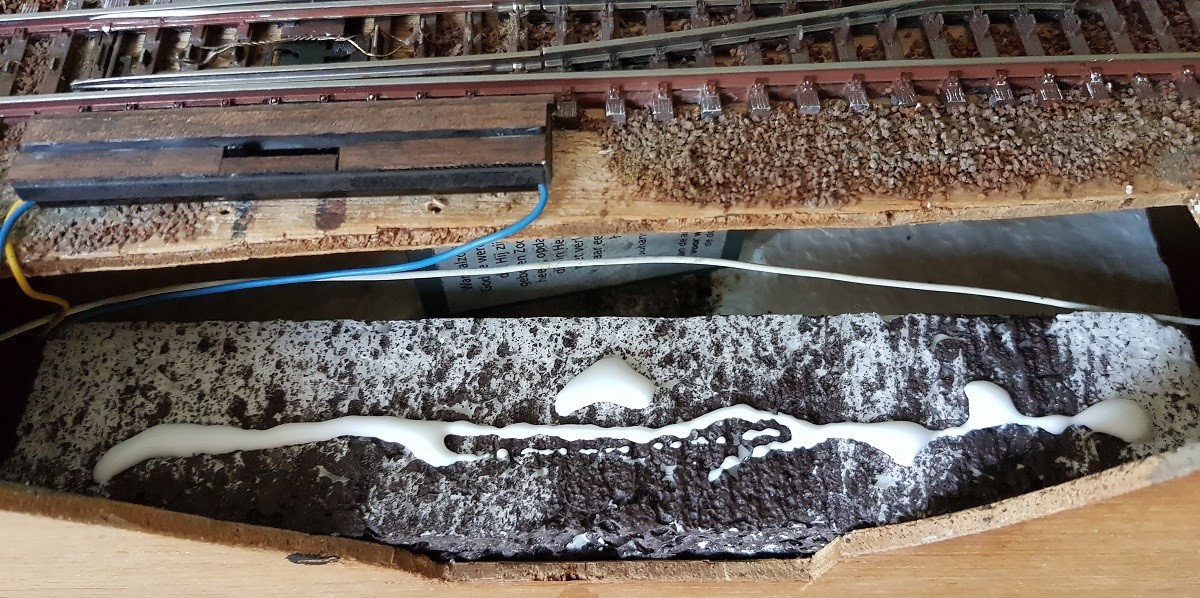
The next step is choosing matching colours for rock. Since water has been involved, I add some Prusian blue...
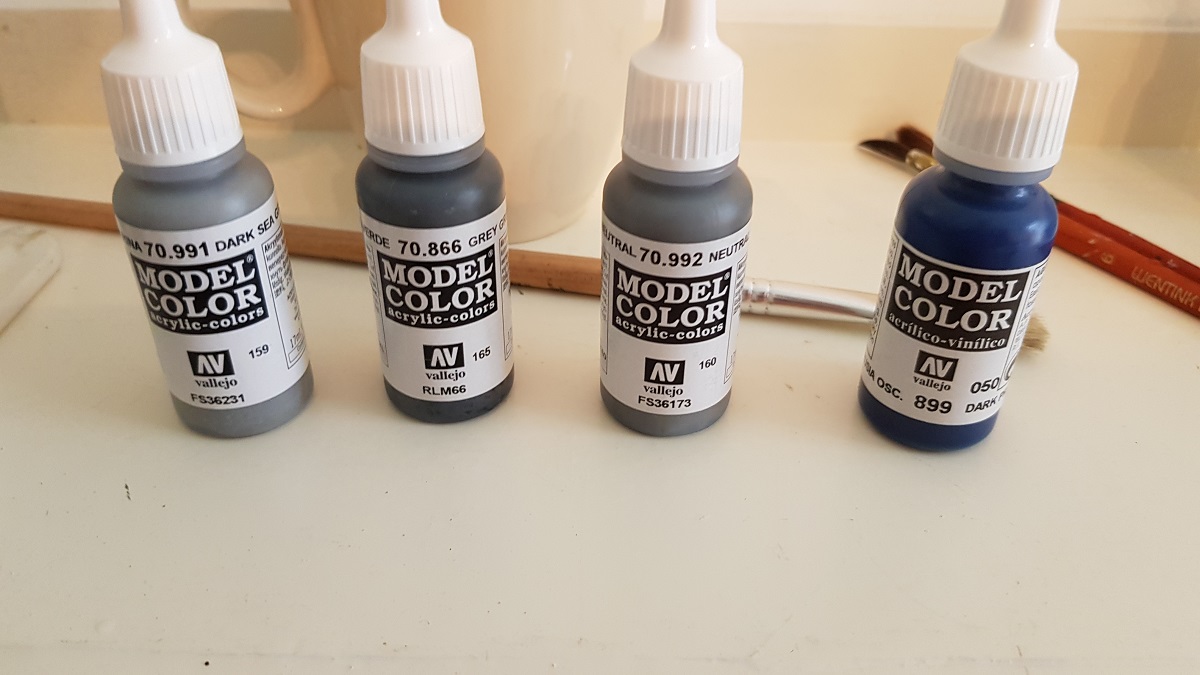
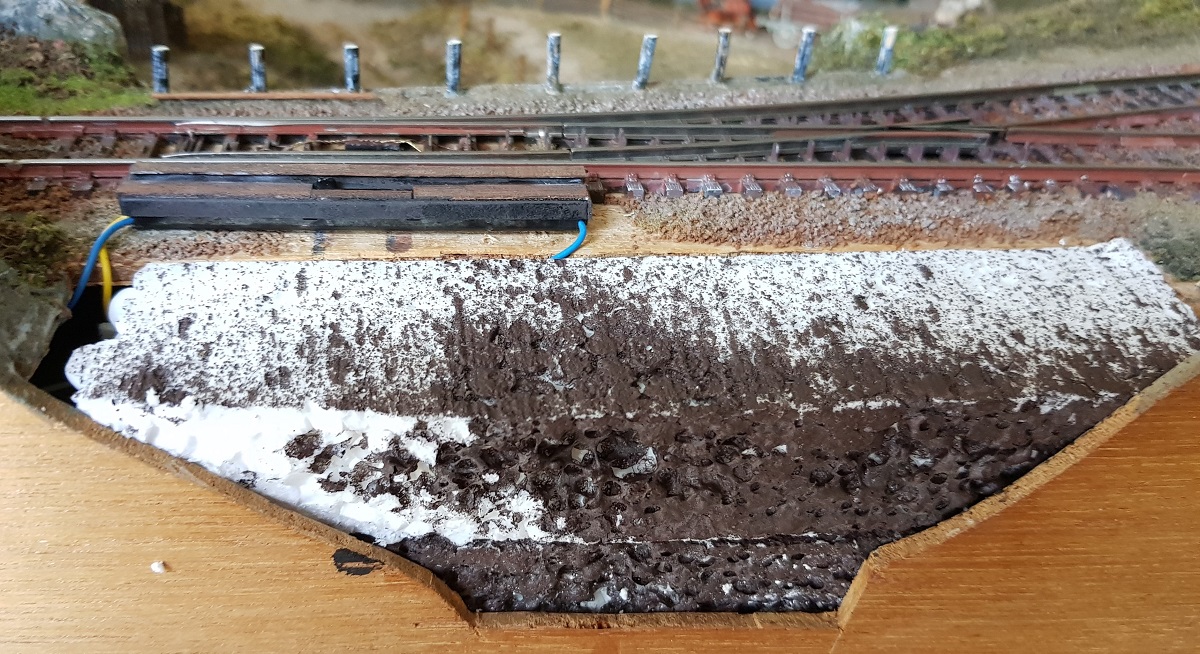
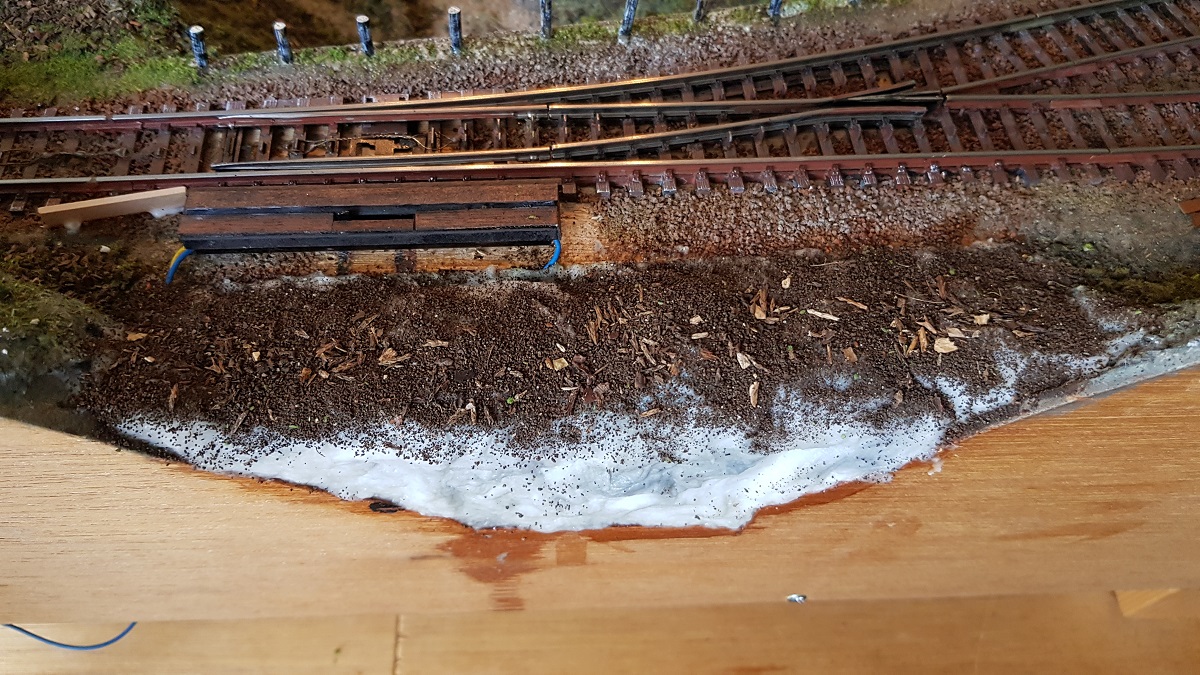
After applying a mixture of shades of gray and blue, I finished with earth and a dry white topping.
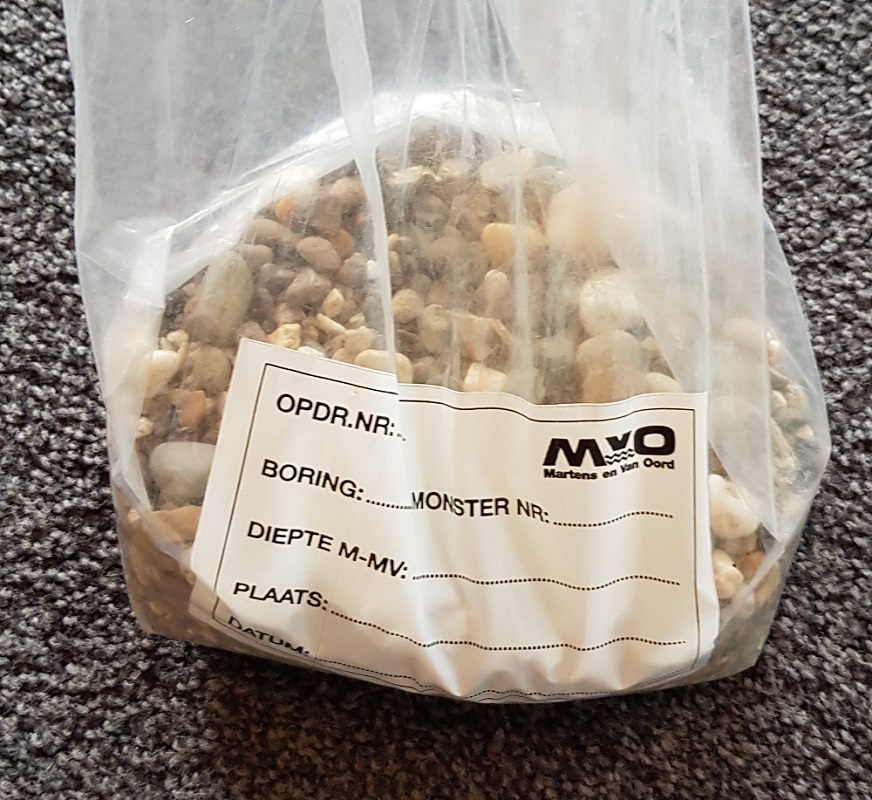
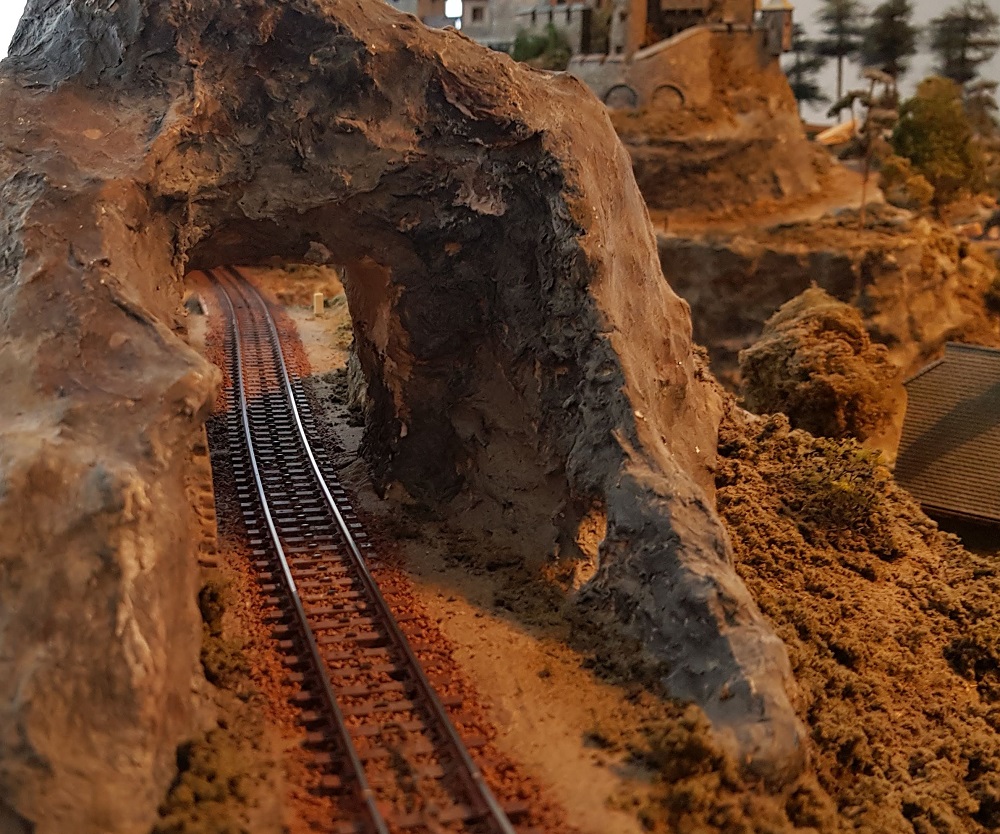
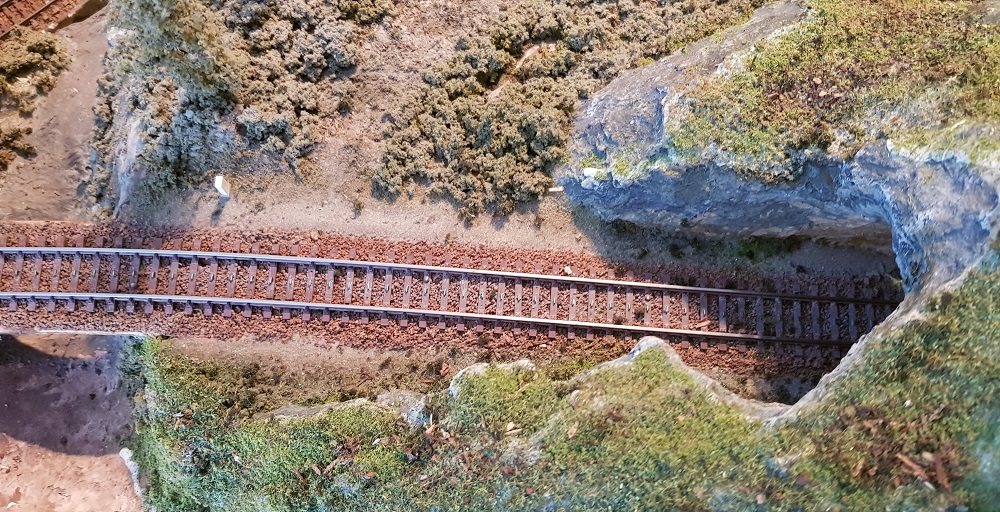
Last weekend, a friend gave me two bags: one filled with yellow sand, the other with gravel .
The fomer flood has left stones and rocks in its course...
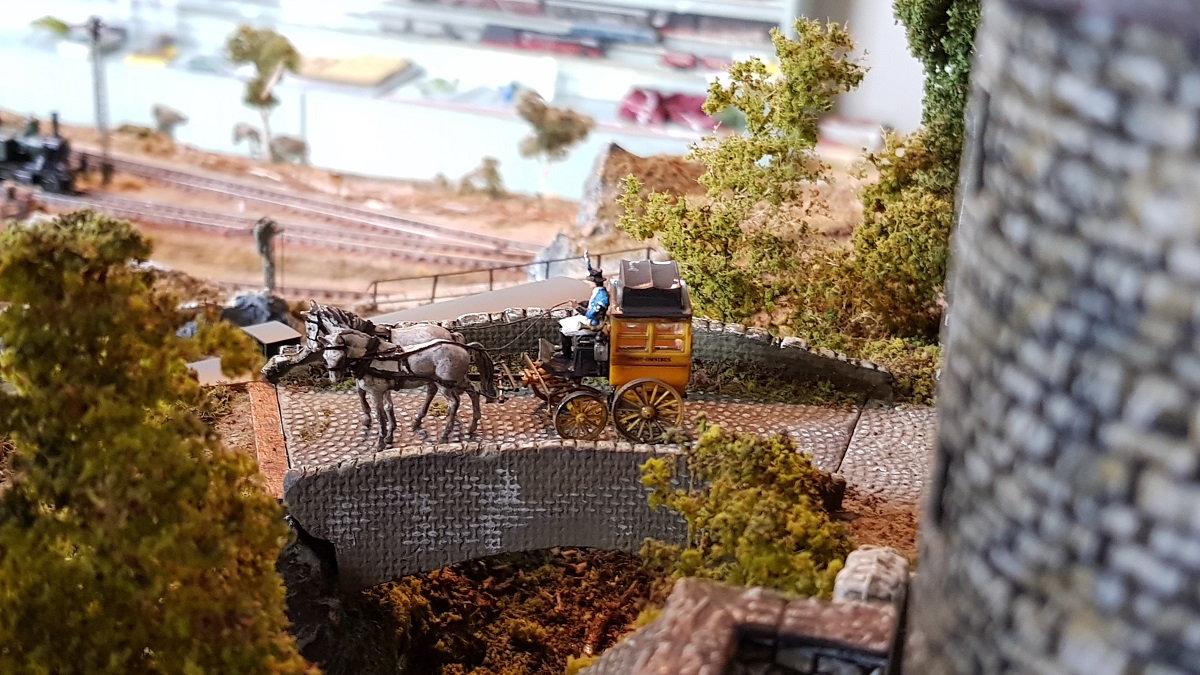
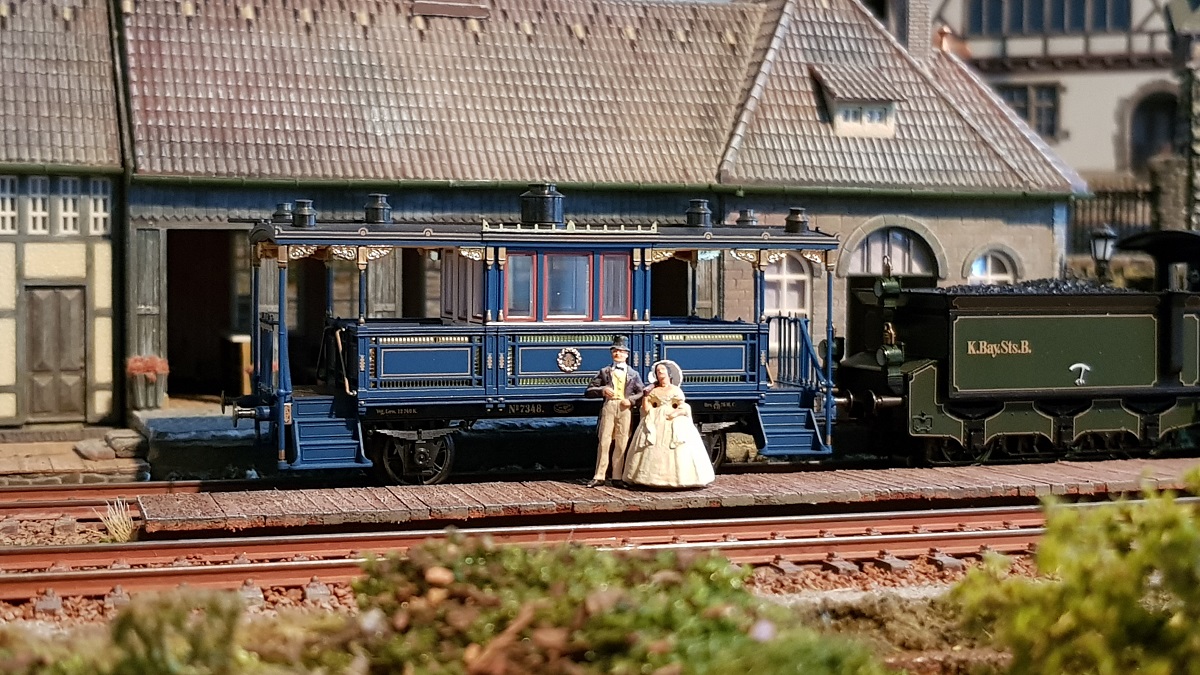
The stage coach was covered with thinned 'Heki Dur Lazur' as well. Less toy-like.
And some new shots taken after some finetuning in September 2019...
~~~
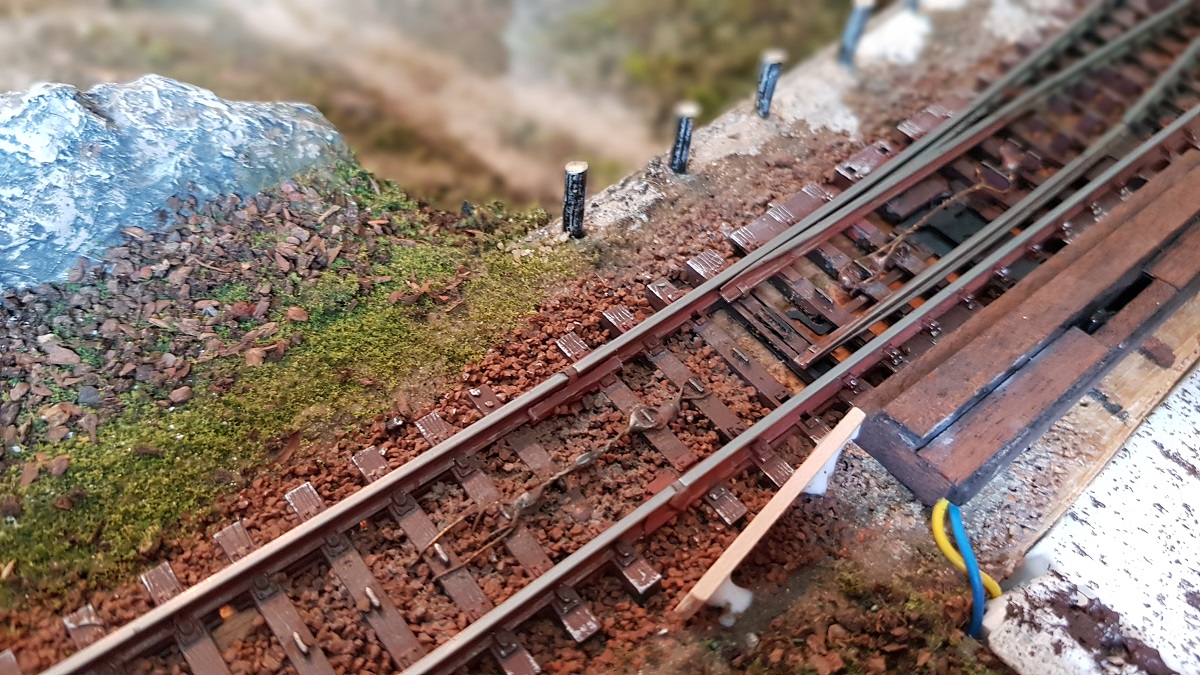
1.17 ~ Finally: the switch... it was about time!
(July 17-18, 2019)
Since I moved, both turnouts at the Endbahnhof won't function properly anymore, the're even beyond repair.
For many years I wanted this handswitch turnout operational. So I decided to 'electrify' it ones and for all!
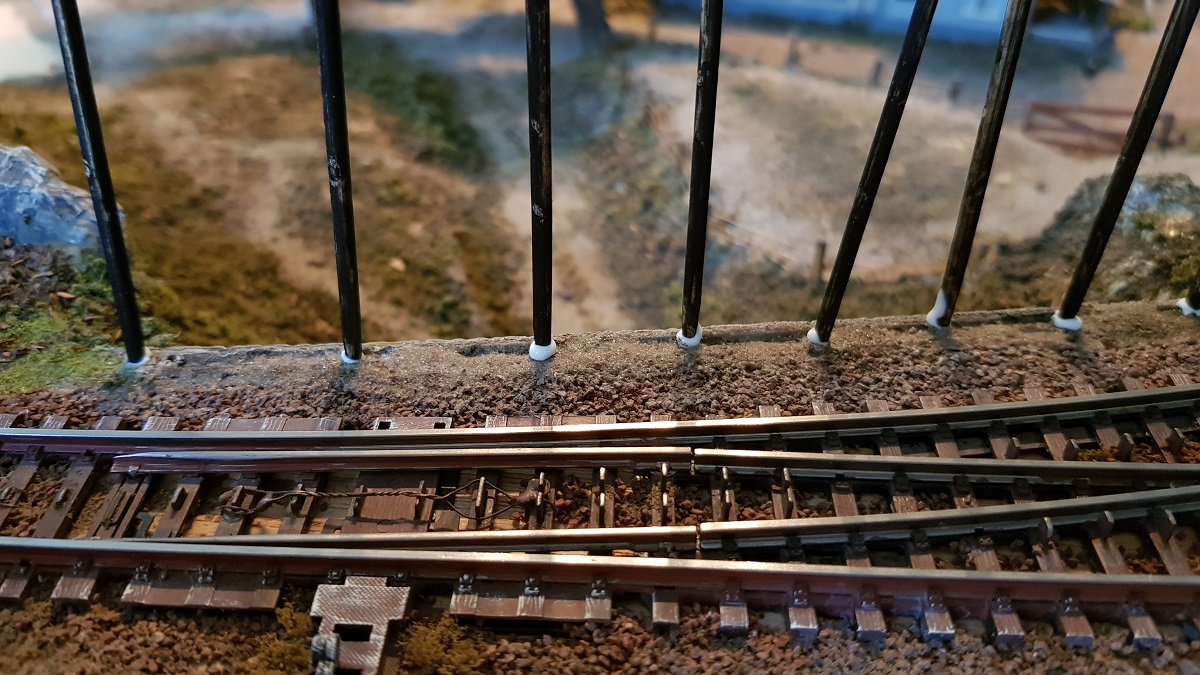
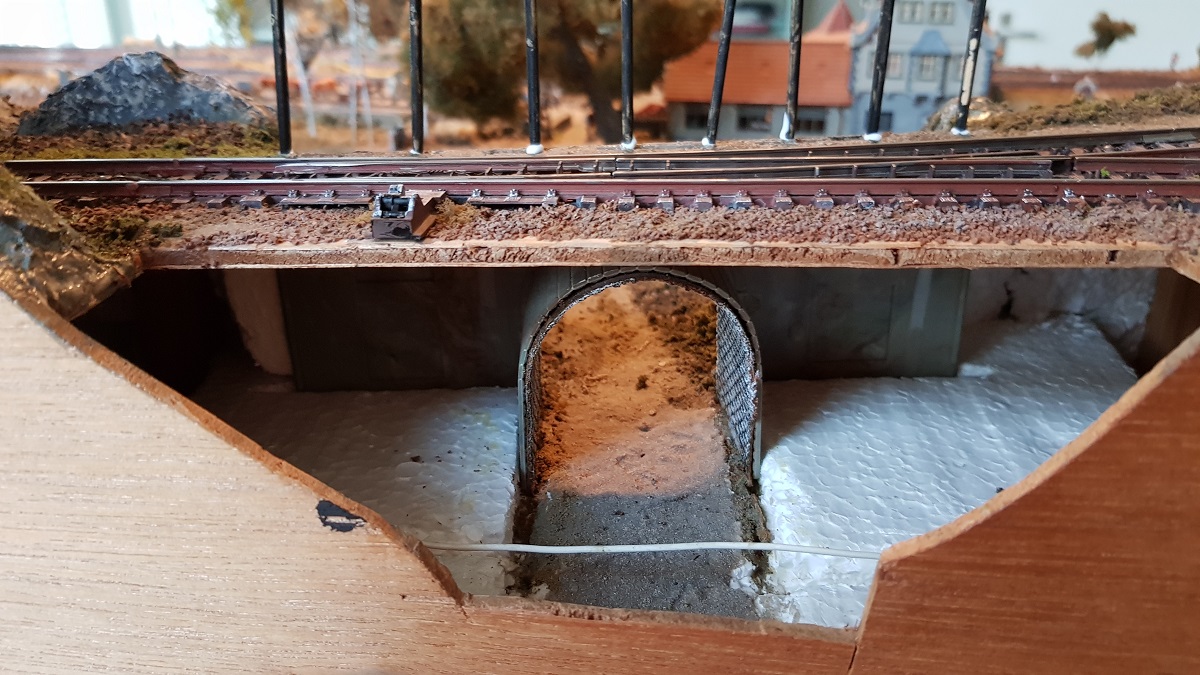
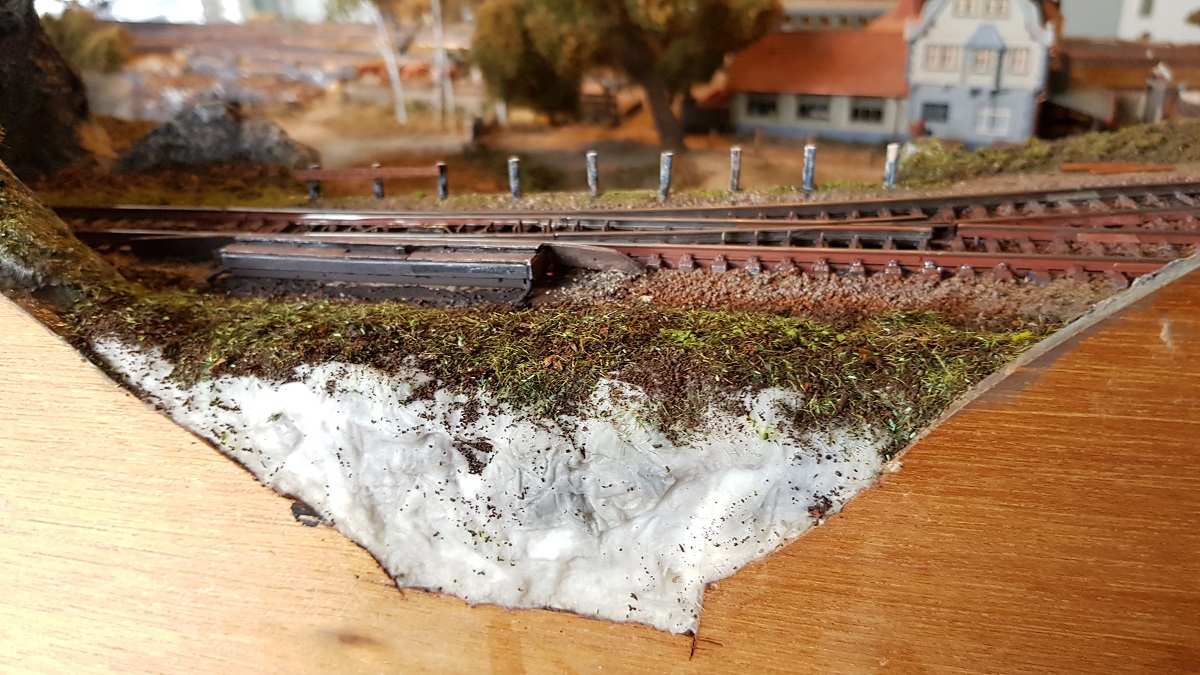
Yet, since it is impossible to give this particular switch an underfloor drive due to inaccessibility, as you can see...
... and yet I do dislike the sight of proportional switches next to the track...
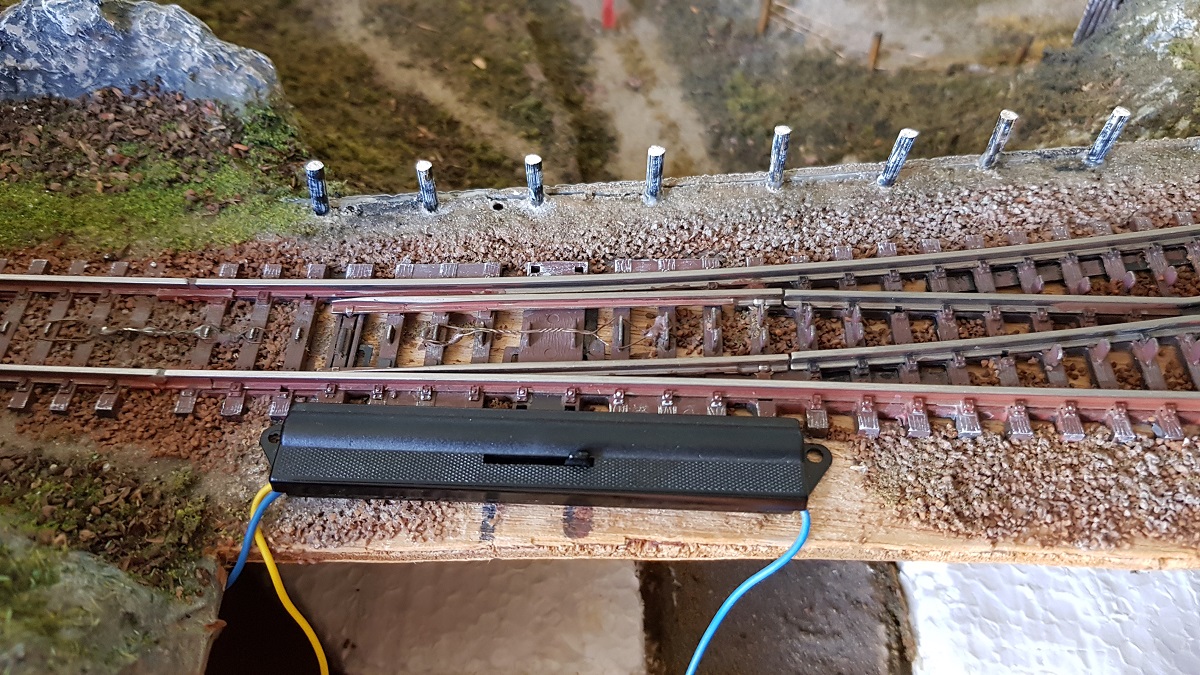
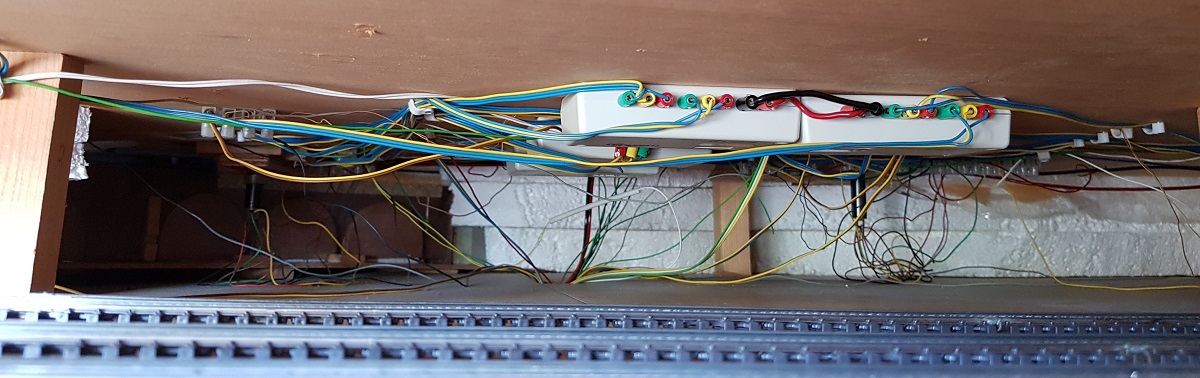
... I still decided to carry through. Since I can't get underneath anymore, it's the functional result that still counts.
Nevertheless, I had to reach out for almost two feet between the two layers of plywood of the layout
to plug in the red, yellow and green plugs into the K 83 device which fortunately were still available!
I felt like a dentist, working up side down and using a small mirror...
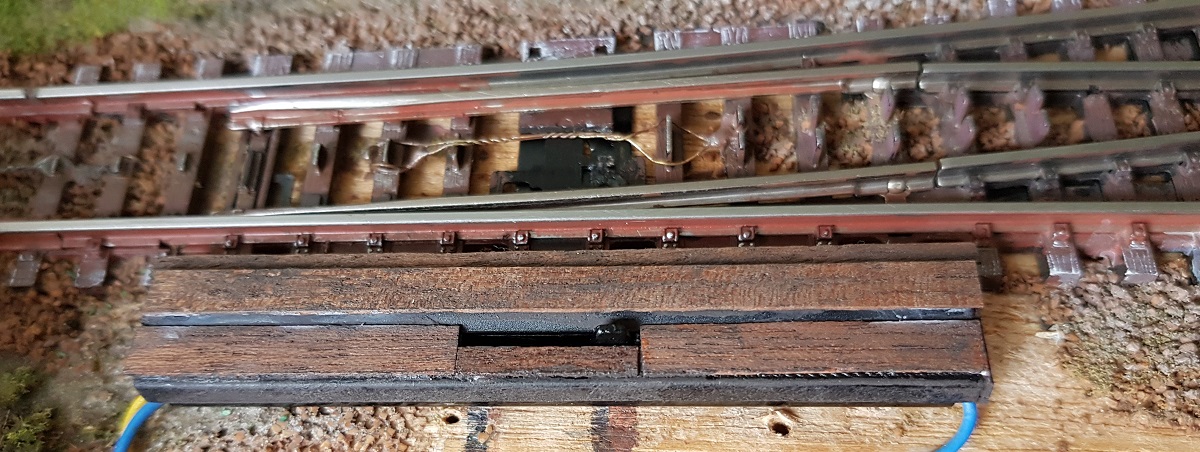
It's not in my line to NOT try and conceal the switch into the landscape as much as possible. I somehow managed to get it right.
It probably has to do with the fence in front of the track, which 'hides' the linear shape of the switch.
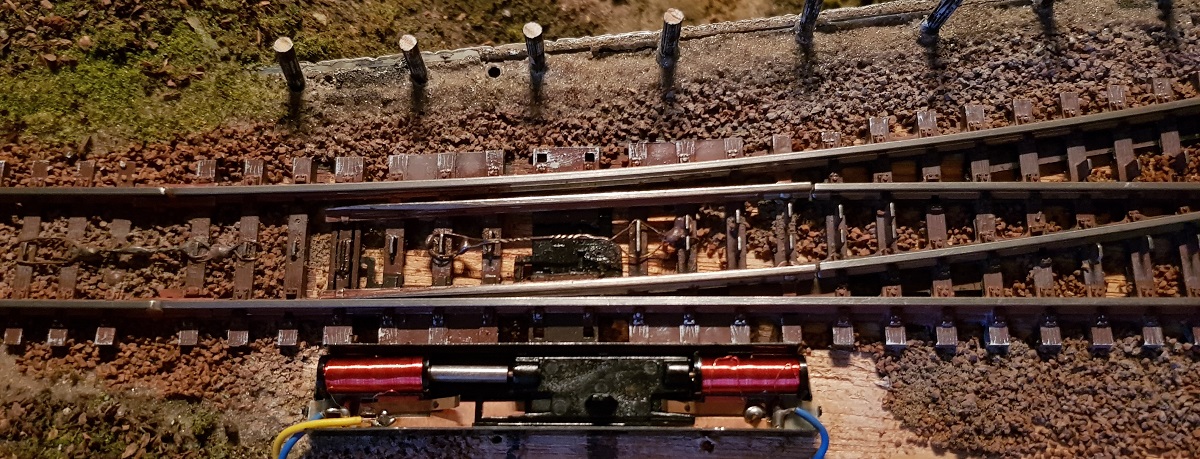
Since the mechanism of the frog somehow broke down, I had to cut out the frame and glue parts together.
~~~
After finishing the turnout, I carried on working ont he environment around the litthe bridge on which this turnout lies.
I never completed that part since in effect I didn't know how to finish it.
A small path working its way into the back? A mirror perhaps? I decided for the latter!
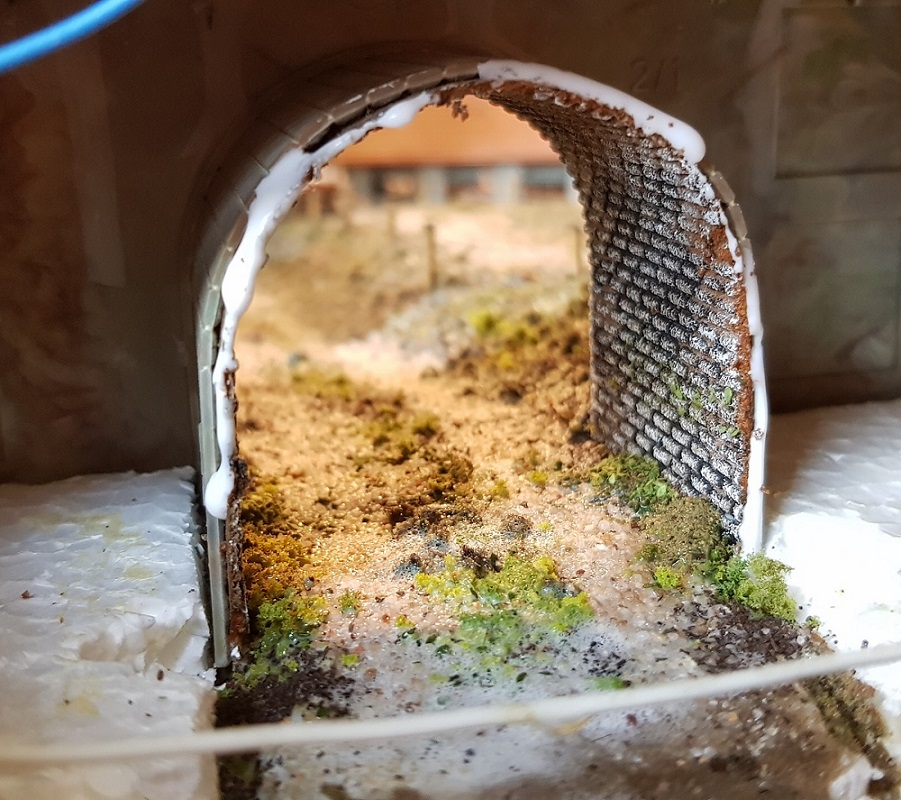
Renewing the path right under the arch with new sand, dirt and grass, I let it continue some further...
... so I was able to position the mirror into the glue for obtaining a straight and sustained line.

The result gave a proper depth
Filling up the still open space behind the bridge...
I didn't realize that some locomotives - such as the Württ. K - would get stuck on the turnout switch because of their low positioned cilinders.
Therefor I added a sort of 'guiding board' on both sides for 'conducting' the cilinder.
Finally the fence:
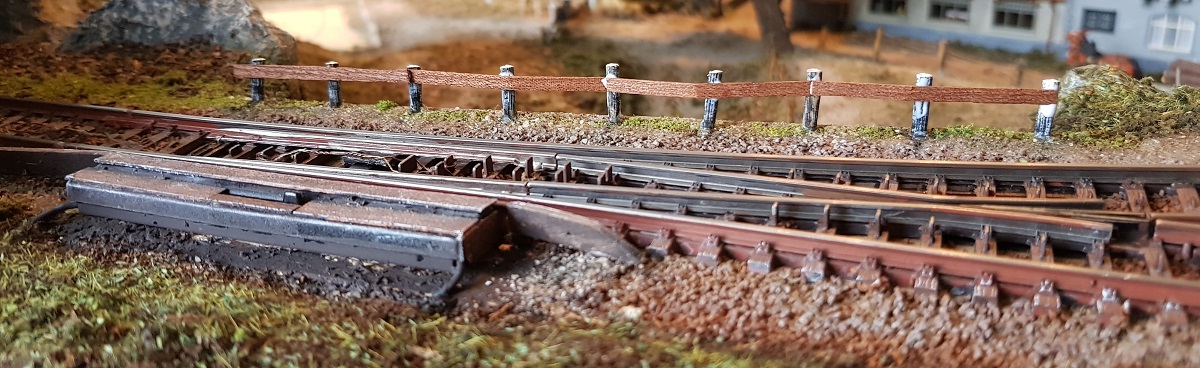
The effect of the fence on (the invisibility of) the turnout device is pretty similar to the linear painting on the wall behind the Efteling Flying Fakir,
which distracts the eye to not focussing on the wires that actually carry the carpet.
~~~
T o B e C o n t i n u e d a f t e r t h e S u m m e r
~~~
Frits Osterthun © 2.4.2019 / 14.4.2019 / 18.4.2019 / 18.6.2019 / 27.6.2019/ 4.7.2019 / 10.7.2019 / 18.7.2019 / 22.7.2019 / final editing: 16.1.2023